April 11, 2020
[Published in Open Source For You (OSFY) magazine, October 2017 edition.]
This article is the eighth in the DevOps series. In this issue, we shall learn to set up Docker in the host system and use it with Ansible.
Introduction
Docker provides operating system level virtualisation in the form of containers. These containers allow you to run standalone applications in an isolated environment. The three important features of Docker containers are isolation, portability and repeatability. All along we have used Parabola GNU/Linux-libre as the host system, and executed Ansible scripts on target Virtual Machines (VM) such as CentOS and Ubuntu.
Docker containers are extremely lightweight and fast to launch. You can also specify the amount of resources that you need such as CPU, memory and network. The Docker technology was launched in 2013, and released under the Apache 2.0 license. It is implemented using the Go programming language. A number of frameworks have been built on top of Docker for managing these cluster of servers. The Apache Mesos project, Google’s Kubernetes, and the Docker Swarm project are popular examples. These are ideal for running stateless applications and help you to easily scale them horizontally.
Setup
The Ansible version used on the host system (Parabola GNU/Linux-libre x86_64) is 2.3.0.0. Internet access should be available on the host system. The ansible/ folder contains the following file:
ansible/playbooks/configuration/docker.yml
Installation
The following playbook is used to install Docker on the host system:
---
- name: Setup Docker
  hosts: localhost
  gather_facts: true
  become: true
  tags: [setup]

  tasks:
    - name: Update the software package repository
      pacman:
        update_cache: yes

    - name: Install dependencies
      package:
        name: "{{ item }}"
        state: latest
      with_items:
        - python2-docker
        - docker

    - service:
        name: docker
        state: started

    - name: Run the hello-world container
      docker_container:
        name: hello-world
        image: library/hello-world
The Parabola package repository is updated before proceeding to install the dependencies. The python2-docker package is required for use with Ansible. Hence, it is installed along with the docker package. The Docker daemon service is then started and the library/hello-world container is fetched and executed. A sample invocation and execution of the above playbook is shown below:
$ ansible-playbook playbooks/configuration/docker.yml -K --tags=setup
SUDO password:

PLAY [Setup Docker] *************************************************************

TASK [Gathering Facts] **********************************************************
ok: [localhost]

TASK [Update the software package repository] ***********************************
changed: [localhost]

TASK [Install dependencies] *****************************************************
ok: [localhost] => (item=python2-docker)
ok: [localhost] => (item=docker)

TASK [service] ******************************************************************
ok: [localhost]

TASK [Run the hello-world container] ********************************************
changed: [localhost]

PLAY RECAP **********************************************************************
localhost                  : ok=5    changed=2    unreachable=0    failed=0
With verbose ’-v’ option to ansible-playbook, you will see an entry for LogPath, such as /var/lib/docker/containers//-json.log. In this log file you will see the output of the execution of the hello-world container. This output is the same when you run the container manually as shown below:
$ sudo docker run hello-world

Hello from Docker!

This message shows that your installation appears to be working correctly.

To generate this message, Docker took the following steps:
 1. The Docker client contacted the Docker daemon.
 2. The Docker daemon pulled the "hello-world" image from the Docker Hub.
 3. The Docker daemon created a new container from that image which runs the
    executable that produces the output you are currently reading.
 4. The Docker daemon streamed that output to the Docker client, which sent it
    to your terminal.

To try something more ambitious, you can run an Ubuntu container with:
 $ docker run -it ubuntu bash

Share images, automate workflows, and more with a free Docker ID:
 https://cloud.docker.com/

For more examples and ideas, visit:
 https://docs.docker.com/engine/userguide/
Example
A Deep Learning (DL) Docker project is available (https://github.com/floydhub/dl-docker) with support for frameworks, libraries and software tools. We can use Ansible to build the entire DL container from the source code of the tools. The base OS of the container is Ubuntu 14.04, and will include the following software packages:
- Tensorflow
- Caffe
- Theano
- Keras
- Lasagne
- Torch
- iPython/Jupyter Notebook
- Numpy
- SciPy
- Pandas
- Scikit Learn
- Matplotlib
- OpenCV
The playbook to build the DL Docker image is given below:
- name: Build the dl-docker image
  hosts: localhost
  gather_facts: true
  become: true
  tags: [deep-learning]

  vars:
    DL_BUILD_DIR: "/tmp/dl-docker"
    DL_DOCKER_NAME: "floydhub/dl-docker"

  tasks:
    - name: Download dl-docker
      git:
        repo: https://github.com/saiprashanths/dl-docker.git
        dest: "{{ DL_BUILD_DIR }}"

    - name: Build image and with buildargs
      docker_image:
         path: "{{ DL_BUILD_DIR }}"
         name: "{{ DL_DOCKER_NAME }}"
         dockerfile: Dockerfile.cpu
         buildargs:
           tag: "{{ DL_DOCKER_NAME }}:cpu"
We first clone the Deep Learning docker project sources. The docker_image module in Ansible helps us to build, load and pull images. We then use the Dockerfile.cpu file to build a Docker image targeting the CPU. If you have a GPU in your system, you can use the Dockerfile.gpu file. The above playbook can be invoked using the following command:
$ ansible-playbook playbooks/configuration/docker.yml -K --tags=deep-learning
Depending on the CPU and RAM you have, it will take considerable amount of time to build the image with all the software. So be patient!
Jupyter Notebook
The built dl-docker image contains Jupyter notebook which can be launched when you start the container. An Ansible playbook for the same is provided below:
- name: Start Jupyter notebook
  hosts: localhost
  gather_facts: true
  become: true
  tags: [notebook]

  vars:
    DL_DOCKER_NAME: "floydhub/dl-docker"

  tasks:
    - name: Run container for Jupyter notebook
      docker_container:
        name: "dl-docker-notebook"
        image: "{{ DL_DOCKER_NAME }}:cpu"
        state: started
        command: sh run_jupyter.sh
You can invoke the playbook using the following command:
$ ansible-playbook playbooks/configuration/docker.yml -K --tags=notebook
The Dockerfile already exposes the port 8888, and hence you do not need to specify the same in the above docker_container configuration. After you run the playbook, using the ‘docker ps’ command on the host system, you can obtain the container ID as indicated below:
$ sudo docker ps
CONTAINER ID        IMAGE                    COMMAND               CREATED             STATUS              PORTS                NAMES
a876ad5af751        floydhub/dl-docker:cpu   "sh run_jupyter.sh"   11 minutes ago      Up 4 minutes        6006/tcp, 8888/tcp   dl-docker-notebook
You can now login to the running container using the following command:
$ sudo docker exec -it a876 /bin/bash
You can then run an ‘ifconfig’ command to find the local IP address (“172.17.0.2” in this case), and then open http://172.17.0.2:8888 in a browser on your host system to see the Jupyter Notebook. A screenshot is shown in Figure 1:

TensorBoard
TensorBoard consists of a suite of visualization tools to understand the TensorFlow programs. It is installed and available inside the Docker container. After you login to the Docker container, at the root prompt, you can start Tensorboard by passing it a log directory as shown below:
# tensorboard --logdir=./log
You can then open http://172.17.0.2:6006/ in a browser on your host system to see the Tensorboard dashboard as shown in Figure 2:

Docker Image Facts
The docker_image_facts Ansible module provides useful information about a Docker image. We can use it to obtain the image facts for our dl-docker container as shown below:
- name: Get Docker image facts
  hosts: localhost
  gather_facts: true
  become: true
  tags: [facts]

  vars:
    DL_DOCKER_NAME: "floydhub/dl-docker"

  tasks:
    - name: Get image facts
      docker_image_facts:
        name: "{{ DL_DOCKER_NAME }}:cpu"
The above playbook can be invoked as follows:
$ ANSIBLE_STDOUT_CALLBACK=json ansible-playbook playbooks/configuration/docker.yml -K --tags=facts
The ANSIBLE_STDOUT_CALLBACK environment variable is set to ‘json’ to produce a JSON output for readability. Some important image facts from the invocation of the above playbook are shown below:
"Architecture": "amd64",
"Author": "Sai Soundararaj <saip@outlook.com>",

"Config": {

"Cmd": [
   "/bin/bash"
],

"Env": [
   "PATH=/root/torch/install/bin:/root/caffe/build/tools:/root/caffe/python:/usr/local/sbin:/usr/local/bin:/usr/sbin:/usr/bin:/sbin:/bin",
   "CAFFE_ROOT=/root/caffe",
   "PYCAFFE_ROOT=/root/caffe/python",
   "PYTHONPATH=/root/caffe/python:",
   "LUA_PATH=/root/.luarocks/share/lua/5.1/?.lua;/root/.luarocks/share/lua/5.1/?/init.lua;/root/torch/install/share/lua/5.1/?.lua;/root/torch/install/share/lua/5.1/?/init.lua;./?.lua;/root/torch/install/share/luajit-2.1.0-beta1/?.lua;/usr/local/share/lua/5.1/?.lua;/usr/local/share/lua/5.1/?/init.lua",
   "LUA_CPATH=/root/torch/install/lib/?.so;/root/.luarocks/lib/lua/5.1/?.so;/root/torch/install/lib/lua/5.1/?.so;./?.so;/usr/local/lib/lua/5.1/?.so;/usr/local/lib/lua/5.1/loadall.so",
   "LD_LIBRARY_PATH=/root/torch/install/lib:",
   "DYLD_LIBRARY_PATH=/root/torch/install/lib:"
],

"ExposedPorts": {
   "6006/tcp": {},
   "8888/tcp": {}
},

"Created": "2016-06-13T18:13:17.247218209Z",
"DockerVersion": "1.11.1",

"Os": "linux",

"task": { "name": "Get image facts" }
You are encouraged to read the ‘Getting Started with Docker’ user guide available at http://docs.ansible.com/ansible/latest/guide_docker.html to know more about using Docker with Ansible.
October 31, 2019
The Tex User Group 2019 conference was held between August 9-11, 2019 at Sheraton Palo Alto Hotel, in Palo Alto, California.

I wanted to attend TUG 2019 for two main reasons - to present my work on the “XeTeX Book Template”, and also to meet my favourite computer scientist, Prof. Donald Knuth. He does not travel much, so, it was one of those rare opportunities for me to meet him in person. His creation of the TeX computer typesetting system, where you can represent any character mathematically, and also be able to program and transform it is beautiful, powerful and the best typesetting software in the world. I have been using TeX extensively for my documentation and presentations over the years.
Day I
I reached the hotel venue only in the afternoon of Friday, August 9, 2019, as I was also visiting Mountain View/San Jose on official work. I quickly checked into the hotel and completed my conference registration formalities. When I entered the hall, Rishi T from STM Document Engineering Private Limited, Thiruvananthapuram was presenting a talk on “Neptune - a proofing framework for LaTeX authors”. His talk was followed by an excellent poetic narration by Pavneet Arora, who happened to be a Vim user, but, also mentioned that he was eager to listen to my talk on XeTeX and GNU Emacs.
After a short break, Shreevatsa R, shared his experiences on trying to understand the TeX source code, and the lessons learnt in the process. It was a very informative, user experience report on the challenges he faced in navigating and learning the TeX code. Petr Sojka, from Masaryk University, Czech Republic, shared his students’ experience in using TeX with a detailed field report. I then proceeded to give my talk on the “XeTeX Book Template” on creating multi-lingual books using GNU Emacs and XeTeX. It was well received by the audience. The final talk of the day was by Jim Hefferon, who analysed different LaTeX group questions from newbies and in StackExchange, and gave a wonderful summary of what newbies want. He is a professor of Mathematics at Saint Michael’s College, and is well-known for his book on Linear Algebra, prepared using LaTeX. It was good to meet him, as he is also a Free Software contributor.
The TUG Annual General Meeting followed with discussions on how to grow the TeX community, the challenges faced, membership fees, financial reports, and plan for the next TeX user group conference.
Day II
The second day of the conference began with Petr Sojka and Ondřej Sojka presenting on “The unreasonable effectiveness of pattern generation”. They discussed the Czech hyphenation patterns along with a pattern generation case study. This talk was followed by Arthur Reutenauer presenting on “Hyphenation patterns in TeX Live and beyond”. David Fuchs, a student who worked with Prof. Donald Knuth on the TeX project in 1978, then presented on “What six orders of magnitude of space-time buys you”, where he discussed the design trade-offs in TeX implementation between olden days and present day hardware.
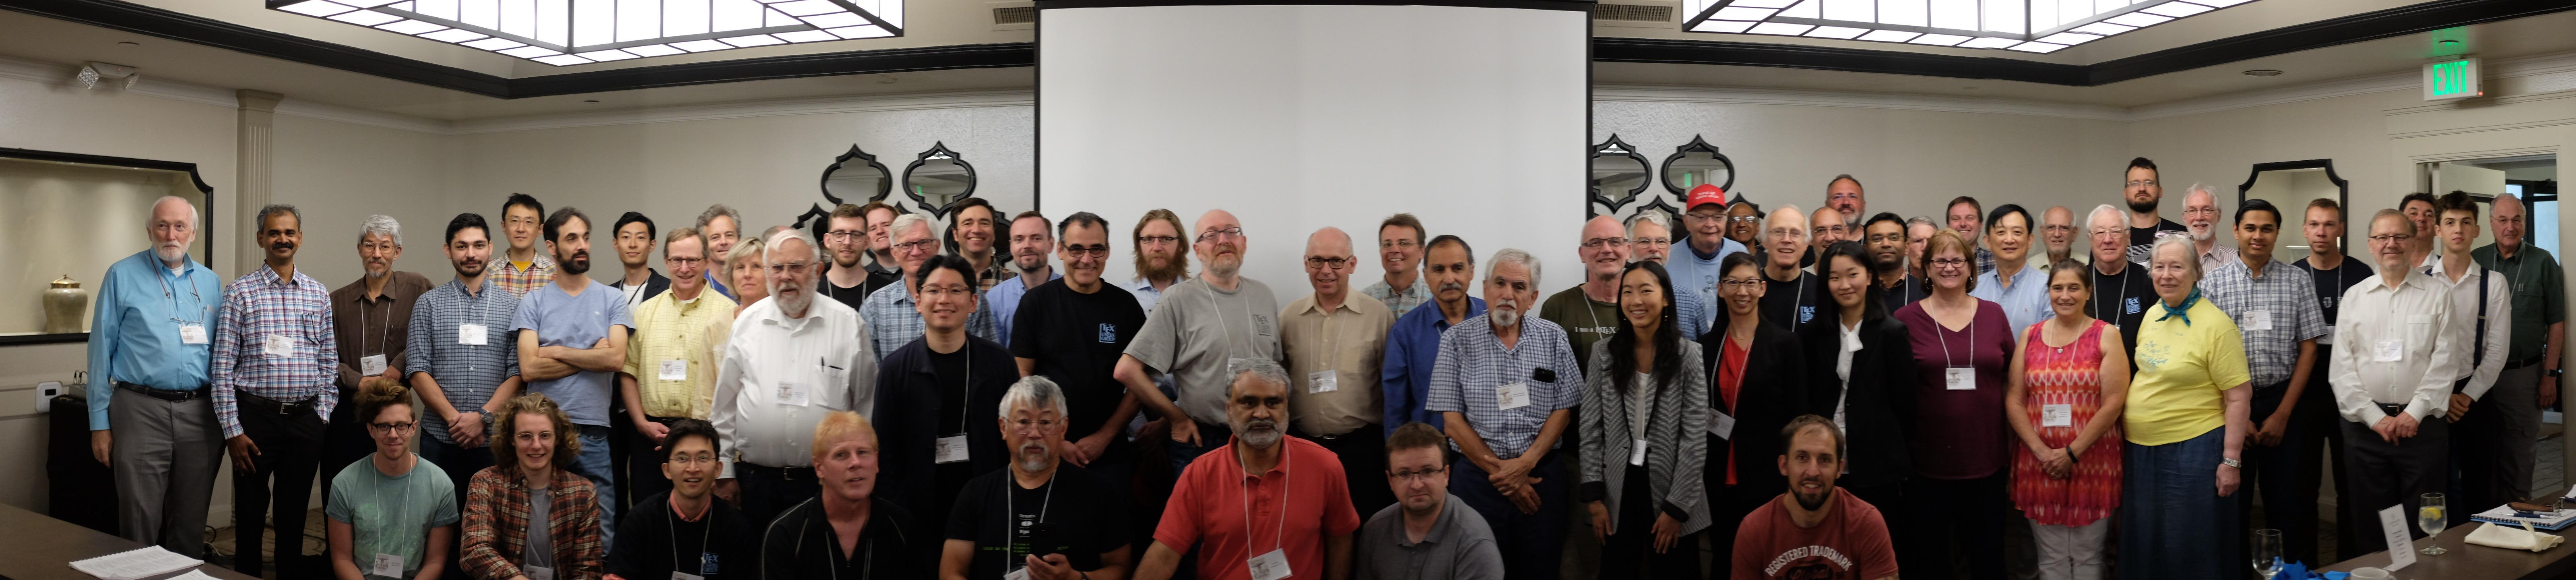
After a short break, Tom Rokicki, who was also a student at Stanford and worked with Donald Knuth on TeX, gave an excellent presentation on searching and copying text in PDF documents generated by TeX for Type-3 bitmap fonts. This session was followed by Martin Ruckert’s talk on “The design of the HINT file format”, which is intended as a replacement of the DVI or PDF file format for on-screen reading of TeX output. He has also authored a book on the subject - “HINT: The File Format: Reflowable Output for TeX”. Doug McKenna had implemented an interactive iOS math book with his own TeX interpreter library. This allows you to dynamically interact with the typeset document in a PDF-free ebook format, and also export the same. We then took a group photo:
I then had to go to Stanford, so missed the post-lunch sessions, but, returned for the banquet dinner in the evening. I was able to meet and talk with Prof. Donald E. Knuth in person. Here is a memorable photo!

He was given a few gifts at the dinner, and he stood up and thanked everyone and said that “He stood on the shoulders of giants like Isaac Newton and Albert Einstein.”
 < />
< />
I had a chance to meet a number of other people who valued the beauty, precision and usefulness of TeX. Douglas Johnson had come to the conference from Savannah, Georgia and is involved in the publishing industry. Rohit Khare, from Google, who is active in the Representational State Transfer (ReST) community shared his experiences with typesetting. Nathaniel Stemen is a software developer at Overleaf, which is used by a number of university students as an online, collaborative LaTeX editor. Joseph Weening, who was also once a student to Prof. Donald Knuth, and is at present a Research Staff member at the Institute for Defense Analyses Center for Communications Research in La Jolla, California (IDA/CCR-L) shared his experiences in working with the TeX project.
Day III
The final day of the event began with Antoine Bossard talking on “A glance at CJK support with XeTeX and LuaTeX”. He is an Associate Professor of the Graduate School of Science, Kanagawa University, Japan. He has been conducting research regarding Japanese characters and their memorisation. This session was followed by a talk by Jaeyoung Choi on “FreeType MF Module 2: Integration of Metafont and TeX-oriented bitmap fonts inside FreeType”. Jennifer Claudio then presented the challenges in improving Hangul to English translation.
After a short break, Rishi T presented “TeXFolio - a framework to typeset XML documents using TeX”. Boris Veytsman then presented the findings on research done at the College of Information and Computer Science, University of Massachusetts, Amherst on “BibTeX-based dataset generation for training citation parsers”. The last talk before lunch was by Didier Verna on “Quickref: A stress test for Texinfo”. He teaches at École Pour l’Informatique et les Techniques Avancées, and is a maintainer of XEmacs, Gnus and BBDB. He also an avid Lisper and one of the organizers of the European Lisp Symposium!
After lunch, Uwe Ziegenhagen demonstrated on using LaTeX to prepare and automate exams. This was followed by a field report by Yusuke Terada, on how they use TeX to develop a digital exam grading system at large scale in Japan. Chris Rowley, from the LaTeX project, then spoke on “Accessibility in the LaTeX kernel - experiments in tagged PDF”. Ross Moore joined remotely for the final session of the day to present on “LaTeX 508 - creating accessible PDFs”. The videos of both of these last two talks are available online.
A number of TeX books were made available for free for the participants, and I grabbed quite a few, including a LaTeX manual written by Leslie Lamport. Overall, it was a wonderful event, and it was nice to meet so many like-minded Free Software people.
A special thanks to Karl Berry, who put in a lot of effort in organizing the conference, but, could not make it to due to a car accident.
The TeX User Group Conference in 2020 is scheduled to be held at my alma mater, Rochester Institute of Technology.
July 22, 2019
Rootconf 2019 was held on June 21-22, 2019 at NIMHANS Convention Centre, in Bengaluru on topics ranging from infrastructure security, site reliability engineering, DevOps and distributed systems.

Day I
I had proposed a workshop titled “Shooting the trouble down to the Wireshark Lua Plugin” for the event, and it was selected. I have been working on the “Aerospike Wireshark Lua plugin” for dissecting Aerospike protocols, and hence I wanted to share the insights on the same. The plugin source code is released under the AGPLv3 license.
“Wireshark” is a popular Free/Libre and Open Source Software protocol analyzer for analyzing protocols and troubleshooting networks. The “Lua programming language” is useful to extend C projects to allow developers to do scripting. Since Wireshark is written in C, the plugin extension is provided by Lua. Aerospike uses the PAXOS family and custom built protocols for distributed database operations, and the plugin has been quite useful for packet dissection, and solving customer issues.

The workshop had both theory and lab exercises. I began with an overview of Lua, Wireshark GUI, and the essential Wireshark Lua interfaces. The Aerospike Info protocol was chosen and exercises were given to dissect the version, type and size fields. I finished the session with real-world examples, future work and references. Around 50 participants attended the workshop, and those who had laptops were able to work on the exercises. The workshop presentation and lab exercises are available in the aerospike-wireshark-plugin/docs/workshop GitHub repository.
I had follow-up discussions with the participants before moving to the main auditorium. “Using pod security policies to harden your Kubernetes cluster” by Suraj Deshmukh was an interesting talk on the level of security that should be employed with containers. After lunch, I started my role as emcee in the main auditorium.
The keynote of the day was by Bernd Erk, the CEO at Netways GmbH, who is also the co-founder of the Icinga project. He gave an excellent talk on “How convenience is killing open standards”. He gave numerous examples on how people are not aware of open standards, and take proprietary systems for granted. This was followed by flash talks from the audience. Jaskaran Narula then spoke on “Securing infrastructure with OpenScap: the automation way”, and also shared a demo of the same.
After the tea break, Shubham Mittal gave a talk on “OSINT for Proactive Defense” in which he shared the Open Source Intelligence (OSINT) tools, techniques and procedures to protect the perimeter security for an organization. The last talk of the day was by Shadab Siddiqui on “Running a successful bug bounty programme in your organization”.
Day II
Anant Shrivastava started the day’s proceedings with a recap on the talks from day one.
The first talk of the day was by Jiten Vaidya, co-founder and CEO at Planetscale who spoke on “OLTP or OLAP: why not both?”. He gave an architectural overview of vitess.io, a Free/Libre and Open Source sharding middleware for running OLTP workloads. The design looked like they were implementing the Kubernetes features on a MySQL cluster. Ratnadeep Debnath then spoke on “Scaling MySQL beyond limits with ProxySQL”.
After the morning break, Brian McKenna gave an excellent talk on “Functional programming and Nix for reproducible, immutable infrastructure”. I have listened to his talks at the Functional Programming conference in Bengaluru, and they have been using Nix in production. The language constructs and cases were well demonstrated with examples. This was followed by yet another excellent talk by Piyush Verma on “Software/Site Reliability of Distributed Systems”. He took a very simple request-response example, and incorporated site reliability features, and showed how complex things are today. All the major issues, pitfalls, and troubles were clearly explained with beautiful illustrations.
Aaditya Talwai presented his talk on “Virtuous Cycles: Enabling SRE via automated feedback loops” after the lunch break. This was followed by Vivek Sridhar’s talk on “Virtual nodes to auto-scale applications on Kubernetes”. Microsoft has been investing heavily on Free/Libre and Open Source, and have been hiring a lot of Python developers as well. Satya Nadella has been bringing in lot of changes, and it will be interesting to see their long-term progress. After Vivek’s talk, we had few slots for flash talks from the audience, and then Deepak Goyal gave his talk on “Kafka streams at scale”.
After the evening beverage break, Øystein Grøvlen, gave an excellent talk on PolarDB - A database architecture for the cloud. They are using it with Alibaba in China to handle petabytes of data. The computing layer and shared storage layers are distinct, and they use RDMA protocol for cluster communication. They still use a single master and multiple read-only replicas. They are exploring parallel query execution for improving performance of analytical queries.

Overall, the talks and presentations were very good for 2019. Time management is of utmost importance at Rootconf, and we have been very consistent. I was happy to emcee again for Rootconf!
June 2, 2019
[Published in Open Source For You (OSFY) magazine, September 2017 edition.]
Introduction
Erlang is a programming language designed by Ericsson primarily for soft real-time systems. The Open Telecom Platform (OTP) consists of libraries, applications and tools to be used with Erlang to implement services that require high availability. In this article, we will create a test Virtual Machine (VM) to compile, build, and test Erlang/OTP from its source code. This allows you to create VMs with different Erlang release versions for testing.
The Erlang programming language was developed by Joe Armstrong, Robert Virding and Mike Williams in 1986 and released as free and open source software in 1998. It was initially designed to work with telecom switches, but is widely used today in large scale, distributed systems. Erlang is a concurrent and functional programming language, and is released under the Apache License 2.0.
Setup
A CentOS 6.8 Virtual Machine (VM) running on KVM will be used for the installation. Internet access should be available from the guest machine. The VM should have at least 2 GB of RAM alloted to build the Erlang/OTP documentation. The Ansible version used on the host (Parabola GNU/Linux-libre x86_64) is 2.3.0.0. The ansible/ folder contains the following files:
ansible/inventory/kvm/inventory
ansible/playbooks/configuration/erlang.yml
The IP address of the guest CentOS 6.8 VM is added to the inventory file as shown below:
erlang ansible_host=192.168.122.150 ansible_connection=ssh ansible_user=bravo ansible_password=password
An entry for the erlang host is also added to the /etc/hosts file as indicated below:
192.168.122.150 erlang
A ‘bravo’ user account is created on the test VM, and is added to the ‘wheel’ group. The /etc/sudoers file also has the following line uncommented, so that the ‘bravo’ user will be able to execute sudo commands:
## Allows people in group wheel to run all commands
%wheel	ALL=(ALL)	ALL
We can obtain the Erlang/OTP sources from a stable tarball, or clone the Git repository. The steps involved in both these cases are discussed below:
Building from the source tarball
The Erlang/OTP stable releases are available at http://www.erlang.org/downloads. The build process is divided into many steps, and we shall go through each one of them. The version of Erlang/OTP can be passed as an argument to the playbook. Its default value is the release 19.0, and is defined in the variable section of the playbook as shown below:
vars:
  ERL_VERSION: "otp_src_{{ version | default('19.0') }}"
  ERL_DIR: "{{ ansible_env.HOME }}/installs/erlang"
  ERL_TOP: "{{ ERL_DIR }}/{{ ERL_VERSION }}"
  TEST_SERVER_DIR: "{{ ERL_TOP }}/release/tests/test_server"
The ERL_DIR variable represents the directory where the tarball will be downloaded, and the ERL_TOP variable refers to the top-level directory location containing the source code. The path to the test directory from where the tests will be invoked is given by the TEST_SERVER_DIR variable.
Erlang/OTP has mandatory and optional package dependencies. Let’s first update the software package repository, and then install the required dependencies as indicated below:
tasks:
  - name: Update the software package repository
    become: true
    yum:
      name: '*'
      update_cache: yes

  - name: Install dependencies
    become: true
    package:
      name: "{{ item }}"
      state: latest
    with_items:
      - wget
      - make
      - gcc
      - perl
      - m4
      - ncurses-devel
      - sed
      - libxslt
      - fop
The Erlang/OTP sources are written using the ‘C’ programming language. The GNU C Compiler (GCC) and GNU Make are used to compile the source code. The ‘libxslt’ and ‘fop’ packages are required to generate the documentation. The build directory is then created, the source tarball is downloaded and it is extracted to the directory mentioned in ERL_DIR.
- name: Create destination directory
  file: path="{{ ERL_DIR }}" state=directory

- name: Download and extract Erlang source tarball
  unarchive:
    src: "http://erlang.org/download/{{ ERL_VERSION }}.tar.gz"
    dest: "{{ ERL_DIR }}"
    remote_src: yes
The ‘configure’ script is available in the sources, and it is used to generate the Makefile based on the installed software. The ‘make’ command will build the binaries from the source code.
- name: Build the project
  command: "{{ item }} chdir={{ ERL_TOP }}"
  with_items:
    - ./configure
    - make
  environment:
    ERL_TOP: "{{ ERL_TOP }}"
After the ‘make’ command finishes, the ‘bin’ folder in the top-level sources directory will contain the Erlang ‘erl’ interpreter. The Makefile also has targets to run tests to verify the built binaries. We are remotely invoking the test execution from Ansible and hence -noshell -noinput are passed as arguments to the Erlang interpreter, as show in the .yaml file.
- name: Prepare tests
  command: "{{ item }} chdir={{ ERL_TOP }}"
  with_items:
    - make release_tests
  environment:
    ERL_TOP: "{{ ERL_TOP }}"

- name: Execute tests
  shell: "cd {{ TEST_SERVER_DIR }} && {{ ERL_TOP }}/bin/erl -noshell -noinput -s ts install -s ts smoke_test batch -s init stop"
You need to verify that the tests have passed successfully by checking the $ERL_TOP/release/tests/test_server/index.html page in a browser. A screenshot of the test results is shown in Figure 1:

The built executables, libraries can then be installed on the system using the make install command. By default, the install directory is /usr/local.
- name: Install
  command: "{{ item }} chdir={{ ERL_TOP }}"
  with_items:
    - make install
  become: true
  environment:
    ERL_TOP: "{{ ERL_TOP }}"
The documentation can also be generated and installed as shown below:
- name: Make docs
  shell: "cd {{ ERL_TOP }} && make docs"
  environment:
    ERL_TOP: "{{ ERL_TOP }}"
    FOP_HOME: "{{ ERL_TOP }}/fop"
    FOP_OPTS: "-Xmx2048m"

- name: Install docs
  become: true
  shell: "cd {{ ERL_TOP }} && make install-docs"
  environment:
    ERL_TOP: "{{ ERL_TOP }}"
The total available RAM (2 GB) is specified in the FOP_OPTS environment variable. The complete playbook to download, compile, execute the tests, and also generate the documentation is given below:
---
- name: Setup Erlang build
  hosts: erlang
  gather_facts: true
  tags: [release]

  vars:
    ERL_VERSION: "otp_src_{{ version | default('19.0') }}"
    ERL_DIR: "{{ ansible_env.HOME }}/installs/erlang"
    ERL_TOP: "{{ ERL_DIR }}/{{ ERL_VERSION }}"
    TEST_SERVER_DIR: "{{ ERL_TOP }}/release/tests/test_server"

  tasks:
    - name: Update the software package repository
      become: true
      yum:
        name: '*'
        update_cache: yes

    - name: Install dependencies
      become: true
      package:
        name: "{{ item }}"
        state: latest
      with_items:
        - wget
        - make
        - gcc
        - perl
        - m4
        - ncurses-devel
        - sed
        - libxslt
        - fop

    - name: Create destination directory
      file: path="{{ ERL_DIR }}" state=directory

    - name: Download and extract Erlang source tarball
      unarchive:
        src: "http://erlang.org/download/{{ ERL_VERSION }}.tar.gz"
        dest: "{{ ERL_DIR }}"
        remote_src: yes

    - name: Build the project
      command: "{{ item }} chdir={{ ERL_TOP }}"
      with_items:
        - ./configure
        - make
      environment:
        ERL_TOP: "{{ ERL_TOP }}"

    - name: Prepare tests
      command: "{{ item }} chdir={{ ERL_TOP }}"
      with_items:
        - make release_tests
      environment:
        ERL_TOP: "{{ ERL_TOP }}"

    - name: Execute tests
      shell: "cd {{ TEST_SERVER_DIR }} && {{ ERL_TOP }}/bin/erl -noshell -noinput -s ts install -s ts smoke_test batch -s init stop"

    - name: Install
      command: "{{ item }} chdir={{ ERL_TOP }}"
      with_items:
        - make install
      become: true
      environment:
        ERL_TOP: "{{ ERL_TOP }}"

    - name: Make docs
      shell: "cd {{ ERL_TOP }} && make docs"
      environment:
        ERL_TOP: "{{ ERL_TOP }}"
        FOP_HOME: "{{ ERL_TOP }}/fop"
        FOP_OPTS: "-Xmx2048m"

    - name: Install docs
      become: true
      shell: "cd {{ ERL_TOP }} && make install-docs"
      environment:
        ERL_TOP: "{{ ERL_TOP }}"
The playbook can be invoked as follows:
$ ansible-playbook -i inventory/kvm/inventory playbooks/configuration/erlang.yml -e "version=19.0" --tags "release" -K
Build from Git repository
We can build the Erlang/OTP sources from the Git repository. The complete playbook is given below for reference:
- name: Setup Erlang Git build
  hosts: erlang
  gather_facts: true
  tags: [git]

  vars:
    GIT_VERSION: "otp"
    ERL_DIR: "{{ ansible_env.HOME }}/installs/erlang"
    ERL_TOP: "{{ ERL_DIR }}/{{ GIT_VERSION }}"
    TEST_SERVER_DIR: "{{ ERL_TOP }}/release/tests/test_server"

  tasks:
    - name: Update the software package repository
      become: true
      yum:
        name: '*'
        update_cache: yes

    - name: Install dependencies
      become: true
      package:
        name: "{{ item }}"
        state: latest
      with_items:
        - wget
        - make
        - gcc
        - perl
        - m4
        - ncurses-devel
        - sed
        - libxslt
        - fop
        - git
        - autoconf

    - name: Create destination directory
      file: path="{{ ERL_DIR }}" state=directory

    - name: Clone the repository
      git:
        repo: "https://github.com/erlang/otp.git"
        dest: "{{ ERL_DIR }}/otp"

    - name: Build the project
      command: "{{ item }} chdir={{ ERL_TOP }}"
      with_items:
        - ./otp_build autoconf
        - ./configure
        - make
      environment:
        ERL_TOP: "{{ ERL_TOP }}"
The ‘git’ and ‘autoconf’ software packages are required for downloading and building the sources from the Git repository. The Ansible Git module is used to clone the remote repository. The source directory provides an otp_build script to create the configure script. You can invoke the above playbook as follows:
$ ansible-playbook -i inventory/kvm/inventory playbooks/configuration/erlang.yml --tags "git" -K
You are encouraged to read the complete installation documentation at: https://github.com/erlang/otp/blob/master/HOWTO/INSTALL.md.
March 28, 2019
I had given a talk on “Opportunities in Free (Libre) and Open Source Software”(FLOSS) on Saturday, March 2, 2019 at the Computer Society of India, Madras Chapter, jointly organized by the IEEE Computer Society, Madras Chapter and ACM India Chennai Professional Chapter. The Computer Society of India, Education Directorate is located opposite to the Institute of Mathematical Sciences in Taramani, close to the Tidel Park. Students, IT professionals and professors from IIT Madras, Anna University and engineering colleges in and around Chennai attended the event.

At around 6:00 p.m. people had assembled for networking, snacks and beverage. I started the “Building Careers with FLOSS” presentation at 6:30 p.m. Prof. Dr. D. Janakiram, CSE, IIT Madras also shared his insights on the benefits of learning from source code available under a FLOSS license. The session was very interactive and the audience asked a lot of good questions. Dr. B. Govindarajulu, author of the famous “IBM PC and Clones: Hardware, Troubleshooting and Maintenance” book then presented his views on creating a Computer History Museum in Chennai. Dinner was served around 8:00 p.m. at the venue.

A review of my book has been published in Volume 14: No. 1, January-March 2019 IEEE India Council Newsletter. The excerpts of Chapter 4 of my book on “Project Guidelines” is also available. I had also written an article on “Seasons of Code” which is published in this edition of the IEEE newsletter.
Special thanks to Mr. H. R. Mohan, Editor, IEEE India and Chairman, ACM Professional Chapter, Chennai for organizing the event and for the logistics support.
December 26, 2018
[Published in Open Source For You (OSFY) magazine, August 2017 edition.]
Introduction
In this sixth article in the DevOps series, we will install Jenkins using Ansible and set up a Continuous Integration (CI) build for a project that uses Git. Jenkins is Free and Open Source automation server software that is used to build, deploy and automate projects. It is written in Java and released under the MIT license. A number of plugins are available to integrate Jenkins with other tools such as version control systems, APIs and databases.
Setting it up
A CentOS 6.8 Virtual Machine (VM) running on KVM will be used for the installation. Internet access should be available from the guest machine. The Ansible version used on the host (Parabola GNU/Linux-libre x86_64) is 2.3.0.0. The ansible/ folder contains the following files:
ansible/inventory/kvm/inventory
ansible/playbooks/configuration/jenkins.yml
ansible/playbooks/admin/uninstall-jenkins.yml
The IP address of the guest CentOS 6.8 VM is added to the inventory file as shown below:
jenkins ansible_host=192.168.122.120 ansible_connection=ssh ansible_user=root ansible_password=password
An entry for the jenkins host is also added to the /etc/hosts file as indicated below:
192.168.122.120 jenkins
Installation
The playbook to install the Jenkins server on the CentOS VM is given below:
---
- name: Install Jenkins software
  hosts: jenkins
  gather_facts: true
  become: yes
  become_method: sudo
  tags: [jenkins]

  tasks:
    - name: Update the software package repository
      yum:
        name: '*'
        update_cache: yes

    - name: Install dependencies
      package:
        name: "{{ item }}"
        state: latest
      with_items:
        - java-1.8.0-openjdk
        - git
        - texlive-latex
        - wget

    - name: Download jenkins repo
      command: wget -O /etc/yum.repos.d/jenkins.repo http://pkg.jenkins-ci.org/redhat/jenkins.repo

    - name: Import Jenkins CI key
      rpm_key:
        key: http://pkg.jenkins-ci.org/redhat/jenkins-ci.org.key
        state: present

    - name: Install Jenkins
      package:
        name: "{{ item }}"
        state: latest
      with_items:
        - jenkins

    - name: Allow port 8080
      shell: iptables -I INPUT -p tcp --dport 8080 -m state --state NEW,ESTABLISHED -j ACCEPT

    - name: Start the server
      service:
        name: jenkins
        state: started

    - wait_for:
        port: 8080
The playbook first updates the Yum repository and installs the Java OpenJDK software dependency required for Jenkins. The Git and Tex Live LaTeX packages are required to build our project, github.com/shakthimaan/di-git-ally-managing-love-letters (now at https://gitlab.com/shakthimaan/di-git-ally-managing-love-letters). We then download the Jenkins repository file, and import the repository GPG key. The Jenkins server is then installed, port 8080 is allowed through the firewall, and the script waits for the server to listen on port 8080. The above playbook can be invoked using the following command:
$ ansible-playbook -i inventory/kvm/inventory playbooks/configuration/jenkins.yml -vv
Configuration
You can now open http://192.168.122.120:8080 in the browser on the host to start configuring Jenkins. The web page will prompt you to enter the initial Administrator password from /var/lib/jenkins/secrets/initialAdminPassword to proceed further. This is shown in Figure 1:

The second step is to install plugins. For this demonstration, you can select the “Install suggested plugins” option, and later install any of the plugins that you require. Figure 2 displays the selected option:

After you select the “Install suggested plugins” option, the plugins will get installed as shown in Figure 3:

An admin user is required for managing Jenkins. After installing the plugins, a form is shown for you to enter the user name, password, name and e-mail address of the administrator. A screenshot of this is shown in Figure 4:

Once the administrator credentials are stored, a “Jenkins is ready!” page will be displayed, as depicted in Figure 5:

You can now click on the “Start using Jenkins” button to open the default Jenkins dashboard shown in Figure 6:

An example of a new project
Let’s now create a new build for the github.com/shakthimaan/di-git-ally-managing-love-letters project. Provide a name in the “Enter an item name” text box and select the “Freestyle project”. Figure 7 provides shows the screenshot for creating a new project:

The next step is to add the GitHub repo to the “Repositories” section. The GitHub https URL is provided as we are not going to use any credentials in this example. By default, the master branch will be built. The form to enter the GitHub URL is shown in Figure 8:

A Makefile is available in the project source code, and hence we can simply invoke “make” to build the project. The “Execute shell” option is chosen in the “Build” step, and the “make clean; make” command is added to the build step as shown in Figure 9.

From the left panel, you can click on the “Build Now” link for the project to trigger a build. After a successful build, you should see a screenshot similar to Figure 10.

Uninstall
An uninstall script to remove the Jenkins server is available in playbooks/admin folder. It is given below for reference:
---
---
- name: Uninstall Jenkins
  hosts: jenkins
  gather_facts: true
  become: yes
  become_method: sudo
  tags: [remove]

  tasks:
    - name: Stop Jenkins server
      service:
        name: jenkins
        state: stopped

    - name: Uninstall packages
      package:
        name: "{{ item }}"
        state: absent
      with_items:
        - jenkins
The script can be invoked as follows:
$ ansible-playbook -i inventory/kvm/inventory playbooks/admin/uninstall-jenkins.yml
July 25, 2018
I have been trying to have regular monthly Emacs meetups online, starting from 2018.
The following are the meeting minutes and notes from the Jitsi meetings held online in the months of February and March 2018.
February 2018
The February 2018 meetup was primarily focussed on using Emacs for publishing.
Using Emacs with Hakyll to build websites and resumes were discussed. It is also possible to output in muliple formats (PDF, YAML, text) from the same source.
I shared my shakthimaan-blog sources that uses Hakyll to generate the web site. We also discussed the advantanges of using static site generators, especially when you have large user traffic to your web site.
I had created the xetex-book-template, for creating multilingual book PDFs. The required supported features in the same, and its usage were discussed in the meeting.
Kushal Das asked about keyboards use in Emacs, and in particular for Control and Alt, as he was using the Kinesis. The best Emacs keyboard options available at http://ergoemacs.org/emacs/emacs_best_keyboard.html was shared. The advantage of using thumb keys for Control and Alt was obvious with the bowl shaped keyboard layout in Kinesis.
We also talked about the Emacs Web Browser (eww), and suggested the use of mu4e for checking e-mails with Emacs.
March 2018
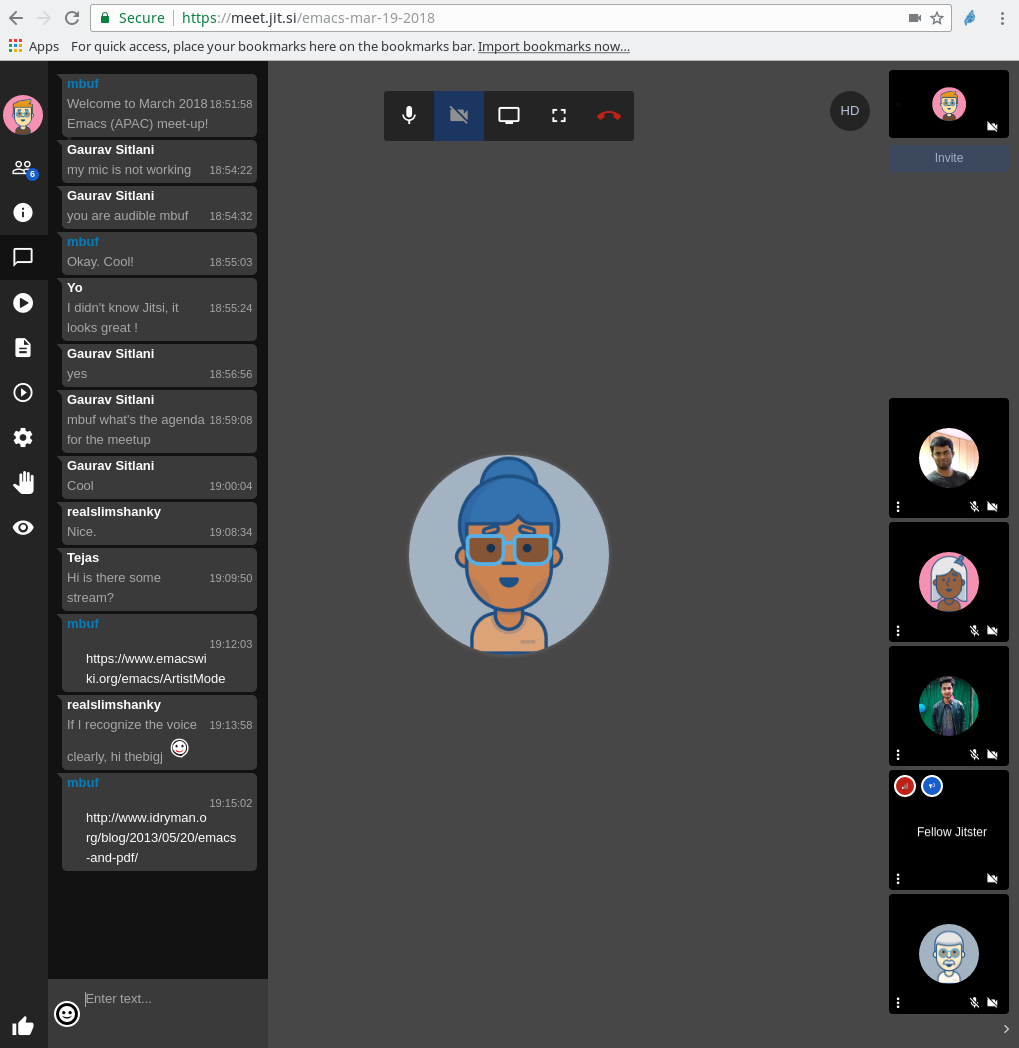
At the beginning of the meetup, the participants asked if there was a live stream available, but, we are not doing so at this point in time with Jitsi.
For drawing inside Emacs, I had suggested ASCII art using Artist Mode.
Emacs has support for rendering PDFs inside, as the following old blog post shows http://www.idryman.org/blog/2013/05/20/emacs-and-pdf/. nnnick then had a question on “Why Emacs?”:
nnnick 19:23:00
Can you tell me briefly why emacs is preferred over other text editors
The discussion then moved to the customization features and extensibility of Emacs that makes it well suited for your needs.
For people who want to start with a basic configuration for Emacs, the following repository was suggested https://github.com/technomancy/emacs-starter-kit.
I had also shared links on using Org mode and scrum-mode for project management:
I shared my Cask setup link https://gitlab.com/shakthimaan/cask-dot-emacs and mentioned that with a rolling distribution like Parabola GNU/Linux-libre, it was quite easy to re-run install.sh for newer Emacs versions, and get a consistent setup.
In order to SSH into local or remote systems (VMs), Tramp mode was suggested.
I also shared my presentation on “Literate DevOps” inspired by Howardism https://gitlab.com/shakthimaan/literate-devops-using-gnu-emacs/blob/master/literate-devops.org.
Org entries can also be used to keep track of personal journal entries. The Date Trees are helpful in this context as shown in the following web page http://members.optusnet.com.au/~charles57/GTD/datetree.html.
Tejas asked about using Org files for executing code in different programming languages. This can be done using Org Babel, and the same was discussed.
Tejas 19:38:23
can org mode files be used to keep executable code in other languages apart from elisp?

mbuf 19:38:42
Yes

mbuf 19:39:15
https://orgmode.org/worg/org-contrib/babel/languages.html
The other useful tools that were discussed for productivity are given below:
Tejas said that he uses perspective-el, but it does not have the save option - just separate workspaces to switch between them - for different projects basically.
A screenshot of the session in progress is shown below:
Arun also suggested using Try for trying out Emacs packages without installation, and cycle-resize package for managing windows.
Tejas and Arun then shared their Emacs configuration files.
Arun 19:51:37
https://github.com/aruntakkar/emacs.d

Tejas 19:51:56
https://github.com/tejasbubane/dotemacs
We closed the session with few references on learning Emacs Lisp:
Tejas 20:02:42
before closing off, can you guys quickly point me to some resources for learning elisp?

mbuf 20:03:59
Writing GNU Emacs Extensions.

mbuf 20:04:10
Tejas: Emacs Lisp manual

Tejas 20:04:35
Thanks
July 20, 2018
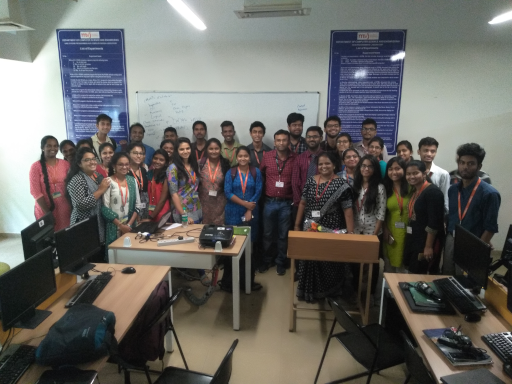
I had organized a hands-on scripting workshop using the Elixir programming language for the Computer Science and Engineering department, MVJ College of Engineering, Whitefield, Bengaluru on May 5, 2018.

The department were interested in organizing a scripting workshop, and I felt using a new programming language like Elixir with the power of the Erlang Virtual Machine (VM) will be a good choice. The syntax and semantics of the Elixir language were discussed along with the following topics:
- Basic types
- Basic operators
- Pattern matching
- case, cond and if
- Binaries, strings and char lists
- Keywords and maps
- Modules and functions
Students had setup Erlang and Elixir on their laptops, and tried the code snippets in the Elixir interpreter. The complete set of examples are available in the following repo:
https://gitlab.com/shakthimaan/elixir-scripting-workshop
A group photo was taken at the end of the workshop.
I would like to thank Prof. Karthik Myilvahanan J for working with me in organizing this workshop.