October 30, 2014
[Published in Open Source For You (OSFY) magazine, October 2013 edition.]
Sparse is a semantic parser written for static analysis of the Linux kernel code. Here’s how you can use it to analyse Linux kernel code.
Sparse implements a compiler front-end for the C programming language, and is released under the Open Software License (version 1.1). You can obtain the latest sources via git:
$ git clone git://git.kernel.org/pub/scm/devel/sparse/sparse.git
You can also install it on Fedora using the following command:
$ sudo yum install sparse
The inclusion of ‘C=1’ to the make command in the Linux kernel will invoke Sparse on the C files to be compiled. Using ‘make C=2’ will execute Sparse on all the source files. There are a number of options supported by Sparse that provide useful warning and error messages. To disable any warning, use the ’-Wno-option’ syntax. Consider the following example:
void
foo (void)
{
}

int
main (void)
{
  foo();

  return 0;
}
Running sparse on the above decl.c file gives the following output:
$ sparse -I/usr/include/linux -I/usr/lib/gcc/x86_64-redhat-linux/4.7.2/include \
         -I/usr/include decl.c

decl.c:2:1: warning: symbol 'foo' was not declared. Should it be static?
The ’-Wdecl’ option is enabled by default, and detects any non-static variables or functions. You can disable it with the ’-Wno-decl’ option. To fix the warning, the function foo() should be declared static. A similar output was observed when Sparse was run on Linux 3.10.9 kernel sources:
arch/x86/crypto/fpu.c:153:12: warning: symbol 'crypto_fpu_init' was not declared.
Should it be static?
While the C99 standard allows declarations after a statement, the C89 standard does not permit it. The following decl-after.c example includes a declaration after an assignment statement:
int
main (void)
{
  int x;

  x = 3;

  int y;

  return 0;
}
When using C89 standard with the ’-ansi’ or ’-std=c89’ option, Sparse emits a warning, as shown below:
$ sparse -I/usr/include/linux -I/usr/lib/gcc/x86_64-redhat-linux/4.7.2/include \
         -I/usr/include -ansi decl-after.c

decl-after.c:8:3: warning: mixing declarations and code
This Sparse command line step can be automated with a Makefile:
TARGET = decl-after

SPARSE_INCLUDE = -I/usr/include/linux -I/usr/lib/gcc/x86_64-redhat-linux/4.7.2/include \
                 -I/usr/include

SPARSE_OPTIONS = -ansi

all:
	sparse $(SPARSE_INCLUDE) $(SPARSE_OPTIONS) $(TARGET).c

clean:
	rm -f $(TARGET) *~ a.out
If a void expression is returned by a function whose return type is void, Sparse issues a warning. This option needs to be explicitly specified with a ’-Wreturn-void’. For example:
static void
foo (int y)
{
  int x = 1;

  x = x + y;
}

static void
fd (void)
{
  return foo(3);
}

int
main (void)
{
  fd();

  return 0;
}
Executing the above code with Sparse results in the following output:
$ sparse -I/usr/include/linux -I/usr/lib/gcc/x86_64-redhat-linux/4.7.2/include \
         -I/usr/include -Wreturn-void void.c

void.c:12:3: warning: returning void-valued expression
The ’-Wcast-truncate’ option warns about truncation of bits during casting of constants. This is enabled by default. An 8-bit character is assigned more than it can hold in the following:
int
main (void)
{
  char i = 0xFFFF;

  return 0;
}
Sparse warns of truncation for the above code:
$ sparse -I/usr/include/linux -I/usr/lib/gcc/x86_64-redhat-linux/4.7.2/include \
         -I/usr/include trun.c

trun.c:4:12: warning: cast truncates bits from constant value (ffff becomes ff)
A truncation warning from Sparse for Linux 3.10.9 kernel is shown below:
arch/x86/kvm/svm.c:613:17: warning: cast truncates bits from
constant value (100000000 becomes 0)
Any incorrect assignment between enums is checked with the ’-Wenum-mismatch’ option. To disable this check, use ’-Wno-enum-mismatch’. Consider the following enum.c code:
enum e1 {a};
enum e2 {b};

int
main (void)
{
  enum e1 x;
  enum e2 y;

  x = y;

  return 0;
}
Testing with Sparse, you get the following output:
$ sparse -I/usr/include/linux -I/usr/lib/gcc/x86_64-redhat-linux/4.7.2/include \
         -I/usr/include enum.c

enum.c:10:7: warning: mixing different enum types
enum.c:10:7:     int enum e2  versus
enum.c:10:7:     int enum e1
Similar Sparse warnings can also be seen for Linux 3.10.9:
drivers/leds/leds-lp3944.c:292:23: warning: mixing different enum types
drivers/leds/leds-lp3944.c:292:23:     int enum led_brightness  versus
drivers/leds/leds-lp3944.c:292:23:     int enum lp3944_status
NULL is of pointer type, while, the number 0 is of integer type. Any assignment of a pointer to 0 is flagged by the ’-Wnon-pointer-null’ option. This warning is enabled by default. An integer pointer ‘p’ is set to zero in the following example:
int
main (void)
{
  int *p = 0;

  return 0;
}
Sparse notifies the assignment of 0 as a NULL pointer:
$ sparse -I/usr/include/linux -I/usr/lib/gcc/x86_64-redhat-linux/4.7.2/include \
         -I/usr/include nullp.c

nullp.c:4:12: warning: Using plain integer as NULL pointer
Given below is another example of this warning in Linux 3.10.9:
arch/x86/kvm/vmx.c:8057:48: warning: Using plain integer as NULL pointer
The corresponding source code on line number 8057 contains:
vmx->nested.apic_access_page = 0;
The GNU Compiler Collection (GCC) has an old, non-standard syntax for initialisation of fields in structures or unions:
static struct
{
  int x;
} local = { x: 0 };

int
main (void)
{
  return 0;
}
Sparse issues a warning when it encounters this syntax, and recommends the use of the C99 syntax:
$ sparse -I/usr/include/linux -I/usr/lib/gcc/x86_64-redhat-linux/4.7.2/include \
         -I/usr/include old.c

old.c:4:13: warning: obsolete struct initializer, use C99 syntax
This option is also enabled by default. The ’-Wdo-while’ option checks if there are any missing parentheses in a do-while loop:
int
main (void)
{
  int x = 0;

  do
    x = 3;
  while (0);

  return 0;
}
On running while.c with Sparse, you get:
$ sparse -I/usr/include/linux -I/usr/lib/gcc/x86_64-redhat-linux/4.7.2/include \
         -I/usr/include -Wdo-while while.c

while.c:7:5: warning: do-while statement is not a compound statement
This option is not enabled by default. The correct use of the the do-while construct is as follows:
int
main (void)
{
  int x = 0;

  do {
    x = 3;
  } while (0);

  return 0;
}
A preprocessor conditional that is undefined can be detected with the ’-Wundef’ option. This must be specified explicitly. The preprocessor FOO is not defined in the following undef.c code:
#if FOO
#endif

int
main (void)
{
  return 0;
}
Executing undef.c with Sparse, the following warning is shown:
$ sparse -I/usr/include/linux -I/usr/lib/gcc/x86_64-redhat-linux/4.7.2/include \
         -I/usr/include -Wundef undef.c

undef.c:1:5: warning: undefined preprocessor identifier 'FOO
The use of parenthesised strings in array initialisation is detected with the ’-Wparen-string’ option:
int
main (void)
{
  char x1[] = { ("hello") };

  return 0;
}
Sparse warns of parenthesised string initialization for the above code:
$ sparse -I/usr/include/linux -I/usr/lib/gcc/x86_64-redhat-linux/4.7.2/include \
         -I/usr/include -Wparen-string paren.c

paren.c:4:18: warning: array initialized from parenthesized string constant
paren.c:4:18: warning: too long initializer-string for array of char
The ’-Wsparse-all’ option enables all warnings, except those specified with ’-Wno-option’. The width of a tab can be specified with the ’-ftabstop=WIDTH’ option. It is set to 8 by default. This is useful to match the right column numbers in the errors or warnings.
You can refer to the following manual page for more available options:
$ man sparse
October 16, 2014
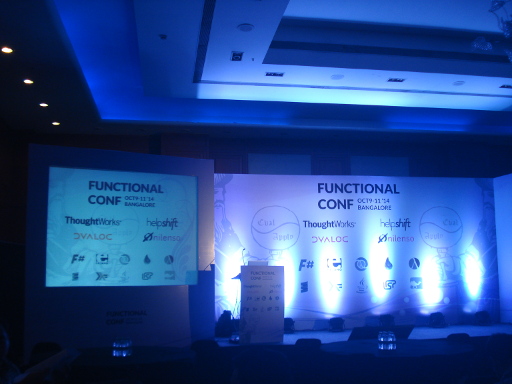
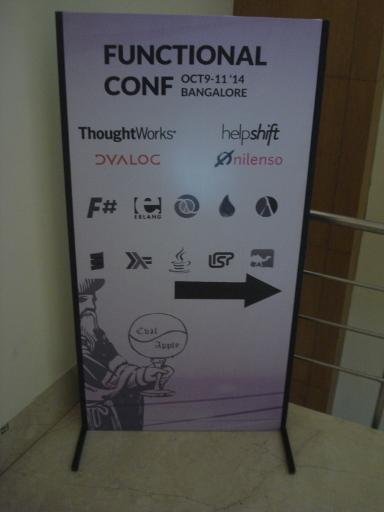
I attended Functional Conf 2014 between October 9-11, 2014 at Hotel Chancery Pavilion, Bengaluru.
Day I
The first day began with the keynote by Dr. Venkat Subramaniam on the “The Joy of Functional Programming”. The talk was centered around what is ‘mainstream’, and why something that is mainstream is not necessarily the ideal approach. He gave examples on writing functional programs in Java, and how these code expressions are easy to read and test.
I then attended the talk on “Functional Reactive UIs with Elm” by Shashi Gowda. He gave an introduction to the Elm functional programming language with UI reactive examples. The syntax of Elm is similar to that of Haskell. The idea is to write less code for creating interactive applications, and Elm generates HTML, CSS and Javascript. There are also d3.js bindings for Elm.
The talk on “Applying functional programming principles to large scale data processing” by Kishore Nallan from Indix introduced the “Lambda Architecture”. They scrap product details from web pages worldwide, and receive 4 TB of data every day. The architecture uses an append-only database, and has multiple readers and views for the data. You can check their engineering.indix.com/blog for more information on their attempts to process large data. Scalding, Cascading, Apache Spark, and Storm are tools that they are experimenting with.
Thomas Gazagnaire talk on “Compile your own cloud with Mirage OS v2.0” was very interesting on how they stripped down the entire OS and applications, and re-wrote them in OCaml for use in production environments. The Mirage OS is a unikernel and targets the Xen hypervisor. It is type safe, and faster to deploy and use. It uses light-weight threads. OPAM is the OCaml Package Manager. IRMIN is an example of a distributed database implemented in OCaml. The TLS protocol was implemented in pure OCaml and deployed as a service. The demo server is available at tls.openmirage.org.
“Property based testing for functional domain models” by Debasish Ghosh introduced the concept of generative data for tests in Scala. The idea is from the QuickCheck library and property-based testing in Haskell. This allows you to focus on executable domain rules. We can get some properties for free in statically typed languages. He mentioned shapeless, a type class and dependent type generic programming library for Scala, and also Algebird, which provides Abstract Algebra for Scala.
Vagmi Mudumbai wrote a simple TODO MVC web application using ClojureScript and Om in his “ClojureScript and Om - Pragmatic functional programming in the Javascript Land” talk. Clojure and ClojureScript can help you write concise code for the problem you want to solve. The immutability of Clojure and the DOM manipulation mutability of React.js complement each other well in implementing performance-savvy web sites.
“Learning (from) Haskell - An experience report” by Aditya Godbole was an attempt to teach functional problem solving using Gofer in an organization, and the lessons learnt.
At the end of the day, a Fish Bowl was organized where people discussed the choice of functional programming language for development, and the also shared their experiences on how they solved problems in the industry using functional programming.
After dinner, there was a BoF session on Clojure, but, it ended with mostly discussions on different programming paradigms, and functional programming languages.
Day II
The first keynote on the second day was by Bruce Tate on “Fear: The Role of Fear in Language Adoption”. He classified the challenges in moving to functional programming into two categories - paralyzing fears and motivational fears. The paralyzing fears are on adoption, cost and getting developers. These can be overcome by building communities, having object-oriented languages implement functional programming features, better deployment options, and with cleaner interfaces. The motivating fears can be overcome by the need for handling code complexity, software to run for multi-core and large distributed systems, and for solving complex problems. He also mentioned that he sees three large programming language communities today - a hybrid, only functional programming, and the JavaScript land.

Morten Kromberg introduced APL (A Programming Language) and Dyalog in his “Pragmatic Functional Programming using Dyalog” talk. APL was invented by Kenneth E. Iverson, an ACM Turing award recipient. Conventions Governing Order of Evaluation by Kenneth explains the context and need for APL. You can try the language using the online REPL at tryapl.org. There are no reserved keywords in this language. Morten also gave a demo of MiServer which is a free and open source web server written in APL. A number of libraries are also available at tools.dyalog.com/library/.
Tejas Dinkar talked on “Monads you already use (without knowing it)” where he tried to mimic the functionality of Haskell Monads in Ruby, but, there are differences in their actual implementation.
“Purely functional data structures demystified” by Mohit Thatte was an excellent talk that illustrates the thesis on Purely Functional Data Structures by Chris Okasaki. Mohit explained how data structures can be built on existing lists, and structural decomposition is an effective way to model complex data. An abstract data type (ADT) can thus be structurally decomposed using list data structures. Every abstract data type can be defined by its operations and invariants. For example, the stack has both push and pop operations, and the invariant is the property of a stack to follow Last In First Out (LIFO). Most programming languages don’t have an expressive power to specify the invariants. He explained functional data structures built with Clojure in simple words, and gave plenty of examples to illustrate the concepts.
I had a chance to meet Ramakrishnan Muthukrishnan, who has been a Debian contributor since 2001. Ramakrishnan’s talk was “An introduction to Continuation Passing Style (CPS)” using the Scheme programming language. A continuation is what is needed to complete the rest of the computation. It provides an alternative model for the use of stacks between function calls. He gave plenty of examples on how to convert an existing piece of code into CPS. Will Byrd’s Google Hangout talk on Introduction to Continuations, call/cc, and CPS was recommended.
“Elixir Today: a round-up on state of Elixir and it’s ecosystem” talk by Akash Manohar gave an introduction to the Elixir programming language. The language is built on the Erlang VM, and the community has taken lot of goodies from the Ruby world. Mix is the tool used to create, build and test Elixir projects, and Hex is the package manager used for Erlang. Elixir code can be deployed to Heroku using a buildpack. A number of useful software are already available - Poison is a JSON parser, Hound for browser automation and integration tests, Ecto is a DSL for communicating with databases, Phoenix is a web frawework for real-time, fault-tolerant applications, and Calliope is an Elixir HAML parser.
The final keynote of the conference was a brilliant talk by Daniel Steinberg on “Methodologies, Mathematics, and the Metalinguistic Implications of Swift”. He began on how people learn mathematics, and why we should reconsider the way we teach geometry. He emphasized that we always try to learn from someone in school (games, for example). Instead of presenting a programming language grammar, the rules can be presented in a playful way. Individuals and interactions are very important in problem solving. Math has a soul and it is beautiful. After providing proofs in geometry with beautiful illustrations, he goes on to say that there are things in mathematics that we can prove, and things that we cannot prove, and we have to accept that, giving examples from the Swift programming language. This was the best talk in the conference.
Day III
I attended the “Clojure Deep-dive” workshop by Baishampayan Ghose (BG). He started with the basics of Clojure and an introduction to functional style of programming. Clojure is opinionated, and the emphasis is on simplicity and fast problem solving. It involves programming at the speed of thought, and aims to make you more productive.
We used the Clojure REPL to practice writing simple functions. You need to determine the data structures that you want to use first, and then work on writing functions. In Clojure, data is of greater importance than code. The Emacs Clojure Starter Kit can be used to get the required environment to work with the REPL. Clojuredocs is a useful quick reference.
We then worked on solving a real problem of counting the most frequently used words from the ‘Alice in Wonderland’ book from Project Gutenberg. BG then explained the use and power of macros, multimethods, and concurrency capabilities in Clojure. Macros allow DSLs to be represented in the Clojure language itself. There is a core.typed library for static typing. core.async can be used for asynchronous programming. Enlive is a selector based (CSS) templating library, and Ring is a Clojure web applications library. You can find more goodies from the The Clojure Toolbox.
A couple of online resources to get started with Clojure are Clojure for the Brave and True and Clojure from the Ground Up.
The video recordings of the talks should be made available in YouTube.
I would like to thank Manufacturing System Insights for sponsoring my trip to the conference.
September 24, 2014
[Published in Open Source For You (OSFY) magazine, September 2013 edition.]
CUnit is a free and open source, unit testing, software framework written in C. It provides a very simple interface to write unit tests, and has a number of assertions for testing data and functions.
CUnit is created as a library that links with the user’s code under test. It is packaged and is available in most GNU/Linux distributions. It has been released under the LGPLv2+ license. You can install it on Fedora, for example, using the following command:
$ sudo yum install CUnit
The CUnit framework helps manage test cases, the test registry, and test suites. A systematic approach is to write unit tests for your code, initialize the CUnit test registry, add the test suites to the test registry, and then add the unit tests to the suites. Set-up and clean-up functions can be written for each test suite. All the test suites can be executed together or can be run selectively. The user interface method to run the tests needs to be decided before executing them. The test registry needs to be cleaned up before returning the error condition and exiting from the test run. Consider the following simple example:
#include <CUnit/CUnit.h>

int init_suite(void)  { return 0; }
int clean_suite(void) { return 0; }

int
is_even (int x)
{
  return (x % 2 == 0);
}

void
test_is_even (void)
{
  CU_ASSERT(is_even(1)  == 0);
  CU_ASSERT(is_even(2)  == 1);
  CU_ASSERT(is_even(3)  == 0);
}

int
main (void)
{
   CU_pSuite pSuite = NULL;

   /* Initialize CUnit test registry */
   if (CUE_SUCCESS != CU_initialize_registry())
      return CU_get_error();

   /* Add suite to registry */
   pSuite = CU_add_suite("Basic_Test_Suite", init_suite, clean_suite);
   if (NULL == pSuite) {
      CU_cleanup_registry();
      return CU_get_error();
      }

   /* add test to suite */
   if ((NULL == CU_add_test(pSuite, "test_is_even", test_is_even)))
   {
      CU_cleanup_registry();
      return CU_get_error();
   }

   /* Run tests using Basic interface */
   CU_basic_run_tests();

   /* Clean up registry and return */
   CU_cleanup_registry();
   return CU_get_error();
}
You can compile the above code using:
$ gcc basic.c -o basic -lcunit -lcurses
The above step can also be abstracted and automated in a Makefile for subsequent compilation and testing, as follows:
CC = gcc
CUNIT_LDFLAGS = -lcunit -lcurses

objects = basic

all:
	$(foreach file,$(objects), $(CC) $(file).c -o $(file) $(CUNIT_LDFLAGS) ;)

clean:
	rm -f *~ *.o $(objects)
You can type ‘make’ in the terminal to compile the code, as follows:
$ make
gcc basic.c -o basic -lcunit -lcurses ;
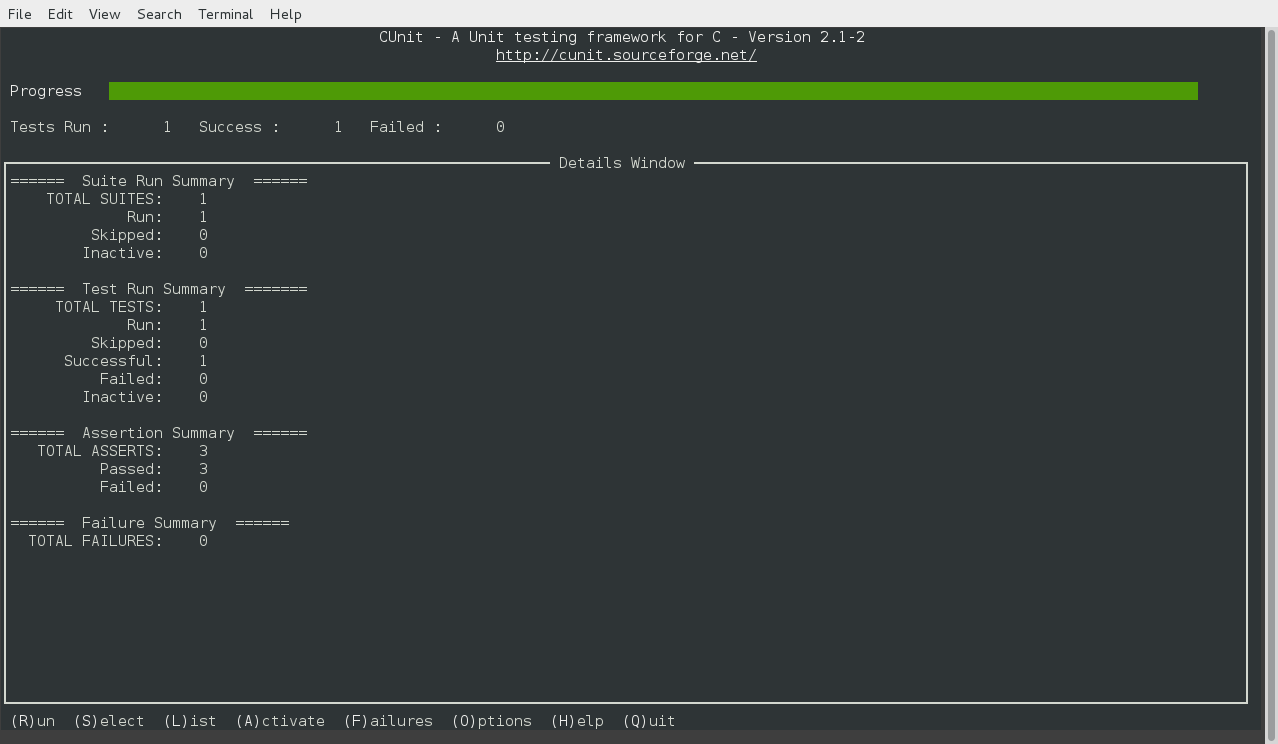
On execution, you get the following output:
$ ./basic


     CUnit - A unit testing framework for C - Version 2.1-2
     http://cunit.sourceforge.net/


Run Summary:    Type  Total    Ran Passed Failed Inactive
              suites      1      1    n/a      0        0
               tests      1      1      1      0        0
             asserts      3      3      3      0      n/a

Elapsed time =    0.000 seconds
The above example uses the Basic interface output from CUnit. A number of assertions have been defined in CUnit/CUnit.h file. Some of them are:
| CU_ASSERT(int expression) CU_ASSERT_FATAL(int expression) |
Check expression is non-zero |
| CU_ASSERT_TRUE(value) CU_ASSERT_TRUE_FATAL(value) |
Check value is non-zero |
| CU_ASSERT_FALSE(value) CU_ASSERT_FALSE_FATAL(value) |
Check value is zero |
| CU_ASSERT_EQUAL(actual, expected) CU_ASSERT_EQUAL_FATAL(actual, expected) |
Check actual == expected |
| CU_ASSERT_NOT_EQUAL(actual, expected) CU_ASSERT_NOT_EQUAL_FATAL(actual, expected) |
Check actual != expected |
| CU_ASSERT_PTR_NULL(value) CU_ASSERT_PTR_NULL_FATAL(value) |
Check pointer == NULL |
| CU_ASSERT_PTR_NOT_NULL(value) CU_ASSERT_PTR_NOT_NULL_FATAL(value) |
Check pointer != NULL |
| CU_ASSERT_STRING_EQUAL(actual, expected) CU_ASSERT_STRING_EQUAL_FATAL(actual, expected) |
Check actual == expected |
The Automated interface dumps the output of the test results to an XML file. The following code snippet is used for the Automated interface:
   /* Run tests using the Automated interface */
   CU_automated_run_tests();
The compilation step is similar to the Basic example. The output is dumped to the CUnitAutomated-Results.xml file, which contains the following:
<?xml version="1.0" ?>
<?xml-stylesheet type="text/xsl" href="CUnit-Run.xsl" ?>
<!DOCTYPE CUNIT_TEST_RUN_REPORT SYSTEM "CUnit-Run.dtd">
<CUNIT_TEST_RUN_REPORT>
  <CUNIT_HEADER/>
  <CUNIT_RESULT_LISTING>
    <CUNIT_RUN_SUITE>
      <CUNIT_RUN_SUITE_SUCCESS>
        <SUITE_NAME> Basic_Test_Suite </SUITE_NAME>
        <CUNIT_RUN_TEST_RECORD>
          <CUNIT_RUN_TEST_SUCCESS>
            <TEST_NAME> test_is_even </TEST_NAME>
          </CUNIT_RUN_TEST_SUCCESS>
        </CUNIT_RUN_TEST_RECORD>
      </CUNIT_RUN_SUITE_SUCCESS>
    </CUNIT_RUN_SUITE>
  </CUNIT_RESULT_LISTING>
  <CUNIT_RUN_SUMMARY>
    <CUNIT_RUN_SUMMARY_RECORD>
      <TYPE> Suites </TYPE>
      <TOTAL> 1 </TOTAL>
      <RUN> 1 </RUN>
      <SUCCEEDED> - NA - </SUCCEEDED>
      <FAILED> 0 </FAILED>
      <INACTIVE> 0 </INACTIVE>
    </CUNIT_RUN_SUMMARY_RECORD>
    <CUNIT_RUN_SUMMARY_RECORD>
      <TYPE> Test Cases </TYPE>
      <TOTAL> 1 </TOTAL>
      <RUN> 1 </RUN>
      <SUCCEEDED> 1 </SUCCEEDED>
      <FAILED> 0 </FAILED>
      <INACTIVE> 0 </INACTIVE>
    </CUNIT_RUN_SUMMARY_RECORD>
    <CUNIT_RUN_SUMMARY_RECORD>
      <TYPE> Assertions </TYPE>
      <TOTAL> 3 </TOTAL>
      <RUN> 3 </RUN>
      <SUCCEEDED> 3 </SUCCEEDED>
      <FAILED> 0 </FAILED>
      <INACTIVE> n/a </INACTIVE>
    </CUNIT_RUN_SUMMARY_RECORD>
  </CUNIT_RUN_SUMMARY>
  <CUNIT_FOOTER> File Generated By CUnit v2.1-2 - Tue Jun 25 16:01:49 2013
 </CUNIT_FOOTER>
</CUNIT_TEST_RUN_REPORT>
If you wish to specify the output XML filename, it can be set using the following command:
   CU_set_output_filename("Even")
   CU_automated_run_tests();
The above XML output is dumped to a ‘Even-Results.xml’ file. The Basic and Automated interfaces are non-interactive modes to run the tests. The interactive Console mode of running tests can be initiated by using the following command:
   /* Run tests in interactive Console mode */
   CU_console_run_tests();
On compilation and execution, the following menu is shown in the terminal:
 $  ./console


      CUnit - A Unit testing framework for C - Version 2.1-2
	      http://cunit.sourceforge.net/


 ***************** CUNIT CONSOLE - MAIN MENU ******************************
 (R)un  (S)elect  (L)ist  (A)ctivate  (F)ailures  (O)ptions  (H)elp  (Q)uit
 Enter command:
This allows you to run all the test suites, or select a suite to be executed. You can list all the registered suites, and also select one to modify it. You can activate or deactivate a suite, and can view any failures from the previous test run. The other interactive ‘Curses’ mode can be invoked using:
    /* Run tests in interactive Curses mode */
    CU_curses_run_tests();
A screenshot of the Curses interface is shown below:
Let’s suppose you have the following code snippet where the third assert fails:
void
test_is_even (void)
{
  CU_ASSERT(is_even(1)  == 0);
  CU_ASSERT(is_even(2)  == 1);
  CU_ASSERT(is_even(4)  == 0);
  CU_ASSERT(is_even(3)  == 0);
}
On executing the above, you will get:
$ ./error


     CUnit - A unit testing framework for C - Version 2.1-2
     http://cunit.sourceforge.net/


Suite Basic_Test_Suite, Test test_is_even had failures:
    1. error.c:17  - is_even(4) == 0

Run Summary:    Type  Total    Ran Passed Failed Inactive
              suites      1      1    n/a      0        0
               tests      1      1      0      1        0
             asserts      4      4      3      1      n/a

Elapsed time =    0.000 seconds
If you wish to terminate the execution of the test when an error occurs, you can use the code shown below:
...
void
test_is_even (void)
{
  CU_ASSERT(is_even(1)  == 0);
  CU_ASSERT(is_even(2)  == 1);
  CU_ASSERT_TRUE_FATAL(is_even(4)  == 0);
  CU_ASSERT(is_even(3)  == 0);
}

int
main (void)
{
  ...
  CU_set_error_action(CUEA_FAIL);
  ...
}
The corresponding output is shown below:
 ./error-fail


     CUnit - A unit testing framework for C - Version 2.1-2
     http://cunit.sourceforge.net/


Suite Basic_Test_Suite, Test test_is_even had failures:
    1. error-fail.c:17  - CU_ASSERT_TRUE_FATAL(is_even(4) == 0)

Run Summary:    Type  Total    Ran Passed Failed Inactive
              suites      1      1    n/a      0        0
               tests      1      1      0      1        0
             asserts      3      3      2      1      n/a

Elapsed time =    0.000 seconds
The test execution stopped after the third assert failed. The different options for error actions are:
| CUEA_IGNORE |
Continue on error |
| CUEA_FAIL |
Stop on error |
| CUEA_ABORT |
Call exit() on error |
You can refer the CUnit Programmers Guide and API documentation to know more about CUnit.
August 15, 2014
[Published in Open Source For You (OSFY) magazine, August 2013 edition.]
Emacs is a popular text editor that can be extended and customized. Haskell is a statically typed, functional programming language. Haskell-mode is a Emacs major mode that provides support to write and use Haskell programs. This article explains interesting features and tips on using Haskell-mode with GNU Emacs.
You can install Haskell-mode using your distribution package manager. For example, on Fedora you can use:
$ sudo yum install emacs-haskell-mode
Mode
You can enter Haskell-mode when opening a Haskell source file that has an extension .hs, or it can be started within Emacs using:
M-x haskell-mode
On the modeline, you will now see “(Haskell)”, indicating that the Haskell mode has been activated. You can enter the indent mode using:
M-x haskell-indent-mode
The modeline will now show “(Haskell Ind)”.
Interpreter
To load a Haskell source file into the interpreter, use C-c C-l. It will create a new buffer, load the module in the current buffer and give a prompt to work with. Consider the following Square.hs program:
square :: Int -> int
square x = x * x
Opening a Square.hs file in an Emacs buffer, and running C-c C-l will produce the following in a new buffer:
GHCi, version 7.0.4: http://www.haskell.org/ghc/  :? for help
Loading package ghc-prim ... linking ... done.
Loading package integer-gmp ... linking ... done.
Loading package base ... linking ... done.
Prelude> :load "/home/guest/Square.hs"
[1 of 1] Compiling Main             ( /home/guest/Square.hs, interpreted )
Ok, modules loaded: Main.
*Main>
If you have multiple buffers opened within Emacs, you can directly switch from the (Haskell) mode buffer to the Haskell interpreter using C-c C-z.
Insertions
The equal to (=) sign can be inserted, and the function type can be neatly aligned with the C-c C-= key stroke. If you type the following function:
volume :: Int -> Int -> Int
volume x
… and keep the cursor after ‘x’ and type C-c C-=, the equal to sign is inserted, and the code gets neatly aligned:
volume   :: Int -> Int -> Int
volume x =
In the following code snippet, after ‘y’, if you hit Return followed by C-c C-|, a guard symbol is inserted:
max :: (Ord a) => a -> a -> a
max x y
 |
After inserting the second guard in the above example, the ‘otherwise’ keyword can be inserted and the code is aligned using C-c C-o:
max :: (Ord a) => a -> a -> a
max x y
 | x > y     = x
 | otherwise =
The ‘where’ clause is produced using C-c C-w. In the following example, pressing return after ‘r’, and using C-c C-w inserts the ‘where’ clause:
circleArea :: Float -> Float
circleArea r = pi * r * r
    where
You can insert the type annotation for a function using C-u C-c C-t. Consider the sphereVolume function:
sphereVolume r = 4 / 3 * pi * r * r * r
    where pi = 3.1412
Placing the cursor on ‘sphereVolume’ and typing C-u C-c C-t produces the following:
sphereVolume :: Fractional a => a -> a
sphereVolume r = 4 / 3 * pi * r * r * r
    where pi = 3.1412
There are a number of shortcut commands that are useful for indentation. Let’s suppose you have the following function with the cursor position indicated by ‘_’:
greeting :: String -> String
greeting x = "Hello" ++ x ++
_
Hitting TAB will take you through the different possible positions for inserting code. When you press TAB for the first time, the cursor will move under ‘Hello’; if you wish to complete the string concatenation (++), issue the following code:
greeting :: String -> String
greeting x = "Hello" ++ x ++
       	     _
Hitting TAB again prepends ‘greeting’ and the cursor will be placed under ‘x’ for you to add another test condition, as follows:
greeting :: String -> String
greeting x = "Hello" ++ x ++
greeting _
Hitting TAB again will move the cursor to the first column if you want to add any text:
greeting :: String -> String
greeting x = "Hello" ++ x ++
_
As you keep hitting TAB again and again, the above sequence will repeat. Comments in Haskell begin with ’- -’.
one -- 1
two -- 2
three -- 3
four -- 4
five -- 5
six -- 6
seven -- 7
After marking the above region, use M-x align-regexp followed by ’–’ for the regexp, and the comments will be aligned:
one    -- 1
two    -- 2
three  -- 3
four   -- 4
five   -- 5
six    -- 6
seven  -- 7
C-c C-. helps align the code neatly. Consider the Area.hs program:
area :: Int -> Int -> Int
area breadth height = breadth * height
After marking the above program, and using C-c C-., the code becomes:
area                :: Int -> Int -> Int
area breadth height = breadth * height
Query
To know the Haskell-mode version, use M-x haskell-version. As an example:
Using haskell-mode version v2.8.0
C-c C-i on a symbol will prompt for getting information about the symbol. For example, ‘Show info of (default Int):’ lists the following:
data Int = GHC.Types.I# GHC.Prim.Int# 	-- Defined in GHC.Types
instance Bounded Int -- Defined in GHC.Enum
instance Enum Int -- Defined in GHC.Enum
instance Eq Int -- Defined in GHC.Base
instance Integral Int -- Defined in GHC.Real
instance Num Int -- Defined in GHC.Num
instance Ord Int -- Defined in GHC.Base
instance Read Int -- Defined in GHC.Read
instance Real Int -- Defined in GHC.Real
instance Show Int -- Defined in GHC.Show
C-c C-t will obtain the type of the symbol with the prompt ‘Show type of (default pi):’. For example:
pi :: Floating a => a
C-c TAB on a symbol returns its definition at the interpreter prompt, as follows:
*Main> :info sphereVolume
sphereVolume :: Fractional a => a -> a
  	-- Defined at /home/guest/Sphere.hs:1:1-12
To find haddock information for a symbol, you can use C-c C-d. Searching for ‘Float’, for example, opens up file:///usr/share/doc/ghc/html/libraries/ghc-prim-0.2.0.0/GHC-Types.html on Fedora.
To use the Hayoo search engine, you can use M-x haskell-hayoo. It will prompt with:
Hayoo query:
The query responses are shown in a browser. Similarily, the Hoogle engine can be queried using M-x haskell-hoogle. If you searched for ‘show’, it will open the URL http://www.haskell.org/hoogle/?q=show with the search results.
Files ending with .lhs are literate Haskell programs. You can use Richard Bird style to separate text and code as follows:
Insert blank line before the code

> quicksort :: Ord a => [a] -> [a]
> quicksort []     = []
> quicksort (p:xs) = (quicksort lesser) ++ [p] ++ (quicksort greater)
>    where
>        lesser  = filter (< p) xs
>        greater = filter (>= p) xs

Insert blank line after the code
The modeline will indicate that you are in the ‘(LitHaskell/bird)’ minor mode.
The hasktag package needs to be installed to help generate TAGS file for source files. For example:
$ hasktags Test.hs
It will create both tags and TAGS files. You can use M-. in the Haskell buffer to search for a tag.
Checks
HLint is a tool that provides suggestions to improve Haskell programs. C-c C-v helps to run hlint on a buffer. Make sure you have the tool installed on your system before using it. For example, running C-c C-v on the above literate quicksort Haskell program suggests:
-*- mode: compilation; default-directory: "~/" -*-
Compilation started at Thu Jun  6 21:31:54

hlint QuickSort.lhs
QuickSort.lhs:6:22: Warning: Redundant bracket
Found:
  (quicksort lesser) ++ [p] ++ (quicksort greater)
Why not:
  quicksort lesser ++ [p] ++ (quicksort greater)

QuickSort.lhs:6:44: Warning: Redundant bracket
Found:
  [p] ++ (quicksort greater)
Why not:
  [p] ++ quicksort greater

2 suggestions

Compilation exited abnormally with code 1 at Thu Jun  6 21:31:54
August 8, 2014
[Published in Electronics For You (EFY) magazine, March 2013 edition.] Source
This tutorial demonstrates the use of eqntott software with some code examples.
eqntott (short for ‘equation to truth table’) is a software tool that can generate truth tables from Boolean equations, which can be used for programmable logic array (PLA) programming. It was initially written at Berkeley, and ported to work on GNU/Linux. It is released under the new BSD license.
Consider a simple AND example:
NAME = and;
INORDER = a b;
OUTORDER = c;

c = a & b;
Here NAME refers to the name of the PLA, and is called ‘and’. INORDER lists the input order of elements, while OUTORDER has the list of outputs in the truth table. Copy this example in a text editor and save it as ‘and.eqn.’
To run the above example, use ‘cd’ command in order to go to the directory where the example is saved. Now run the following command:
$ eqntott and.eqn
You will get the output as:
.i 2
.o 1
.p 1
11  1
.e
’.i’ in the output refers to the number of inputs defined, which refers to ‘a’ and ‘b’ in the above example. ’.o’ corresponds to the number of output variables, which is ‘c’. ’.p’ is the number of product terms. The truth table generated shows that the output is ‘1’ when bothe inputs are ‘1’.
You can use ’-l’ option with eqntott to output the PLA name, input, and output elements.
$ eqntott -l and.eqn
The output will be:
.i 2
.o 1
.na and
.ilb  a b
.ob  c
.p 1
11  1
.e
The name of the PLA is mentioned next to ’.na’ in the output. The order of inputs and outputs in the truth table is also listed.
The following expressions are allowed in the equations for eqntott:
| & |
Logical AND operation |
| | |
Logical OR operation |
| ! |
Logical NOT operation |
| ZERO or 0 |
False or the value zero |
| ONE or 1 |
True or the value one |
| () |
To enclose any expression |
| ? |
Don’t care condition |
| name |
Any input/output in the expression |
The half adder circuit adds two binary digits, and produces a sum and a carry. It can be implemented as follows:
NAME = half_adder;
INORDER = a b;
OUTORDER = s c;
c = a & b;
s = (!a & b) | (a & !b);
When the above equation is run with eqntott:
$ eqntott -l half_adder.eqn
The output will be:
.i 2
.o 2
.na half_adder
.ilb  a b
.ob  s c
.p 3
01  1 0
10  1 0
11  0 1
.e
The sum is represented by ’s’ and carry with ‘c.’ When either the sum or carry is ‘1’, the sum is ‘1’ and carry is ‘0’. When both the sum and carry are ‘1’, then the sum is ‘0’ and carry is ‘1’.
The output of eqntott can be customized using the ’-.key’ argument. The default option is the string ‘iopte’. A few key code options with their output meaning are given below:
| e |
.e |
| f |
.f output-number input-number |
| h |
Human readable format |
| i |
.i number of inputs |
| l |
Truth table with PLA name, inputs and outputs |
| o |
.o number of outputs |
| p |
.p number-of-product-terms |
| v |
eqntott version number |
| S |
PLA connectivity summary |
If the half adder example is run with the following key options:
$ eqntott -.lhptv half_adder.eqn
The output will be:
.na half_adder
.ilb  a b
.ob  s c
2 inputs, 2 outputs, 3 product terms.
s	!a	b
s	a	!b
c	a	b
.p 3
01  1 0
10  1 0
11  0 1
eqntott 9.0
The PLA connectivity summary can be displayed using the ’-.S’ key code option. When used with ‘and.eqn’ example as:
$ eqntott -.S and.eqn
The output will be:
PLA Connectivity Summary
#pterms	input
1	b
1	a
#pterms	output
1	c
#out	#in	product term expression
1	2	a & b
’-s’ option allows you to use an output variable in another expression. Consider, for example:
NAME = s;
INORDER = a b;
OUTORDER = d;

c = a | b;
d = !c;
When you run the above example with ’-s’ option as:
$ eqntott -l -s s.eqn
The output will be:
.i 3
.o 2
.na s
.ilb  a b c
.ob  d c
.p 3
00-  1 0
-1-  0 1
1--  0 1
.e
When both the inputs ‘a’ and ‘b’ are zero, then the output ‘c’ is zero and ‘d’ is ‘1’. If either ‘a’ and ‘b’ is ‘1’, ‘c’ is ‘1’ and ‘d’ is ‘0’.
’-f’ option allows an input to also be present in the output, and used as though the value was observed at different times. Consider, for example:
NAME = f;
INORDER = a;
OUTORDER = a;

a = !a;
When you execute the above example as:
$ eqntott -l -f f.eqn
The output will be:
.i 1
.o 1
.na f
.ilb  a
.ob  a
.p 1
.f 1 1
0  1
.e
The truth table output is ‘1’ only when the input is ‘0’. The ’-s’ and ’-f’ options are mutually exclusive.
eqntott can attempt to minimize the logic terms in the equations. ’-r’ option will try to reduce the minterms in the output. Consider the example:
NAME = reduce;
INORDER = x y;
OUTORDER = z;

z = x & y | x;
When you use the above example with ’-l’ option as:
$ eqntott -l reduce.eqn
The output will be:
.i 2
.o 1
.na reduce
.ilb  x y
.ob  z
.p 2
1-  1
11  1
.e
Using ’-r’ option, eqntott will try to minimize the truth table output:
$ eqntott -l -r reduce.eqn
The output will be:
.i 2
.o 1
.na reduce
.ilb  x y
.ob  z
.p 1
1-  1
.e
The output ‘z’ is ‘1’ whenever ‘x’ is ‘1’.
You can define expressions using ‘define’ keyword. The XOR logic takes two binary inputs, and returns ‘1’ only when either input is ‘1’ but not both. It can be expressed as:
#define xor(a,b) (a&!b | !a&b)

NAME = xor;
INORDER = a b;
OUTORDER = c;

c = xor (a,b);
On running the example as:
$ eqntott -l xor.eqn
The output will be:
.i 2
.o 1
.na xor
.ilb  a b
.ob  c
.p 2
01  1
10  1
.e
As a final example, consider generating an odd parity bit for three inputs. The parity bit is set to ‘1’ when the number of ‘1’s’ in the input is even, so as to make the total number of ‘1’s’ odd. We can define the logic using:
#define xor(a,b) (a&!b | !a&b)

NAME = parity;
INORDER = x y z;
OUTORDER = p;

p = !( xor (xor(x,y), z) );
When you run the above example with ’-l’ and ’-s’ option as:
$ eqntott -l -s parity.eqn
The output will be:
.i 3
.o 1
.na parity
.ilb  x y z
.ob  p
.p 4
000  1
011  1
101  1
110  1
.e
You can refer the manual page of eqntott for more documentation. Sources are available from the eqntott webpage.
June 13, 2014
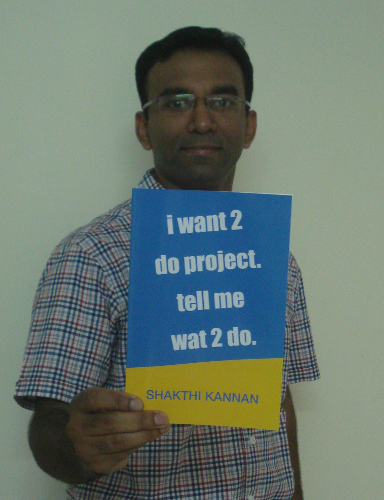
I am happy to announce my first self-published book on working with free and open source software projects, titled, “i want 2 do project. tell me wat 2 do.”
Topics covered in the book:
- Mailing List Guidelines
- Attention to Detail
- Project Communication
- Project Guidelines
- Development Guidelines
- Methodology of Work
- Tools
- Reading and Writing
- Art of Making Presentations
- Sustenance
The product details are as follows:
- Price: ₹ 399
- Pages: 135 pages
- Publisher: Self-published (June 2014)
- Language: English
- ISBN-13: 978-93-5174-187-9
- Size: 6 x 9 inches
- Binding: Paperback (Perfect Binding)
- Availability: In Stock (Indian edition)
You can order the book at pothi.com:
http://pothi.com/pothi/book/shakthi-kannan-i-want-2-do-project-tell-me-wat-2-do
The home page for the book is at:
http://shakthimaan.com/what-to-do.html
If you have any comments or queries, please feel free to write to me at author@shakthimaan.com.
May 27, 2014
Steps to install VirtualBox 4.3.10 on Fedora 20. You need to first open a terminal and become root user:
$ su -
Password:
#
Install dkms package:
# yum install dkms
If Virtual Machine Manager is running, stop the same, and uninstall it.
# yum remove virt-manager
Remove the KVM modules if already loaded:
# rmmod kvm_intel
Download and install rpmfusion-free repo from rpmfusion.org:
# yum install rpmfusion-free-release-20.noarch.rpm
Install VirtualBox:
# yum install VirtualBox
Install the required VirtualBox kernel module for your running kernel. For example, on Fedora 20 with kernel 3.11.10-301, you can run:
# yum install kmod-VirtualBox-3.11.10-301.fc20.x86_64
Load the vboxdrv driver:
# modprobe vboxdrv
You can now start VirtualBox and use it. To convert Virt-manager images to VirtualBox, you can use:
$ VBoxManage convertdd ubuntu1204-lts.img ubuntu1204-lts.vdi
August 7, 2013


More photos available in my /gallery.
June 18, 2013
A Fedora workshop was organised at St. Joseph’s College of Engineering, Chennai, Tamil Nadu, India on Friday, June 14, 2013. The participants were students from the Master of Computer Applications (MCA) department.
The forenoon session began with an introduction to Free/Open Source Software (F/OSS) and Fedora. I explained the various project and communication guidelines that students need to follow, and mentioned the various Fedora sub-projects that they can contribute to. System architecture, and compilation concepts were also discussed. The need to use free and open standards was emphasized. Copyright, and licensing were briefly addressed.

After lunch, a programming lab session was held to see how students solve problems. Their code was reviewed, and suggestions for improvement were given. Klavaro was shown to students to learn touch typing. I also gave an overview of GCC using the “Introduction to GCC” presentation. The concept of using revision control systems was illustrated. A demo of Fedora 18 (x86_64) was shown, and the same was installed on the lab desktops.
Thanks to Prof. Parvathavarthini Mam for working with me in organizing this workshop. Thanks also to Prof. Shirley for managing the logistics.
Few photos taken during the trip are available in my /gallery.
April 25, 2013
A Fedora Activity Day was held at Sri Jayachamarajendra College Of Engineering, Mysore, Karnataka, India on Saturday, April 20, 2013.

The agenda included talks in the morning, and practical sessions in the afternoon. I started the day’s proceedings on best practices to be followed when working with free/open source software projects, giving examples on effective project, and communication guidelines. The various Fedora sub-projects that students can contribute to were mentioned. This was followed by an introductory session on Python by Aravinda V K. The “Python: Introduction for Programmers” presentation was given to the students. Vijaykumar Koppad then gave an overview, and a demo of the Gluster file system.
After lunch, we had a Q&A session with the participants. Questions on working with free/open source software projects, differences between file systems, GNU/Linux distributions, and programming languages were answered. Basic installation and troubleshooting techniques were discussed. I addressed system architecture design concepts, compilation, cross-compilation, and revision control systems, and briefed them on copyright, and licensing. Students had brought their laptops to work on Python scripting, and GlusterFS. I also worked on few bug fixes, package builds for ARM, and package updates:
- Bug 928059 - perl-Sys-CPU 0.54 tests fail on ARM
- Bug 926079 - linsmith: Does not support aarch64 in f19 and rawhide
- Bug 925483 - gputils: Does not support aarch64 in f19 and rawhide
- Bug 922397 - flterm-debuginfo-1.2-1 is empty
- Bug 925202 - csmith: Does not support aarch64 in f19 and rawhide
- Bug 925247 - dgc: Does not support aarch64 in f19 and rawhide
- Bug 925208 - CUnit: Does not support aarch64 in f19 and rawhide
- Bug 901632 - ghc-smallcheck-1.0.2 is available
- Bug 926213 - nesc: Does not support aarch64 in f19 and rawhide
- Bug 953775 - ghc-data-inttrie-0.1.0 is available
Thanks to Vijay Bellur and Vijaykumar Koppad for working with me in organizing this workshop. Thanks also to the Fedora project for sponsoring my travel and accommodation.
Few photos taken during the trip are available in my /gallery.