May 1, 2017
[Published in Open Source For You (OSFY) magazine, June 2016 edition.]
We have covered a lot of ground in our quest to learn the intricacies of GNU Emacs and we trust that you have found your long journey fulfilling. This is the last article in the series.
Introduction
The GNU Emacs editor is written using Emacs Lisp and the C programming language. You can use GNU Emacs as an editor without knowing Emacs Lisp, but, being familiar with it will help you customize it or extend it to your needs. Emacs Lisp is a dialect of the Lisp programming language and is inspired by Maclisp and Common Lisp. The source files end with the filename extension .el and the byte-compiled files end with the .elc filename extension. You can also write scripts using Emacs Lisp and execute them as a batch operation. The code can thus be executed from the command line or from an executable file. Byte-compiling the source files can help you speed up the execution.
All comments begin with a semi-colon. An Emacs Lisp file usually has the following sections in the code, specified with three semi-colons. These always start in the left margin as shown below:
;;; Module --- Summary

;;; Commentary:

;;; Code:

;;; Module ends here
All comments outside functions begin with two semi-colons. The contents of the scratch buffer, shown below, are an example:
;; This buffer is for notes you don't want to save, and for Lisp evaluation.
;; If you want to create a file, visit that file with C-x C-f,
;; then enter the text in that file's own buffer.
Comments inside functions use a single semi-colon, and if they span multiple lines, they must be neatly aligned. For example:
...
(let* ((sexp (read (current-buffer)))    ; using `read' here
                                         ; easier than regexp
                                         ; matching, esp. with
                                         ; different forms of
                                         ; MONTH
 ...
 ))
Literals
The basic data types are available in Emacs Lisp. Numbers can be represented by integers or floats. Integers can have their sign representation before the digit (+1, -2). Floating point numbers can be represented using a decimal point (3.1415) or with an exponent (314.15e-2). A character (S) is represented by its integer code (83), while a string is a list of characters enclosed within double quotes (“A string”).
A symbol is an object with a name. A keyword symbol is one that starts with a colon (:). A vector is an array and can contain different types ([1 “two” :three]). The Boolean values for true and false are ’t’ and ‘nil’ respectively. A cons cell is an object with two slots. The first slot is called the CAR (Contents of the Address part of the Register number) and the second slot is called the CDR (Contents of the Decrement part of the Register number). A list is a series of linked cons cells. For example, in the list ‘(A B)’, the CAR is A and the CDR is B.
Sexp
Emacs Lisp uses prefix notation which consists of an operation followed by operands (arguments). All programs are represented as symbolic expressions (sexp). For example, the ‘+’ operation is applied to its arguments ‘1’ and ‘2’ in the following sexp:
(+ 1 2)
If you copy the above code in an Emacs buffer, you can evaluate the same by placing the cursor at the end of the expression and using the C-x C-e shortcut. The output ‘3’ will be displayed in the minibuffer.
You can also have nested sexps, wherein the innermost expressions are evaluated first.
(+ 1 (* 2 3))
Similar to the ‘+’ operation, you can use pre-defined keywords or functions in Emacs Lisp programs. The format function is similar to your printf statement in the C programming language.
(format "Hello, World!")
You can store a value in a variable using the setq operation as shown below:
(setq IST "Indian Standard Time")

IST     ; No enclosing parenthesis!
        ; produces "Indian Standard Time"
You can find the data type, using the type-of function. A few examples are shown below:
(type-of 1)                ; produces integer

(type-of 3.1415)           ; produces float

(type-of "A string")       ; produces string

(type-of :foo)             ; produces symbol

(type-of t)                ; produces symbol

(type-of '(1 2))           ; produces cons

(type-of [1 "two" :three]) ; produces vector
In the Bash shell, you can escape evaluation by using the backslash. Similarly, you can prevent the Emacs Lisp interpreter from evaluating an expression using quotes. For example:
(+ 1 2)     ; produces 3

'(+ 1 2)    ; produces the list (+ 1 2)
progn
The progn statement is used to execute several sexps. For example:
(progn
  (setq title "Introduction to Emacs Lisp")
  (setq author "Robert J. Chassell")
  (format "%s by %s" title author))  ; produces "Introduction to Emacs Lisp by Robert J. Chassell"
Functions
You can define your own function using the defun built-in keyword. The ‘say’ function simply prints the string “Hello, World!”" in the following example:
(defun say ()
  (format "Hello, World!"))
In order to execute the function, invoke it inside parenthesis as shown below:
(say) ; produces "Hello, World!"
Arguments can be passed to a function. The ‘square’ function is demonstrated below:
(defun square (x)
  (* x x))

(square 3)  ; produces 9
You can also store a list of names and retrieve them using the car and cdr functions as illustrated below:
(setq teams '("GL" "DD" "KKR" "MI" "SRH" "RPS" "RCB" "KXIP"))

(car teams)       ; produces "GL"

(cdr teams)       ; produces "DD" "KKR" "MI" "SRH" "RPS" "RCB" "KXIP"

(car (cdr teams)) ; produces "DD"
let
The let statement allows you to bind a value to a variable in a local context. GNU Emacs 24 has lexical binding support. An example is given below:
(defun hello (name)
  (let ((new-name (concat "Hello " name)))
    new-name
      ))

(hello "Mark")   ; produces "Hello Mark"
Conditions
Conditions can be checked using the if and cond statements. The if statement takes a condition, and if the condition evaluates to true, the sexp immediately following the condition is executed. Otherwise, the else-form is evaluated. The syntax is
(if condition then-form else-form)
An example:
(if t
    (format "True")
  (format "False"))  ; produces "True"
The when condition statement is a variant of the if statement written as a macro. Macros are an important feature of Lisp programming that allow you to extend the language. They are primarily code generators. If the ‘when’ condition is true, then it evaluates the then-forms. The syntax and an example are given below:
(when condition then-forms)

(when t
  (print "Abracadabra!"))  ; produces "Abracadabra!"
Looping
You can use the while statement to perform looping in Emacs Lisp. The body of the ‘while’ loop is executed as long as the condition is true. An example that prints the numbers 0 to 4 is shown below:
(progn
  (setq i 0)
  (while (< i 5)
    (print i)
    (setq i (+ i 1))))
The dolist and dotimes macros can also be used for looping. The other approach is to use recursion. A literal definition in Emacs Lisp for computing the Fibonacci series is given below:
(defun fib (n)
  (cond ((= n 0) 0)
        ((= n 1) 1)
        (t (+ (fib (- n 1))
              (fib (- n 2))))))
The cond control structure takes a series of clauses, each has a condition and a body-form. If any condition evaluates to true, the body-form is executed. Otherwise, it proceeds to the next clause.
An iterative version of the Fibonacci series is given below:
(defun fib (n)
  (fib-helper n 0 1))

(defun fib-helper (n a b)
  (if (= n 0)
      a
    (fib-helper (- n 1) b (+ a b))))

(fib 10) ; produces 55
The Emacs Lisp Cookbook is very handy https://www.emacswiki.org/emacs/ElispCookbook.
You are encouraged to read ‘An Introduction to Programming in Emacs Lisp’ at https://www.gnu.org/software/emacs/manual/eintr.html and the Emacs Lisp Reference Manual at https://www.gnu.org/software/emacs/manual/elisp.html.
April 5, 2017
I had a chance to attend the Pune GNU/Linux Users Group (PLUG) ClipArt Hackathon on Sunday, March 12, 2017 at Bhaskaracharya Pratishthana. The hackathon was an initiative to start organizing different kinds of F/OSS events.
Gaurav (“dexter”) Pant started the day’s proceedings with a quick demo of Inkscape. He also provided the participants with an Inkscape quick reference sheet. The advantage of creating Scalable Vector Graphics (SVG) is that it can be used on a web page as well as enlarged for printing on posters and banners, without any distortion.
I took this time to create some illustrations. The first image was a logo with the letter “S”, whose shape was modified to fit into a boundary. The stick-figure-push SVG is already available in Openclipart. I modified it for a stick-figure-pull image. Few icons were then created for use in web pages. Finally, I completed an SVG of “The Common Man”.


All the images are available in Creative Commons Attribution-Share Alike 4.0 International license at Wikimedia ( https://commons.wikimedia.org/w/index.php?title=Special:ListFiles/Shakthimaan ).
The hackathon was a good initiative to encourage creative contributions to F/OSS. I was happy to see a number of excellent designers who were creating beautiful SVGs. Participants used both GIMP and Inkscape for their work. It was also good to have met the PLUG members.

PC: Siddharth Subramaniam
Such events help grow the activities in a region, and also showcases the diversity in a F/OSS group.
March 31, 2017
[Published in Open Source For You (OSFY) magazine, May 2016 edition.]
Keeping notes, maintaining to-do lists, planning projects and author documents with a fast and effective plain-text system - that’s what Emacs Org mode helps you do. There’s even a mobile version available as FOSS so that your favourite note-taking tool remains with you always.
In this next article in the GNU Emacs series, let’s learn about Org mode.
Introduction
Org-mode is an outline, major mode in GNU Emacs that can be used for taking notes, planning and documentation. It was written by Carsten Dominik in 2003. The Org file is written in plain text and markdown, and it can be exported into multiple output formats (TeX, HTML, PDF, etc.). Org-mode ships with GNU Emacs and this tutorial uses GNU Emacs 24.4.1 (M-x version) and Org mode version 8.2.10 (M-x org-version).
Structure
An Org file ends with the .org filename extension. The top-level headlines are marked using an asterisk (‘*’). For example, a college student may have the following high-level topics:
* College
* Home
* Recreation
You can create topics in the sub-section with more asterisks. For example:
* College
** Assignments
** Lab
** Exams
* Home
* Recreation
If you wish to hide the multiple asterisks at the sub-section level, you can add the following to your ~/.emacs:
(setq org-hide-leading-stars t)
The resultant Org file will look like what follows:
* College
 * Assignments
 * Lab
 * Exams
* Home
* Recreation
You can add unnumbered (use minus or plus symbols) or numbered lists as shown below:
* College
 * Assignments
 * Lab
   1. Compiler Design
   2. Programming Languages
 * Exams
   - Mathematics
   - Operating Systems
   - Databases
   - Compilers
* Home
* Recreation
You can cycle through the various levels in the Org file using the Tab and Shift-Tab keys.
A checkbox with a ‘/’ or a ‘%’ symbol can be used next to a topic name to indicate the completion status of the task. The lists under a topic can each have a checkbox too. Using C-c C-c will mark a checkbox for completion (‘X’) and will also update the statistics in the top-level checkbox. An example is shown below:
* College...
* Home [2/2]
  - [X] Read book
  - [X] Take print-out
* Recreation [50%]
  - [X] Read newspaper
  - [ ] Meditate
If a task is completed, you can move it out of the Org file using C-c C-x C-a. This will create an archive file with the completed items.
Planner
An Org mode file can be used as a planner. Each task can be marked with any of the following states - {TODO, DONE} using C-c C-t key combination. For example:
* TODO College...
* DONE Home [2/2]...
* Recreation [50%]...
You can also customize the TODO states depending on your workflow by setting org-todo-keywords in your Emacs startup file. For example:
(setq org-todo-keywords
  '((sequence "TODO(t)" "NEXT(n)" "STARTED(s)" "WAITING(w)" "|" "DONE(d)" "CANCELED(c)")))
The tasks can be scheduled using C-c C-s. A date is prompted for using the Calendar and is placed below the list entry. For example:
* TODO College
 * Assignments
 * Lab
   SCHEDULED: <2016-04-06 Wed>
   1. Compiler Design
   2. Programming Languages
 * Exams...
You can also add the time interval during which you intend to complete the task. The above example with a scheduled time is shown below:
* TODO College
 * Assignments
 * Lab
   SCHEDULED: <2016-04-06 Wed 14:00-16:00>
   1. Compiler Design
   2. Programming Languages
 * Exams...
A deadline can be added to a task using C-c C-d shortcut. An example is given below:
* TODO College
 * Assignments
 * Lab...
 * Exams
   DEADLINE: <2016-04-08 Fri>
   - Mathematics
   - Operating Systems
   - Databases
   - Compilers
* DONE Home [2/2]...
* Recreation [50%]...
You can have multiple Org files stored in your system, and you can instruct GNU Emacs where to find them by setting org-agenda-files in your Emacs start-up file as shown below:
(setq org-agenda-files (quote ("/tmp")))
Additionally, if you want an agenda view to see the scheduled items and deadlines, add the following to your GNU Emacs startup init file:
(define-key global-map "\C-ca" 'org-agenda)
In the Org file, when you press C-c a, the following agenda will show up in a new buffer:
Week-agenda (W14):
Monday      4 April 2016 W14
  test:       In   4 d.:  Exams
Tuesday     5 April 2016
Wednesday   6 April 2016
  test:       14:00-16:00 Scheduled:  Lab
Thursday    7 April 2016
Friday      8 April 2016
  test:       Deadline:   Exams
Saturday    9 April 2016
Sunday     10 April 2016
Tables
Org-mode has a built-in table editor which neatly aligns the column data. For example:
* TODO College...
* DONE Home [2/2]...
* Recreation [50%]
  - [X] Read newspaper
  - [ ] Meditate
  | Day       | Time | Status |
  |-----------+------+--------|
  | Monday    | 1.25 | Done   |
  | Tuesday   | 1.50 | Done   |
  | Wednesday |      |        |
  | Thursday  |      |        |
  | Friday    |      |        |
  | Saturday  |      |        |
  | Sunday    |      |        |
You can also use spreadsheet formula on these tables to perform calculations. For example:
* TODO College...
* DONE Home [2/2]...
* Recreation [50%]
  - [X] Read newspaper
  - [ ] Meditate
  | Day       | Time | Status |
  |-----------+------+--------|
  | Monday    | 1.25 | Done   |
  | Tuesday   | 1.50 | Done   |
  | Wednesday |      |        |
  | Thursday  |      |        |
  | Friday    |      |        |
  | Saturday  |      |        |
  | Sunday    |      |        |
  |-----------+------+--------|
  | Total     | 2.75 |        |
  #+TBLFM: @9$2=vsum(@2$2..@8$2)
Exporting
The Org file can be exported to multiple output formats (TeX, HTML, ASCII, PDF, etc.). Using C-c C-e will produce a buffer with the ‘Org Export Dispatcher’ menu to select an exporter. This is shown in the following figure:

You can also write your own backend customisations to suit your needs.
Literate programming
Donald Knuth coined the term ‘Literate Programming’ in 1984. To quote him:
"I believe that the time is ripe for significantly better documentation of programs, and that we can best achieve this by considering programs to be works of literature. Hence, my title: ‘Literate Programming’.
Let us change our traditional attitude to the construction of programs: Instead of imagining that our main task is to instruct a computer what to do, let us concentrate rather on explaining to human beings what we want a computer to do."
Org mode supports this style of programming using Babel. You need to activate the support for the programming languages in your GNU Emacs startup file. For example, the following code snippet helps to execute Bash shell scripts.
(org-babel-do-load-languages
 'org-babel-load-languages
 '((sh . t)
   ))
Consider a shell command to find the disk usage. You can create an Org file, and enclose the command in a Babel code block as shown below:
#+BEGIN_SRC sh
  df -h
#+END_SRC
When you press C-c C-c on this code block, you will be prompted with the string “Evaluate this sh code block on your system? (yes/no).” If you input “yes”, the output is produced in a Results section as shown below:
#+RESULTS:
| Filesystem | Size | Used | Avail | Use% | Mounted        | on |
| udev       | 1.9G | 0    | 1.9G  |   0% | /dev           |    |
| tmpfs      | 384M | 6.0M | 378M  |   2% | /run           |    |
| /dev/sda1  | 913G | 75G  | 792G  |   9% | /              |    |
| tmpfs      | 1.9G | 57M  | 1.9G  |   3% | /dev/shm       |    |
| tmpfs      | 5.0M | 4.0K | 5.0M  |   1% | /run/lock      |    |
| tmpfs      | 1.9G | 0    | 1.9G  |   0% | /sys/fs/cgroup |    |
| tmpfs      | 384M | 64K  | 384M  |   1% | /run/user/1000 |    |
You can learn more on Babel from their web page http://orgmode.org/worg/org-contrib/babel/.
A mobile version of Org mode is also available as Free and Open Source Software. You can use a third party service to sync your Org files between your mobile and system. Since the files are plain text, they can also be revision controlled using Git or any version control software.
Please refer to the Org reference manual at http://orgmode.org/#docs for more tips, customisation options and documentation.
March 10, 2017
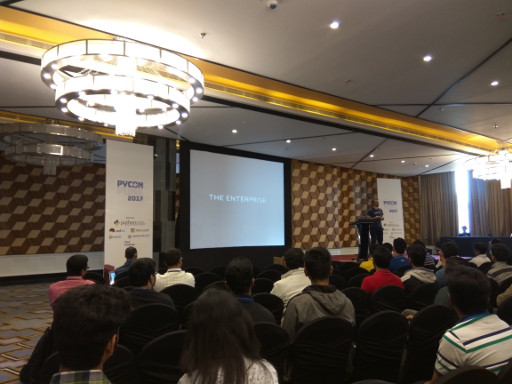
I attended PyCon Pune 2017 conference between February 16-17 (Thursday-Friday), 2017 at Amanora - The Ferns Hotels and Club, Pune.

Day I
I reached the venue early in the morning, to be of any help to the volunteers. The projector had to be checked, and I used my laptop to test the same. After changing couple of cables and adapters, the clarity on the screen was good.
This event had a single track where everyone sat in one big hall. I welcome this change!
Honza Král started the conference with his keynote, titled “(My) OSS Life”. He shared his experiences and learning in the Free and Open Source Software (F/OSS) world. At present, he maintains the Python drivers for Elasticsearch.
The keynote was followed by Anand Chitipotu’s talk on “Writing Beautiful Code”. He illustrated code examples on how to write simple, elegant, readable Python code. The use of meaningful variable names, comments were emphasized a lot. It was a short list of collated points on basic mistakes that newbie programmers make, and how to effectively write beautiful code.
Florian Fuchs then spoke on “Hacking Mailing Lists - The Mailman 3 API Ecosystem”. He explained the new architecture and API with code examples. He has been hacking on the new Mailman 3 web UI and the Python API bindings.
After attending these talks, I made a visit to the three booths at the conference - Red Hat, Python Software Foundation and reserved-bit. I also signed copies of my book that people had brought.
After lunch, I attended the “i18n-ise Django Apps” talk by Sundeep Anand, where he showed the internationalization processes for a Django application. All the relevant file modifications and commands involved were demonstrated.
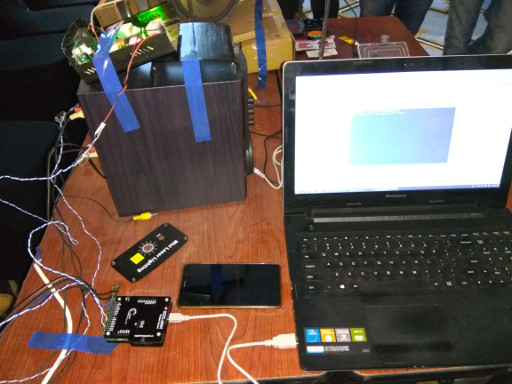
John ‘warthog9’ Hawley is a Perl guy and gave an interesting keynote on building your own hardware, and why you should do that. He explained the various challenges he had faced, the process involved in the same. He had exclusively designed and produced a “Battle Bunny” embedded micro-Python kit for the conference and development sprints.
The “Building Trust in Releases” talk by Nigel Babu was very informative. He explained four important aspects in release management - cadence, documentation, testing, and empathy. This was also an experience report on DevOps practices, and was quite detailed and useful.
The last keynote of the day was by a Physics teacher, Praveen Patil. He shared his exploration on using Python to teach Physics to high school students. He is actively involved in ExpEYES Project, teacher training programs and also contributes content to National Repository of Open Educational Resources (NROER).
Day II
The morning keynote was by Katie Cunningham. She was initially testing the microphone and laptop by singing nursery rhymes. While the organizers decided to wait for people to arrive and settle down, there was time for lightning talks. So, I volunteered to start the day with the resounding “Nursery Rhymes”. After a couple of other lightning talks, Katie started her keynote on accessibility guidelines. It was quite an informative session.
“You can help develop Python - and you should!” talk by Stephen Turnbull was on the history of Python, PEP guidelines and the functioning of the community. I also had a chance to talk with him personally on the story of XEmacs.
Farhaan Bukhsh and Vivek Anand presented their Google Summer of Code (GSoC) work on the project Pagure, which is an alternative to GitHub and GitLab. They shared the past, present and future roadmap for the project. In the “Testing native binaries using CFFI” talk, Noufal Ibrahim demonstrated how to write Python bindings using CFFI.
After lunch, there was time for lightning talks. Different Python user group communities (PyDelhi, HydPy, PythonPune, PyLadies Pune) pitched about their work . I had prepared the sequel to “The Yet Another Lightning Talk” and requested the audience to sing on my behalf. The feedback was positive, as usual. The latest addition to the nursery rhyme is as follows:
Twinkle, Twinkle, unit tests,
How I wonder, where you exist!
I will write unit tests,
Until the project is laid to rest.
The afternoon keynote was by Nick Coghlan. He also shared his know-how on Free and Open Source Software and community best practices. “Django on Steroids - Lessons from Scale” by Sanket Saurav was a good technical, intermediate-level talk on Django customization, nginx settings, scaling and deployment.
The last keynote of the day and the conference was by Terri Oda on “Is OSS more secure?”. She presented the various dimensions on which one needs to answer the question. She concluded by saying that there is definitely more scope in F/OSS to be more secure given the number of people involved, and the transparency in the process.
Conclusion
The number of participants at the conference was more than five hundred, and they all came on a week day to attend! For a first-time event, that is quite impressive. This clearly shows that there is a demand for such events across India.
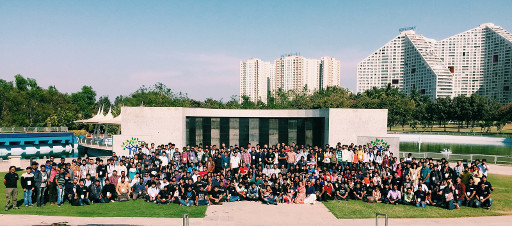
PC: Kushal Das
Initially, there was a lot of resistance (follow the thread) to this event, including the name of the event. Communities are meant for innovation, and stifling is futile. You can learn a lot in a community, and there are guidelines and best practices that are followed.
It was a four day event with development sprints, and hence it had to be a PyCon. Legally, the Python Software Foundation allows using the name “PyCon” for regional events too. Given the context and the necessity, I am happy that the Python Software Foundation (PSF) got the message right, and understood the need for the conference and supported it in a big way!
The development sprints had a limited seating capacity, and the registration got over early. I was informed that there were hundred more requests for the development sprints, which again emphasizes the need for such events! I also had a chance to meet some of the #dgplug (irc.freenode.net) folks with whom I have been interacting online on IRC.
It does take a lot of effort to organize a conference, and I congratulate the PyCon Pune team on their first event.
February 7, 2017
[Published in Open Source For You (OSFY) magazine, April 2016 edition.]
This article in the GNU Emacs series takes readers on how to use HTML mode, do indentation, and use the Magit interface.
HTML mode
You can use HTML mode to effectively edit HTML and CSS files using GNU Emacs. To start the mode, use M-x html-mode. You will see the string ‘HTML’ in the mode line.
Default template
A default HTML template can be started by opening a test.html file, and using C-c C-t html. It will produce the following content:
<html>
  <head>
<title>
You will then be prompted with the string ‘Title:’ to input the title of the HTML page. After you type ‘Hello World’, the default template is written to the buffer, as follows:
<html>
  <head>
<title>Hello World</title>
</head>
<body>
<h1>Hello World</h1>

<address>
<a href="mailto:user@hostname">shakthi</a>
</address>
</body>
</html>
You can enter HTML tags using C-c C-t. GNU Emacs will prompt you with the available list of tags. A screenshot of the available tags is shown in Figure 1:
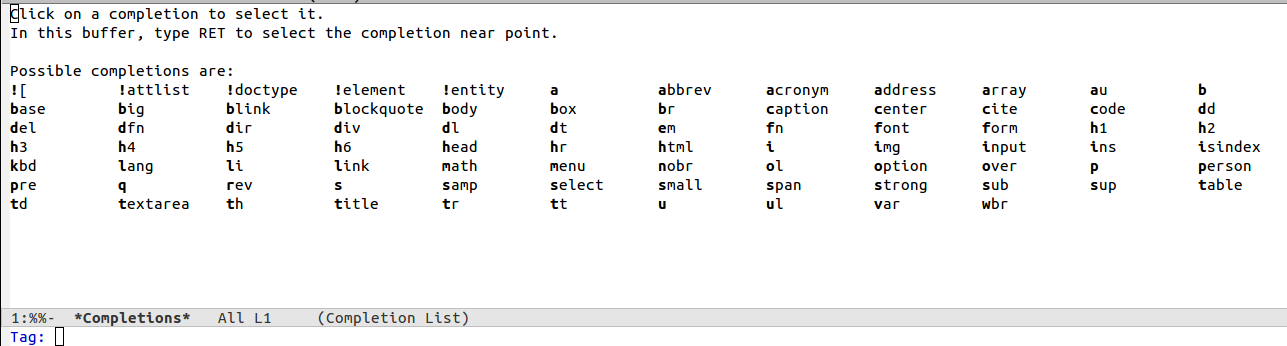
The anchor tag can be inserted using ‘a’. You will then receive a message prompt: ‘Attribute:’. You can provide the value as ‘href’. It will then prompt you for a value, and you can enter a URL, say, ‘http://www.shakthimaan.com’. The anchor tag will be constructed in the buffer as you input values in the mini-buffer. You will be prompted for more attributes. If you want to finish, simply hit the Enter key, and the anchor tag will be completed. The final output is shown below:
<a href="http://www.shakthimaan.com"></a>
You can insert a h2 tag by specifying the same after C-c C-t. You can also add any attributes, as required. Otherwise, simply hitting the Enter key will complete the tag. The rendered text is as follows:
<h2></h2>
You can insert images using the alt tag. You can specify the src attribute and a value for the same. It is also a good practice to specify the alt attribute for the image tag. An example is shown below:
<img alt="image" src="http://shakthimaan.com/images/ShakthiK-workshop-A4-poster.png">
Unordered lists can be created using C-c C-t followed by ‘ul’. It will then prompt you for any attributes that you want included in the tag. You can hit the Enter key, which will prompt you with the string ‘List item:’ to key in list values. An example of the output is shown below:
<ul>
  <li>One
    <li>Two
      <li>Three
</ul>
You can neatly align the code by highlighting the above text and indenting the region using C-M-\. The resultant output is shown below:
<ul>
  <li>One
  <li>Two
  <li>Three
</ul>
If you wish to comment out text, you can select the region and type M-q. The text is enclosed using “<!--” and “-->”. For example, the commented address tags in the above example look like what follows:
<!-- <address> -->
<!-- <a href="mailto:shakthi@achilles">shakthi</a> -->
<!-- </address> -->
A number of major modes exist for different programming environments. You are encouraged to try them out and customize them to your needs.
Accents
In HTML mode, you can insert special characters, accents, symbols and punctuation marks. These characters are mapped to Emacs shortcuts. Some of them are listed in the following table:
| C-x 8 ’ a |
á |
| C-x 8 " e |
ë |
| C-x 8 / E |
Æ |
| C-x 8 3/4 |
¾ |
| C-x 8 C |
© |
| C-x 8 L |
£ |
| C-x 8 P |
¶ |
| C-x 8 u |
µ |
| C-x 8 R |
® |
| C-x / / |
÷ |
Indentation
Consider the following paragraph:
“When we speak of free software, we are referring to freedom, not price. Our General Public Licenses are designed to make sure that you have the freedom to distribute copies of free software (and charge for this service if you wish), that you receive source code or can get it if you want it, that you can change the software or use pieces of it in new free programs; and that you know you can do these things.”
You can neatly fit the above text into 80 columns and 25 rows inside GNU Emacs using M-q. The result is shown below:
When we speak of free software, we are referring to freedom, not
price.  Our General Public Licenses are designed to make sure that you
have the freedom to distribute copies of free software (and charge for
this service if you wish), that you receive source code or can get it
if you want it, that you can change the software or use pieces of it
in new free programs; and that you know you can do these things.
You can also neatly indent regions using the C-M-\ shortcut. For example, look at the following HTML snippet:
<table>
<tr>
<td>Tamil Nadu</td>
<td>Chennai</td>
</tr>
<tr>
<td>Karnataka</td>
<td>Bengaluru</td>
</tr>
<tr>
<td>Punjab</td>
<td>Chandigarh</td>
</tr>
</table>
After indenting the region with C-M-\, the resultant output is shown below:
<table>
  <tr>
    <td>Tamil Nadu</td>
    <td>Chennai</td>
  </tr>
  <tr>
    <td>Karnataka</td>
    <td>Bengaluru</td>
  </tr>
  <tr>
    <td>Punjab</td>
    <td>Chandigarh</td>
  </tr>
</table>
If you have a long line which you would like to split, you can use the C-M-o shortcut. Consider the quote:
“When you’re running a startup, your competitors decide how hard you work.” ~ Paul Graham
If you keep the cursor after the comma, and use C-M-o, the result is shown below:
"When you're running a startup,
                                your competitors decide how hard you work." ~ Paul Graham
Magit
Magit is a fantastic interface to Git inside GNU Emacs. There are many ways in which you can install Magit. To install from the Melpa repository, add the following to your ~/.emacs:
(require 'package)
(add-to-list 'package-archives
             '("melpa" . "http://melpa.org/packages/") t)
When you do M-x list-packages, you will see ‘magit’ in the list. You can press ‘i’ to mark Magit for installation, followed by ‘x’ to actually install it. This will install Magit in ~/.emacs.d/elpa. The version installed on my system is magit-20160303.502.
When you open any file inside GNU Emacs that is version controlled using Git, you can start the Magit interface using M-x magit-status. I have bound this key to C-x g shortcut in ~/.emacs using the following:
(global-set-key (kbd "C-x g") 'magit-status)
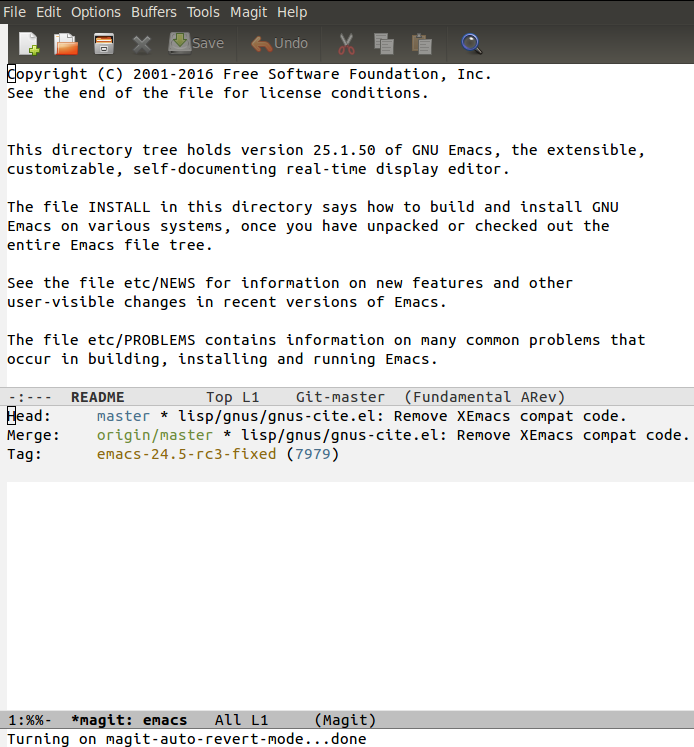
The default magit screenshot for the GNU Emacs project README file is shown in Figure 2.
Pressing ‘l’ followed by ‘l’ will produce the history log in the magit buffer. A screenshot is provided in Figure 3.

You can make changes to the project sources and stage them to the index using the ’s’ shortcut. You can unstage the changes using the ‘u’ shortcut. After making changes to a file, you need to use M-x magit-status to update the Magit buffer status.
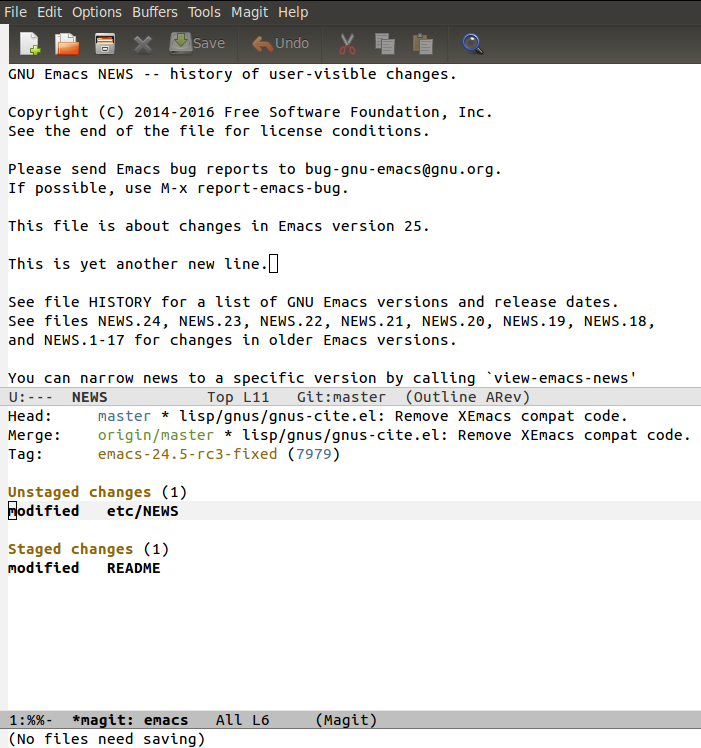
A sample screenshot of the modified files and staged changes is shown in Figure 4.
You can hit TAB and Shift-TAB to cycle through the different sections in the Magit buffer. To commit a message, press ‘c’ followed by ‘c’. It will pop up a buffer where you can enter the commit message.
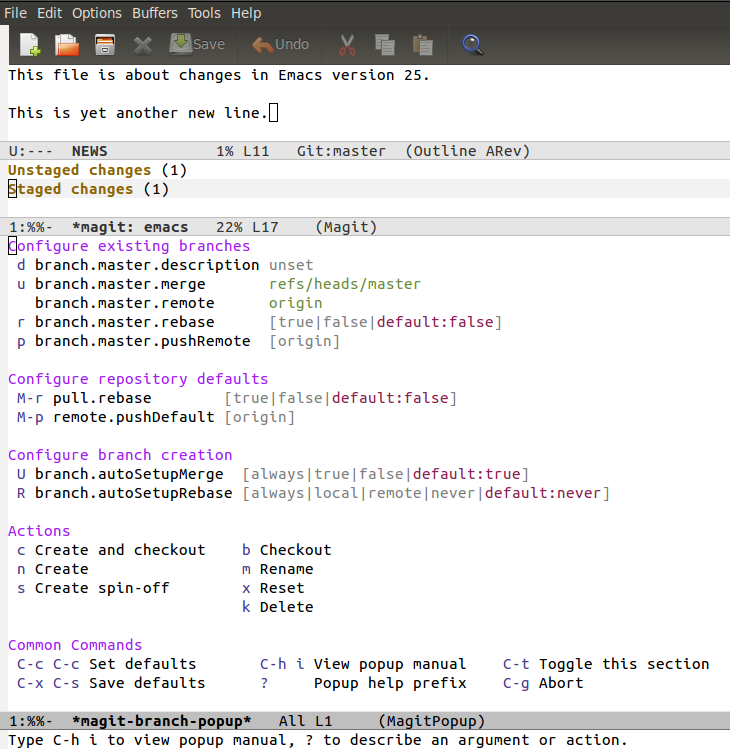
You can create and checkout branches using the ‘b’ shortcut. A screenshot of the magit branch pop-up menu is shown in Figure 5.
All the basic Git commands are supported in Magit - diffing, tagging, resetting, stashing, push-pull, merging and rebasing. You are encourged to read the Magit manual ( https://magit.vc/ ) to learn more.
February 2, 2017
I wanted to buy a laptop for my personal use, and exclusively for Free Software. I have mostly used Lenovo Thinkpads because of their good support for GNU/Linux. I neither wanted an expensive one nor did I want to pay for Windows. The use of SSD would help speed up the boot time. A wide screen laptop will be helpful to split the Emacs frame. I looked at various Netbooks in the market, but, the processing power was not good enough. I really need computing power, with at least four CPUs. 8 GB of RAM with room for expansion will be helpful in future. I prefer to use anti-glare matte displays as they are easy on the eyes. Also, I wanted a laptop that is less than 2kg, and is easy to carry around.
After reviewing many models and configurations, I purchased the Lenovo E460 model that comes with FreeDOS, and swapped the default HDD for SSD (< 500 GB).

Specification
- Intel(R) Core(TM) i5-6200 CPU @ 2.30 GHz (4 processors).
- 14" display
- 437 GB SSD disk
- 8 GB RAM
- Intel Corporation HD Graphics 520
- Intel Dual Band Wireless-AC 3165 Plus Bluetooth
- Intel I219-V Ethernet Controller
- 3 USB ports
- 1 HDMI port
- 4-in-1 Card Reader
- FreeDOS
- 1.81 kg
Parabola GNU/Linux Libre
I tried Trisquel GNU/Linux first on on this laptop. It is a derivative of Ubuntu without non-free software. I experimented with Qubes OS, but, its dom0 has proprietary blobs. GNU Guix is an interesting project, but, it does not have all the packages that I need (yet). I liked rolling distributions, and hence decided to try Parabola GNU/Linux Libre, a derivative of Arch, without the binary blobs.
There is no CD/DVD drive on this laptop, but, you can boot from USB. I first checked if all the software that I need are available in the Parabola GNU/Linux Libre repository, and then proceeded to install the same. I always encrypt the disk during installation. I have the Mate desktop environment with XMonad setup as a tiling window manager.
Audio works out of the box. I do not use the web cam. I had to use the package scripts to install Grisbi as it was not available in the base repository. Virtualization support exists on this hardware, and hence I use Virtual Machine Manager, QEMU and libvirt.
Command Output
All the hardware worked out of the box, except for the wireless which requires a binary blob. So, I purchased a ThinkPenguin Wireless N USB Adapter for GNU/Linux which uses the free ath9k Atheros wireless driver.
As mandatory, I am providing some command outputs.
$ lspci

00:00.0 Host bridge: Intel Corporation Skylake Host Bridge/DRAM Registers (rev 08)
00:02.0 VGA compatible controller: Intel Corporation HD Graphics 520 (rev 07)
00:14.0 USB controller: Intel Corporation Sunrise Point-LP USB 3.0 xHCI Controller (rev 21)
00:14.2 Signal processing controller: Intel Corporation Sunrise Point-LP Thermal subsystem (rev 21)
00:16.0 Communication controller: Intel Corporation Sunrise Point-LP CSME HECI #1 (rev 21)
00:17.0 SATA controller: Intel Corporation Sunrise Point-LP SATA Controller [AHCI mode] (rev 21)
00:1c.0 PCI bridge: Intel Corporation Device 9d12 (rev f1)
00:1c.5 PCI bridge: Intel Corporation Sunrise Point-LP PCI Express Root Port #6 (rev f1)
00:1f.0 ISA bridge: Intel Corporation Sunrise Point-LP LPC Controller (rev 21)
00:1f.2 Memory controller: Intel Corporation Sunrise Point-LP PMC (rev 21)
00:1f.3 Audio device: Intel Corporation Sunrise Point-LP HD Audio (rev 21)
00:1f.4 SMBus: Intel Corporation Sunrise Point-LP SMBus (rev 21)
00:1f.6 Ethernet controller: Intel Corporation Ethernet Connection I219-V (rev 21)
01:00.0 Network controller: Intel Corporation Intel Dual Band Wireless-AC 3165 Plus Bluetooth (rev 99)
02:00.0 Unassigned class [ff00]: Realtek Semiconductor Co., Ltd. RTS522A PCI Express Card Reader (rev 01)

$ uname -a

Linux aether 4.8.17-gnu-1 #1 SMP PREEMPT Wed Jan 18 05:04:13 UYT 2017 x86_64 GNU/Linux

$ df -h

Filesystem             Size  Used Avail Use% Mounted on
dev                    3.7G     0  3.7G   0% /dev
run                    3.7G  920K  3.7G   1% /run
/dev/mapper/cryptroot  437G   95G  321G  23% /
tmpfs                  3.7G   26M  3.7G   1% /dev/shm
tmpfs                  3.7G     0  3.7G   0% /sys/fs/cgroup
tmpfs                  3.7G  196K  3.7G   1% /tmp
/dev/sda1              976M   45M  865M   5% /boot
tmpfs                  745M   28K  745M   1% /run/user/1000

$ free -h
              total        used        free      shared  buff/cache   available
Mem:           7.3G        2.4G        3.2G         83M        1.7G        4.6G
Swap:          2.1G          0B        2.1G

$ lscpu

Architecture:          x86_64
CPU op-mode(s):        32-bit, 64-bit
Byte Order:            Little Endian
CPU(s):                4
On-line CPU(s) list:   0-3
Thread(s) per core:    2
Core(s) per socket:    2
Socket(s):             1
NUMA node(s):          1
Vendor ID:             GenuineIntel
CPU family:            6
Model:                 78
Model name:            Intel(R) Core(TM) i5-6200U CPU @ 2.30GHz
Stepping:              3
CPU MHz:               499.951
CPU max MHz:           2800.0000
CPU min MHz:           400.0000
BogoMIPS:              4801.00
Virtualization:        VT-x
L1d cache:             32K
L1i cache:             32K
L2 cache:              256K
L3 cache:              3072K
NUMA node0 CPU(s):     0-3
Flags:                 fpu vme de pse tsc msr pae mce cx8 apic sep mtrr pge mca cmov pat pse36 clflush dts acpi mmx fxsr sse sse2 ss ht tm pbe syscall nx pdpe1gb rdtscp lm constant_tsc art arch_perfmon pebs bts rep_good nopl xtopology nonstop_tsc aperfmperf eagerfpu pni pclmulqdq dtes64 monitor ds_cpl vmx est tm2 ssse3 sdbg fma cx16 xtpr pdcm pcid sse4_1 sse4_2 x2apic movbe popcnt tsc_deadline_timer aes xsave avx f16c rdrand lahf_lm abm 3dnowprefetch epb intel_pt tpr_shadow vnmi flexpriority ept vpid fsgsbase tsc_adjust bmi1 avx2 smep bmi2 erms invpcid mpx rdseed adx smap clflushopt xsaveopt xsavec xgetbv1 xsaves dtherm ida arat pln pts hwp hwp_notify hwp_act_window hwp_epp
Conclusion

I have been using the laptop for more than three months, and it has really been a smooth experience. It costed less than ₹ 55,000. The battery life is decent. I printed couple of Free Software stickers to identify my laptop. The “Inside GNU/Linux” sticker covers the web cam, and the “Free Software Foundation” sticker is pasted behind the screen. The folks at #parabola IRC channel on irc.freenode.net are quite helpful. The Parabola GNU/Linux Libre Wiki has excellent documentation for your reference.
December 28, 2016
[Published in Open Source For You (OSFY) magazine, March 2016 edition.]
In this next article in the GNU Emacs series, you will learn how to use its calendar, center text, macros and drawing tools.
Calendar
You can use and display a calendar inside GNU Emacs using the following command (also see figure below):
M-x calendar
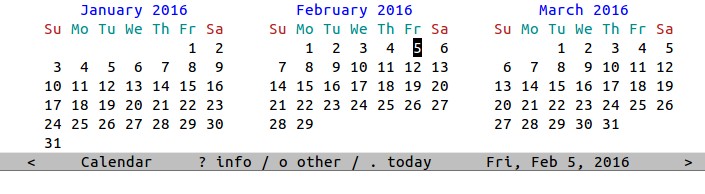
Day
You can move forward by a day using the C-f shortcut, and move back a day using the C-b keys. You can move to the current date using the ’.’ key.
To start the week on a Monday, set the following in your ~/.emacs.
(setq calendar-week-start-day 1)
Week
If you wish to move forward by a week, you can use the C-n shortcut, and to move back by a week, use the C-p shortcut. The C-a shortcut can be used to move to the beginning of the week, while the C-e shortcut can be used to move to the end of the week.
Month
You can move to the beginning of a month using the M-a shortcut. To move to the end of the month, use M-e.
You can move forward and backward a month using the M-} and M-{ shortcuts, respectively.
If you wish to scroll forward three months, use the C-v shortcut. To scroll backward three months, use the M-v shortcut.
Year
In order to move forward a year, you can use the C-x ] shortcut, and to move back a year, you can use the C-x [ shortcut.
You can go to a specified date using the g d key combination. It will then prompt you with the messages “Year (>0):”, “Month name:” and “Day (1-31):”, and will take you to the specified date.
You can move to the beginning of the year using the M-< shortcut, and to the end of the year using the M-v shortcut.
You are encouraged to read the ‘Calendar’ section in the GNU Emacs manual at https://www.gnu.org/software/emacs/manual/html_node/emacs/Calendar_002fDiary.html#Calendar_002fDiary, to learn more.
Centering
Consider the following poem that I wrote in 2015:
Poem

Project issues in the way,
In the way, in the way.
Project issues in the way,
My fair user.

Fixing bugs right way,
Right away, right away.
Fixing bugs right way,
My fair user.

Merging pull requests as I say,
As I say, as I say.
Merging pull requests as I say,
My fair user.

All the tests are passing, hey!
Passing, hey! Passing, hey!
All the tests are passing, hey!
My fair user.

As a client, you should pay,
You should pay, you should pay.
As a client, you should pay,
My fair user.

Python really saved the day,
Saved the day, saved the day.
Python really saved the day,
My fair user.
You can center the title “Poem” by placing the cursor on it, and typing “M-x set-justification-center”.
Marking and highlighting the poem, and using M-x center-region will center the poem. The output is shown below:
         Poem

Project issues in the way,
 In the way, in the way.
Project issues in the way,
      My fair user.

 Fixing bugs right way,
Right away, right away.
 Fixing bugs right way,
     My fair user.

Merging pull requests as I say,
      As I say, as I say.
Merging pull requests as I say,
         My fair user.

All the tests are passing, hey!
  Passing, hey! Passing, hey!
All the tests are passing, hey!
         My fair user.

  As a client, you should pay,
You should pay, you should pay.
  As a client, you should pay,
         My fair user.

 Python really saved the day,
Saved the day, saved the day.
 Python really saved the day,
        My fair user.
Macros
Macros are recorded key strokes that can be stored and replayed. You can start defining a keyboard macro using C-x ( command or the F3 key. You can then type a series of keys that constitute the macro. To finish defining the macro, you can use C-x ) or the F4 key. In order to execute the previous defined macro, you can use C-x e shortcut or F4.
Consider the following text in a buffer that contains a serial number, date and an examination subject list:
1,2015-03-02,English
2,2015-03-03,Physics
3,2015-03-05,Mathematics
4,2015-03-08,Biology
5,2015-03-10,Chemistry
Suppose you wish to add a space after each comma, you can define the following macro (exclude the semi-colon followed by the text) for the first line using the following key strokes:
F3    ; Start macro definition
C-s   ; Search for
,     ;   comma
Enter ;
Space ;
C-s   ; Search again for
,     ;   comma
Enter ;
Space ;
C-n   ; Move to next line
C-a   ; Move to beginning of line
F4    ; End macro definition
Using C-x e or F4 repeatedly will turn the above input CSV text into the following:
1, 2015-03-02, English
2, 2015-03-03, Physics
3, 2015-03-05, Mathematics
4, 2015-03-08, Biology
5, 2015-03-10, Chemistry
You can give a name (say, ‘comma’) to the previously defined macro using C-x C-k n. You can then execute the macro using M-x comma. You can also insert the named macro into a file using M-x insert-kbd-macro command. You can bind a macro to a key using C-x C-k b shortcut.
If you wish to apply the macro to each line in a region, you can use C-x C-k r keys. In order to cycle between the previous and next macros in the macro ring, you can use C-x C-k C-p and C-x C-k C-n shortcuts respectively. You can also delete a macro using C-x C-k C-d key combination.
Picture mode
You can draw diagrams inside Emacs using Picture mode. To start Picture mode, use M-x picture-mode command, and to exit use the C-c C-c shortcut.
The cursor movement keys in a buffer are also applicable in picture mode. To move the cursor right, you can use the C-f keys, and to move left by one character, you can use the C-b shortcut. To move the cursor up and down by one character, use the C-p and C-n shortcuts, respectively. The C-d shortcut is used to delete a character.
Before you move the cursor to draw in the buffer, you need to set the drawing direction. The following table summarizes the shortcut keys, and their associated drawing direction.
| C-c ^ |
Up |
| C-c . |
Down |
| C-c > |
Right |
| C-c < |
Left |
| C-c ` |
Northwest |
| C-c ’ |
Northeast |
| C-c / |
Southwest |
C-c
|
Southeast |
If you want to move the cursor forward in the drawing direction, you can use the C-c C-f shortcut. To move the cursor backward, use the C-c C-b key combination. If you want to delete a line, use the C-k command. You can insert a new line using the C-o shortcut. You can also draw a rectangle around a region using the C-c C-r shortcut. A drawing done using Picture mode is shown in Figure 2.
Artist mode
Artist mode can also be used to draw diagrams in GNU Emacs. You can enter this mode using M-x artist-mode, and exit the same using C-c C-c.
You can draw pictures using the keyboard alone or also use the mouse in Artist mode. In order to start and stop drawing, use the Enter key. This is equivalent to putting the pen down when drawing, and lifting it up when you want to perform a different action.
The buffer navigation commands to move right and left are the same as C-f and C-b shortcuts respectively. You can move up a column using the C-p shortcut, and move down a column using the C-n key.
You can draw geometric shapes using Artist mode. To select a shape or operation you can use C-c C-a C-o key combination. This will provide a list of shapes and actions you can perform. This list is shown in Figure 3:
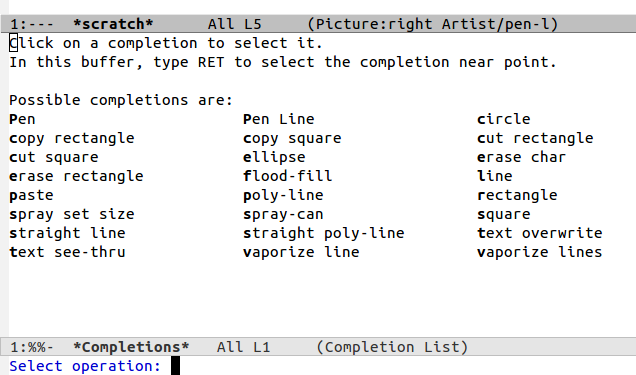
The shortcuts listed in the following table are available for drawing specific shapes:
| C-c C-a e |
Ellipse |
| C-c c-a p |
Polylines |
| C-c C-a r |
Rectangles |
| C-c C-a l |
Lines |
Figure 4 depicts an ellipse drawn using Artist mode:
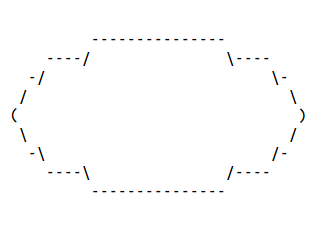
Figure 5 is an example of polylines:
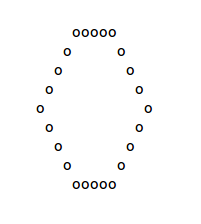
You can fill a shape using C-c C-a f key combination. The following Figure 6 shows a circular representation filled with dots.

You can also spray characters in the buffer using the C-c C-a S shortcut keys. An example is shown in Figure 7:

The character to be used for drawing can be changed using C-c C-a C-l shortcut. The character to fill shapes can be set using C-c C-a C-f key combination.
If you want to cut an area, you can draw a rectangle around it using C-c C-a C-k key combination. You can also copy the image area using the C-c C-a M-w keys, and paste the same using C-c C-a C-y or C-x r y shortcuts. To set the operation to erase text, you can use C-c C-a C-d key combination.
You can refer to the Emacs Wiki Artist mode for more documentation and help - http://www.emacswiki.org/emacs/ArtistMode.
November 26, 2016
I attended Functional Conf 2016 at Hotel Chancery Pavilion, Bengaluru between October 13-16, 2016. The conference was on October 14-15, 2016 and there were pre- and post-conference workshops.
After arriving early on the day of the workshop, I checked-in to my hotel accommodation. A view of the Kanteerva stadium from the hotel.

Pre-Conference Workshop
I had registered for the “Deep Dive into Erlang Ecosystem” workshop by Robert Virding, one of the creators of the Erlang programming language. He started the day’s proceedings with an introduction to Erlang basics and covered both sequential and concurrent programming. He also gave an overview of the Open Telecom Platform (OTP) and answered a number of questions from the participants. He, along with Joe Armstrong and Mike Williams, designed the Erlang programming language for telecommunication, keeping the system in mind and all the way from the ground-up.
He also mentioned how WhatsApp was able to handle two million concurrent connections on a single box, and they would peak at three million at times. As another Emacs and Lisp user, he wrote Lisp Flavoured Erlang (LFE). He did not have much time to talk about it during the workshop, but, he did share differences between Erlang, Elixir and other languages that are being built around the Erlang ecosystem.
Day I
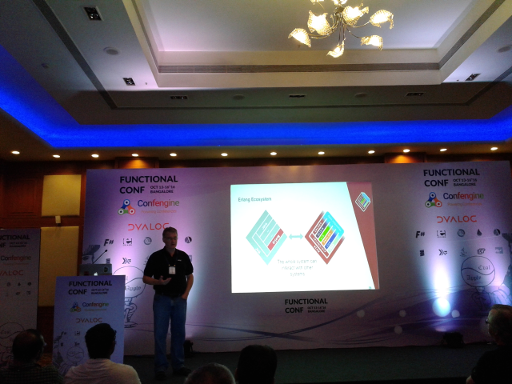
The keynote of the day was from Robert Virding on “The Erlang Ecosystem”. He gave a good overview and history of the Erlang programming language, and the rationale for designing the same. He elaborated on the challenges they faced in the early days of computing, and the first principles that they had to adhere to. They did not intend the language to be functional, but, it turned out to be so, and greatly helped their use case. One of the beautiful expressions in Erlang to represent bit-level protocol formats in an expressive format is shown below:
<<?IP_VERSION:4, HLen:4, SrvcType:8, TotLen:16,
      ID:16, Flgs:3, FragOff:13,
      TTL:8, Proto:8, HdrChkSum:16,
      SrcIP:32,
      DestIP:32, RestDgram/binary>>
Robert’s keynote was followed by another keynote by Brian McKenna on “No Silver Bullets in Functional Programming”. He gave the pros and cons of using Functional and other programming paradigms, and discussed the trade-offs. A number of code examples were shown to illustrate the concepts.
The next talk that I attended was by Aloïs Cochard on “Welcome to the Machines”. He gave an overview on the history of various Haskell libraries for data stream processing (pipes, conduit) and finally provided a tutorial on machines.
Abdulsattar Mohammed introduced the need for dependent types using Idris with simple examples in his “Dependently Typed Programming with Idris” talk. The concepts were well narrated with numerous code snippets.
The next talk by Debasish Ghosh on “An algebraic approach to functional domain modeling” was a modelling exercise on how to map business logic into functional algebra. He demonstrated a real world step-by-step process on the transformation from a problem domain to the solution domain consisting of algebraic data types, functions that operate on them, and business rules.
Ravi Mohan started his talk titled, “Equational Reasoning - From Code To Math and Back Again”, with his learning in the Functional Programming (FP) world, and an overview of how to go about reasoning from code to math. His laptop had ran out of battery power, and he did not have his laptop charger. Before his scheduled talk, he had re-created plain text notes of his slides and walked us through the content.
“Implementing Spark like system in Haskell” was an interesting session by Yogesh Sajanikar on his attempt to create a DSL for map-reduce jobs. He did cover much of the internals in his implementation and the challenges faced. The hspark code is available at https://github.com/yogeshsajanikar/hspark.
Day II
The second day began with the keynote by John Hughes on “Why Functional Programming Matters”. This was the best keynote of the conference, where John gave a very good historical perspective of FP and the experiences learnt in the process. His slide deck was excellent and covered all the necessary points that were part of his famous paper with the same title.
This was followed by a series of demos on cool features in Functional Programming languages - Erlang, Idris, APL, F# and Julia.
“Using F# in production: A retrospective” was a talk by Ankit Solanki on the lessons learned in using a functional language in implementing a tax e-filing application. They heavily use F# Type Providers to handle the variation in input CSV files.
“Real world functional programming in Ads serving” was a talk by Sathish Kumar from Flipkart on how they used functional programming in Java 8 for their product. They initially prototyped with Haskell, and used the constructs in Java.
I skipped the next talks, and spent time with Robert Virding in the Erlang booth.
Rethinking “State Management.” was presented by Tamizhvendan S. He narrated examples on state management for a cafe application using F#. He also gave a demo of Ionide text editor and its features.
Post-conference workshop
I attended John Hughes workshop on Property-based Testing. Initially, I thought he would be using Haskell QuickCheck, but, in the workshop he used the Erlang implementation. John mentioned that the Haskell and Erlang implementations are different, and their interests have diverged.
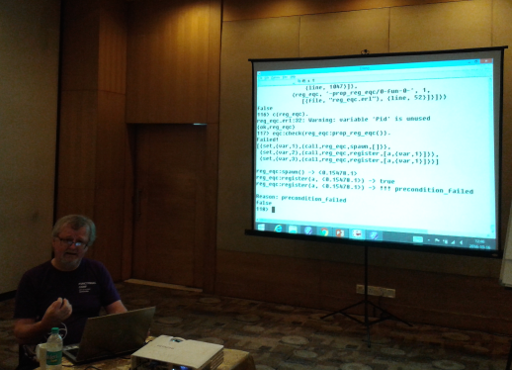
He started the workshop by taking an example of writing property tests for encoded SMS messages using Erlang. He also demonstrated on how a minimal test example is produced when a test fails. The choice of deciding on what properties to test is still an active research problem. He also demonstrated how to collect statistics from the test results to analyse and improve them.
The property-based testing has been used by his company, QuviQ, to test C protocols for the automobile industry. They were able to generate tests to detect bugs in the CAN bus implementation. Here is a summary of the statistics for a project:
3,000 pages of specification
20,000 lines of QuickCheck
1,000,000 LoC, 6 suppliers
200 problems
100 problems in the standard
He also shared his experience in generating tests for Klarna - an invoicing service web shop that uses Mnesia - the distributed Erlang database. He concluded by saying that we should not write tests, but, they shoud be generated.
Overall, the workshops were quite useful. It was good to have met both Robert Virding and John Hughes.
October 18, 2016
[Published in Open Source For You (OSFY) magazine, February 2016 edition.]
In this next article in the GNU Emacs series, we shall learn how to use GNU Emacs as a news reader.
Elfeed
Elfeed is an Emacs web feed reader that is extensible and supports both Atom and RSS feeds. It has written by Christopher Wellons.
Installation
We shall use Milkypostman’s Experimental Lisp Package Archive (MELPA) to install Elfeed. Create an initial GNU Emacs start-up file that contains the following:
(require 'package) ;; You might already have this line
(add-to-list 'package-archives
             '("melpa" . "https://melpa.org/packages/"))

(when (< emacs-major-version 24)
  ;; For important compatibility libraries like cl-lib
  (add-to-list 'package-archives '("gnu" . "http://elpa.gnu.org/packages/")))
(package-initialize) ;; You might already have this line
The above code snippet has been taken from the MELPA project documentation website http://melpa.org/#/getting-started, and has been tested on GNU Emacs 24.5.2.
You can now start GNU Emacs using the following command:
$ emacs -Q -l ~/elfeed-start.el
You can obtain the list of available packages using M-x list-packages, which will search the melpa.org and elpa.gnu.org repositories. You can search for ‘elfeed’ in this buffer, and select the same for installation by pressing the ‘i’ key. To actually install the package, press the ‘x’ (execute) key, and Elfeed will be installed in ~/.emacs.d/elpa directory.
Configuration
You can create a shortcut to start Elfeed using the following code snippet in your ~/elfeed-start.el file.
(global-set-key (kbd "C-x w") 'elfeed)
The list of feeds can be defined as shown below:
(setq elfeed-feeds
      '(("http://www.shakthimaan.com/news.xml" people)
        ("http://arduino.cc/blog/feed/" projects)
        ("http://planet-india.randomink.org/rss10.xml" people planet)
        ))
Tags can be added at the end of the feed. The above feeds include ‘people’, ‘projects’ and ‘planet’ tags.
Usage
You can use the C-x w shortcut to start Elfeed. If you press ‘G’, it will fetch the latest news feeds from the servers, starting with the message ‘3 feeds pending, 0 in process …’. A screenshot of Elfeed in GNU Emacs is shown below:
The RSS entries are stored in ~/.elfeed directory on your system.
You can read a blog entry by pressing the ‘Enter’ key. If you would like to open an entry in a browser, you can use the ‘b’ key. In order to copy the selected URL entry, you can use the ‘y’ key. To mark an entry as read, you can use the ‘r’ key, and to unmark an entry, press the ‘u’ key. You can add and remove tags for an entry using the ‘+’ and ’-’ keys, respectively.
You can also filter the feeds based on search critera. Pressing ’s’ will allow you to update the filter that you want to use. There are many filter options available. You can use ‘+’ to indicate that a tag must be present, and ’-’ to indicate that the tag must be absent. For example, “+projects -people”.
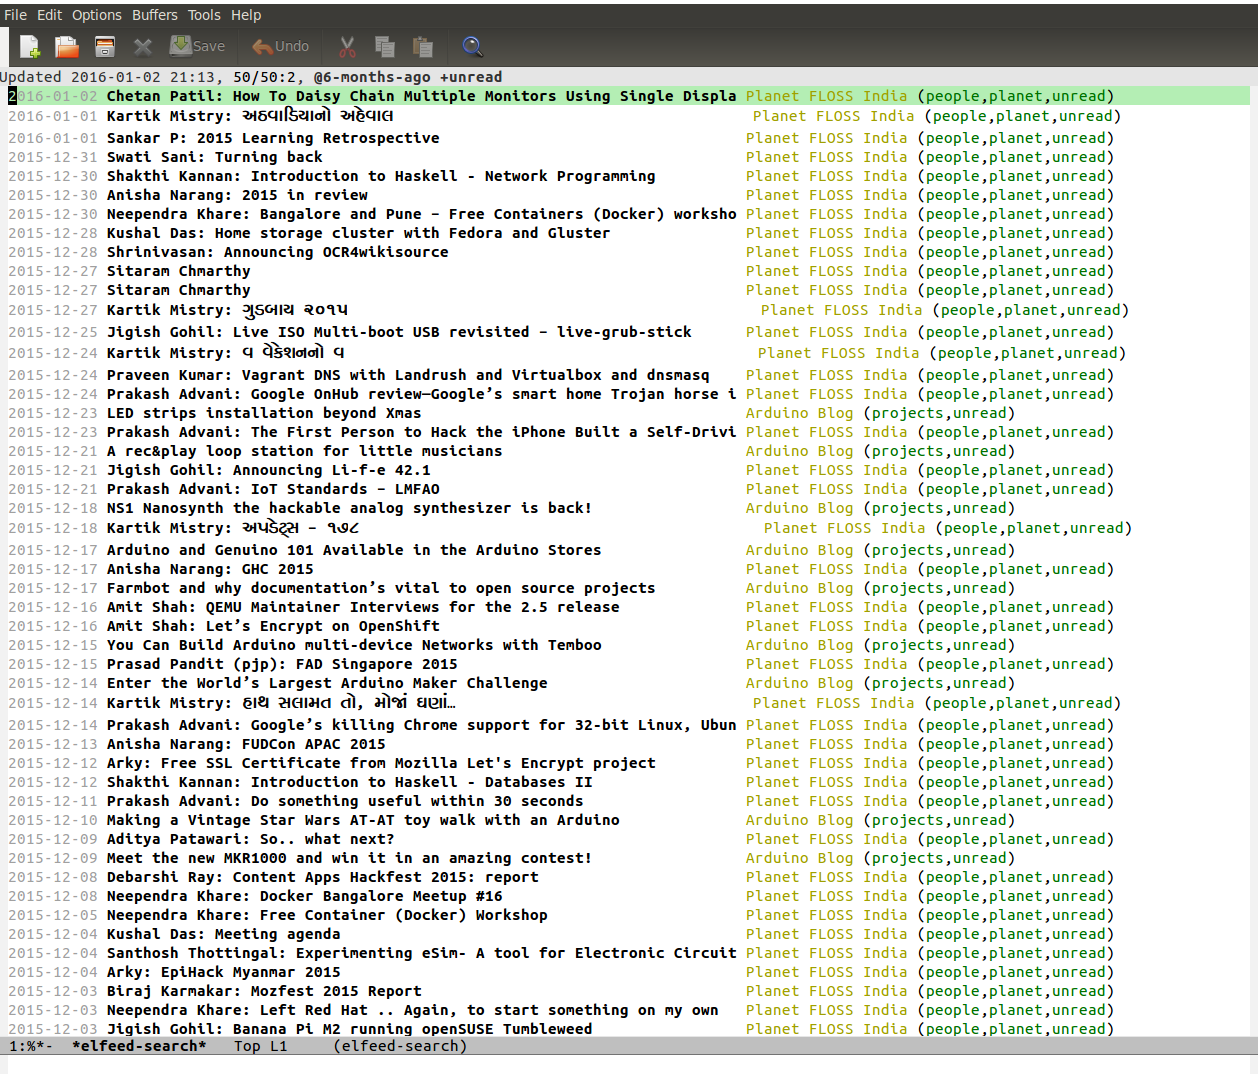
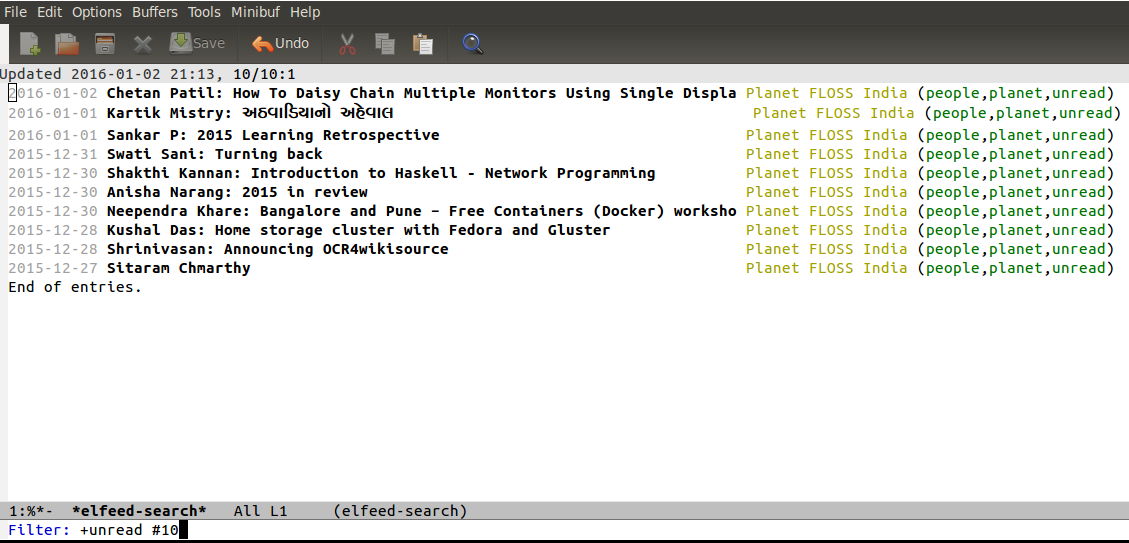
The filter text starting with ‘@’ represents a relative time. It can contain plain English text combined with dashes – for example, ‘@1-month-ago +unread’. The ’!’ notation can be used to negate a filter. To limit the number of entries to be displayed, you can use the ‘#’ pattern. For example, ‘+unread #5’ will list five unread blog articles. A screenshot of Elfeed with a filter applied is shown in the following figure:
You can also use regular expressions as part of your filter text. The default search filter can be changed by modifying the value of elfeed-search-filter. For example:
(setq-default elfeed-search-filter "@1-month-ago +unread")
The search format date can be customized as shown below:
(defun elfeed-search-format-date (date)
  (format-time-string "%Y-%m-%d %H:%M" (seconds-to-time date)))
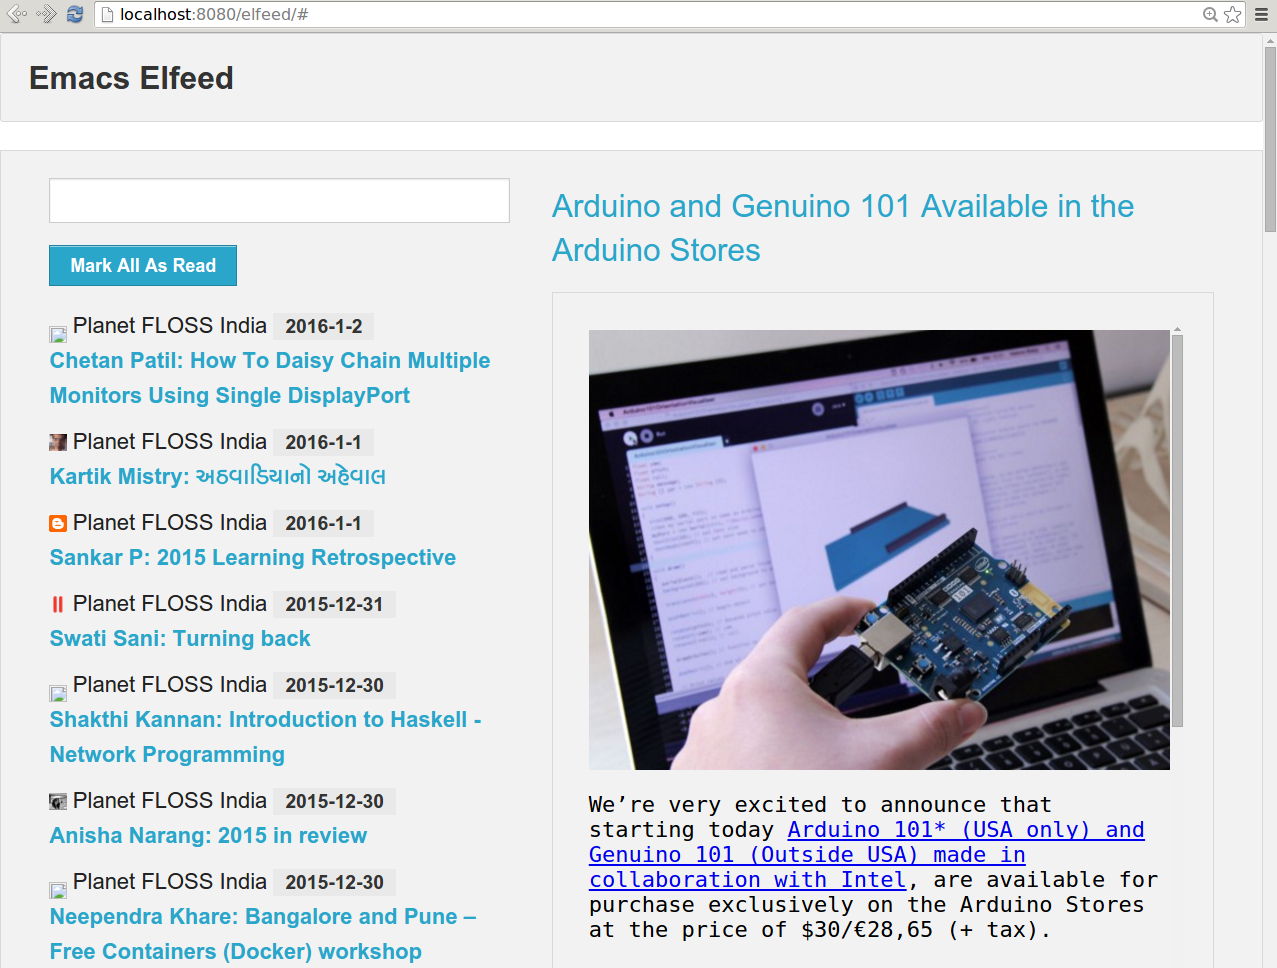
Elfeed also has an export option to view the feeds in a browser. If you install the elfeed-web package from the packages list, you can then start it using M-x elfeed-web-start. You can then start a browser, and open http://localhost:8080/elfeed/ to view the feeds. A screenshot is shown below:
The entire contents of the elfeed-start.el configuration file are shown below:
(require 'package) ;; You might already have this line
(add-to-list 'package-archives
             '("melpa" . "https://melpa.org/packages/"))

(when (< emacs-major-version 24)
  ;; For important compatibility libraries like cl-lib
  (add-to-list 'package-archives '("gnu" . "http://elpa.gnu.org/packages/")))
(package-initialize) ;; You might already have this line

(global-set-key (kbd "C-x w") 'elfeed)

(defun elfeed-search-format-date (date)
  (format-time-string "%Y-%m-%d %H:%M" (seconds-to-time date)))

(setq elfeed-feeds
      '(("http://www.shakthimaan.com/news.xml" people)
        ("http://arduino.cc/blog/feed/" projects)
        ("http://planet-india.randomink.org/rss10.xml" people planet)
        ))
Gnus
Configuration
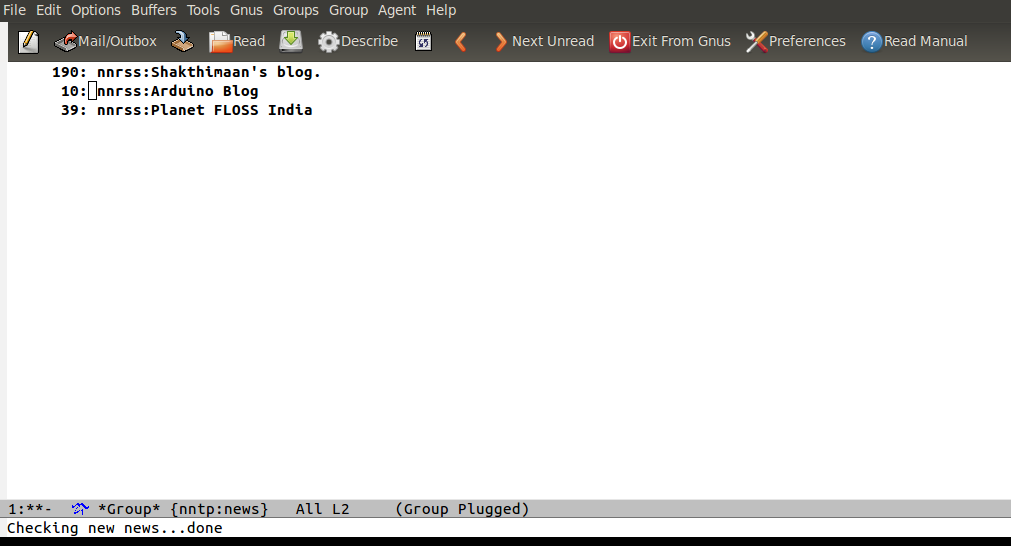
Gnus is an Emacs package for reading e-mail and Usenet news. The nnrss backend supports reading RSS feeds. Gnus is available by default in GNU Emacs. After launching emacs using emacs -Q in the terminal, you can start Gnus using M-x gnus. To add a new RSS entry, you can use ‘G R’. It will prompt you with the message ‘URL to Search for RSS:’. You can then provide the feed, for example, http://www.shakthimaan.com/news.xml. It will try to connect to the server and will provide you the message ‘Contacting host: www.shakthimaan.com:80’. After a successful connect, it will prompt for the title, ‘Title: Shakthimaan’s blog.’ You can simply hit Enter. You will then be prompted for a description, ‘Description: RSS feed for Shakthimaan’s blog.’ You can hit Enter to proceed. Now, the blog entry has been added to Gnus. In this fashion, you can add the other blog entries too. A screenshot of the main Gnus group buffer is shown below:
Usage
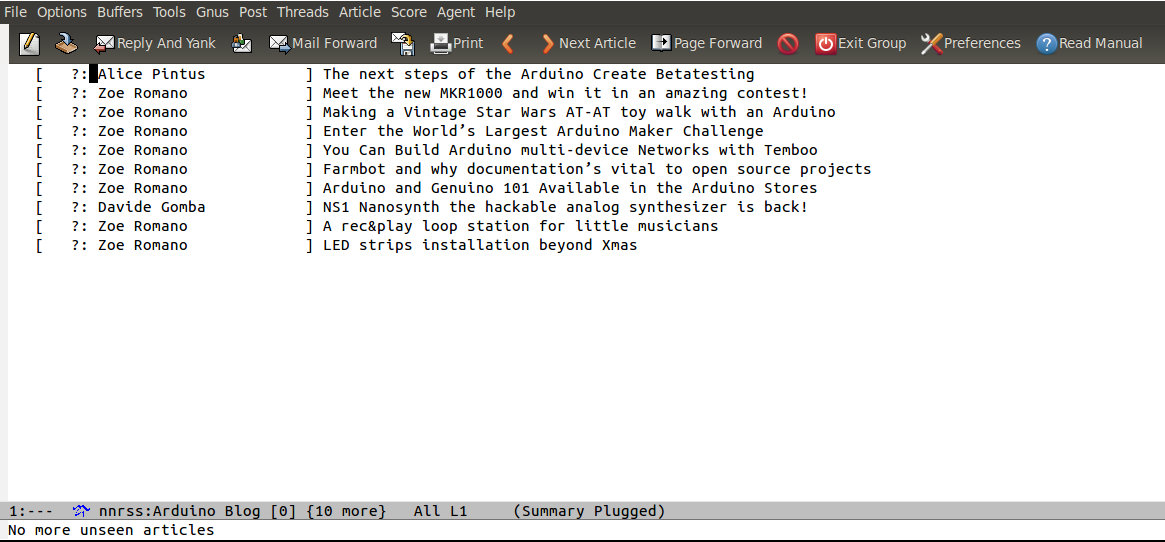
You can press ‘g’ to refresh the buffer and ask Gnus to check for latest blog entries. Using the ‘Enter’ key will open the feed, and the list of blogs for a feed. A screenshot is shown in Figure 5.
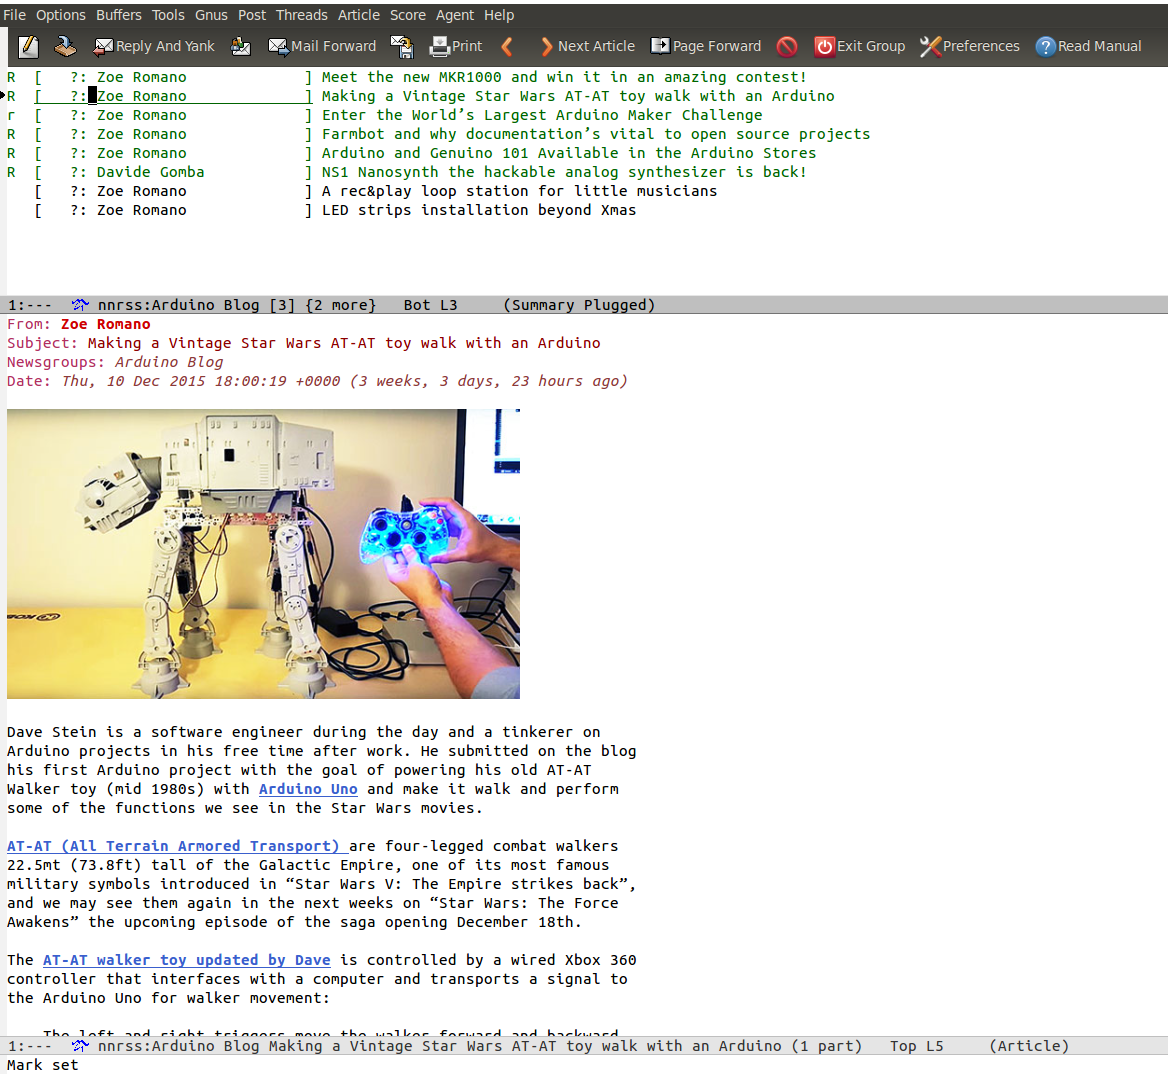
You can press ‘Enter’ on a blog entry, and it will open the contents in a new buffer. It will then be marked as read, indicated by ‘R’. A screenshot of a blog entry rendering text and image is shown in the following figure:
You can press ‘q’ to quit from any level inside Gnus. You are encouraged to read the Gnus tutorial ( http://www.emacswiki.org/emacs/GnusTutorial ) and manual ( http://www.gnus.org/manual/big-gnus.html ) to learn more, and to customize it for your needs.


