September 25, 2016
[Published in Open Source For You (OSFY) magazine, January 2016 edition.]
In this next article in the GNU Emacs series, we shall learn how to execute shell commands, run shells, use spell-checkers and abbreviations, and print from GNU Emacs.
Shell mode commands
You can run a shell command from GNU Emacs using the M-! shortcut. For example, typing ‘M-!’ will prompt you with the message ‘Shell command:’ in the minibuffer. If you then type ‘date’, it will produce the output ‘Tue Dec 8 21:19:24 IST 2015’ in the minibuffer. But, if you want the output to be inserted in the current buffer you can use the C-u M-! command sequence.
Consider the following poem that I wrote:
"Water, water everywhere
Little power and aid to spare
Really tough for us to bear
We will face it with Chennaites' flair.

Lakes and rivers overflowing everywhere
No road, rail or plane to go anywhere
People really are in big despair
But we will ride it with Chennaites' flair.

More storms are forecast to be aware
Nothing like this in 100 years to compare
Stay indoors and please do take care
And we will take it with Chennaites' flair."
Suppose I want to know the number of words used, I can mark the poem as a region in the GNU Emacs buffer, and execute a shell command for the region using M-| shortcut. It then prompts with the string ‘Shell command on region’, and when I type in ‘wc -w’ it returns ‘90’.
Shells
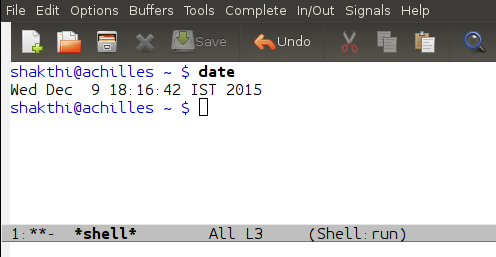
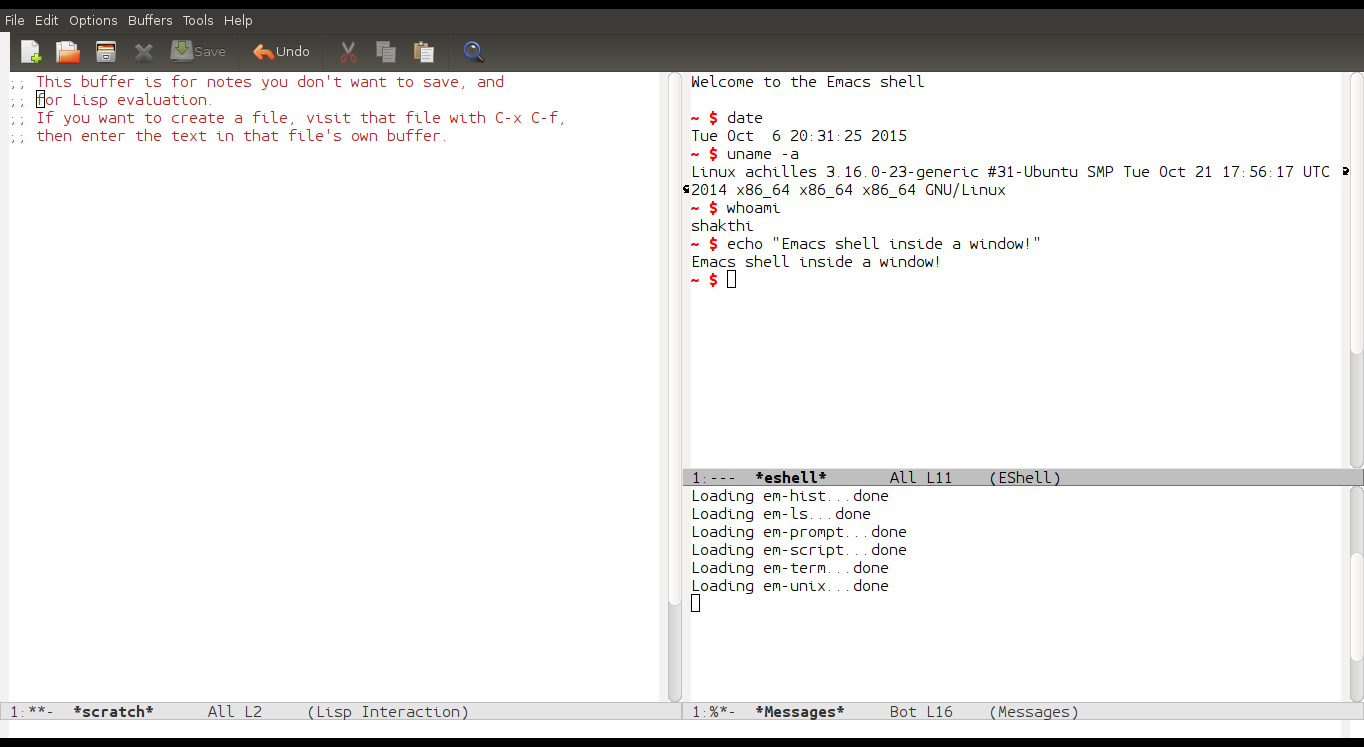
There are three shells available in GNU Emacs - shell, ansi-term and eshell. Using M-x shell will invoke a shell for you. This starts a new buffer with the name ‘shell’ in it. You can use all the GNU Emacs buffer commands in this window. For example, C-p will move the cursor up, and C-n will move the cursor down. In order to interrupt a current job in the shell buffer, you can use C-c C-c. If you want to suspend the current job, you can use C-c C-z. You can also clear the output from the previous command using C-c C-o. For example, the output of ‘ifconfig’ command is shown below:
/tmp $ ifconfig docker0
docker0   Link encap:Ethernet  HWaddr 56:84:7a:fe:97:99
          inet addr:172.17.42.1  Bcast:0.0.0.0  Mask:255.255.0.0
          UP BROADCAST MULTICAST  MTU:1500  Metric:1
          RX packets:0 errors:0 dropped:0 overruns:0 frame:0
          TX packets:0 errors:0 dropped:0 overruns:0 carrier:0
          collisions:0 txqueuelen:0
          RX bytes:0 (0.0 B)  TX bytes:0 (0.0 B)
/tmp $
After executing ‘C-c C-o’, the previous command output gets cleared as shown below:
/tmp $ ifconfig docker0
 *** output flushed ***
/tmp $
You can move the cursor up to the previously executed commands using C-c C-p and move down using C-c C-n. You can also cycle backwards and forwards through the command history using the M-p and M-n shortcuts respectively. The C-c C-r shortcut moves to the first line of the output to the top of the window. You can move the cursor to the bottom of the window using C-c C-e. The C-r key binding allows you to search for a previously typed command from history.
The default shell is Bash, but, you can change it to use other shells like ksh, csh or zsh. You can open another shell buffer using C-u M-x shell. The new shell buffer will be called ’shell<2>". You can, of course, rename this buffer. You can thus open multiple shells to work inside GNU Emacs.
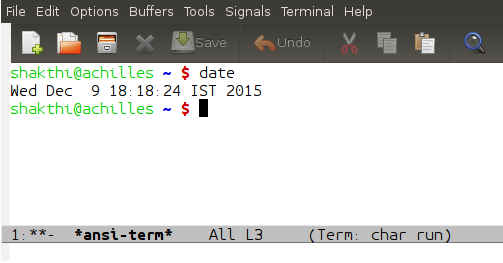
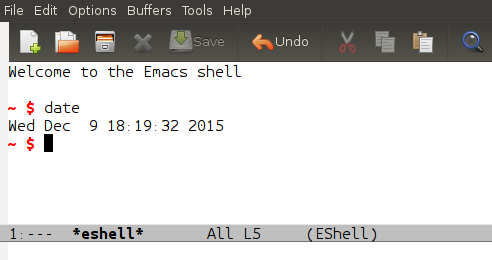
GNU Emacs also has a terminal emulator that you can invoke using M-x ansi-term. You can start a Bash session with this command to get the actual colours that you see in a terminal session. This is like a fallback shell if you do not want to use ‘M-x shell’. Eshell is the Emacs built-in shell written completely in Emacs Lisp (Elisp). You can start it using M-x eshell. The advantage of using this is that you can extend it, write your own customized Elisp functions and use it similar to shell scripting.
Screenshots of shell, ansi-term and eshells in GNU Emacs are shown in Figure 1, 2 and 3 respectively:
Spell check commands
You can check the spelling of a word by placing the cursor on it and using M-$ shortcut. For example, for the word ‘hte’, GNU Emacs provides the following spelling options:
(0) hate (1) HT (2) ht (3) GTE (4) the (5) He (6) Te (7) he (8) Hts
(9) hie (:) hoe (;) hue (<) Rte (=) Ste (>) Ute (@) ate (B) rte
It also lists some options in the minibuffer:
C-h or ? for more options; SPC to leave unchangedo Character to
replace word
On pressing the number 4, the word is replaced with the correct spelling. If the spelling is already correct, then GNU Emacs will tell you that the word is correct. You can also spell check a region using M-x ispell-region and a buffer using M-x ispell-buffer. If you would like to stop the spell checker while it is running, you can use M-x ispell-kill-ispell. There is a flyspell mode that can check your spelling as you type. You can enable it using M-x flyspell-mode. If you want this mode only in a buffer, you can use M-x flyspell-buffer.
Word abbreviation
GNU Emacs can complete words for you. If you type ‘ba’ and then hit M-/, then GNU Emacs will try to complete the word for you. If you continue to use ‘M-/’, it will cycle through the various options such as ‘backwards’, ‘ball’, ‘bash’, ‘bar’, ‘back’, ‘based’ etc. To enter into the abbreviation mode, you need to use M-x abbrev-mode followed by the Enter key.
The abbreviations can either be local or global. Suppose, you want to define a local abbreviation for ‘international’, you can type in ‘intl’ and use C-x a i l to define the expansion. It will prompt you with the message ‘Mode expansion for “intl”:’. You can then type the word ‘international’. The next time you enter ‘intl’ followed by the space key, GNU Emacs will automatically expand the same for you. In order to define a global expansion, you need to use C-x a i g command sequence. If you would like to remove all abbreviations for the current session, you can use M-x kill-all-abbrevs followed by the Enter key.
You can save the abbreviations to a file, say ~/.emacs.d/.abbrev_defs, using M-x write-abbrev-file for future use. You can also edit the stored abbreviations using M-x edit-abbrevs shortcut. If you would like to view all the defined abbreviations, you can use M-x list-abbrevs. The relevant contents of ~/.emacs.d/.abbrev_defs are shown below:
;;-*-coding: utf-8;-*-
(define-abbrev-table 'Buffer-menu-mode-abbrev-table '())

(define-abbrev-table 'completion-list-mode-abbrev-table '())

(define-abbrev-table 'edit-abbrevs-mode-abbrev-table '())

(define-abbrev-table 'emacs-lisp-mode-abbrev-table
  '(
    ("intl" "international" nil 2)
   ))

(define-abbrev-table 'fundamental-mode-abbrev-table '())

(define-abbrev-table 'global-abbrev-table '())

(define-abbrev-table 'lisp-mode-abbrev-table '())

(define-abbrev-table 'sh-mode-abbrev-table '())

(define-abbrev-table 'shell-mode-abbrev-table '())
Printing
You can print the buffer contents from GNU Emacs using M-x print-buffer command. If you would like to print a selected region, you can use M-x print-region command. These will be printed with page numbers and headers. You can also print a buffer without page numbers using M-x lpr-buffer. Similarly, to print a region without page numbers, use M-x lpr-region. If you are already using the Dired mode, you can select the files that you want to print using the P shortcut, and then execute in Dired mode to print them.
September 6, 2016
[Published in Open Source For You (OSFY) magazine, December 2015 edition.]
In this article in the GNU Emacs series, we shall learn how to play games and try out some software for fun.
Ten games that are available and can be played easily in GNU Emacs are listed and discussed in this article. We start with the Tetris game.
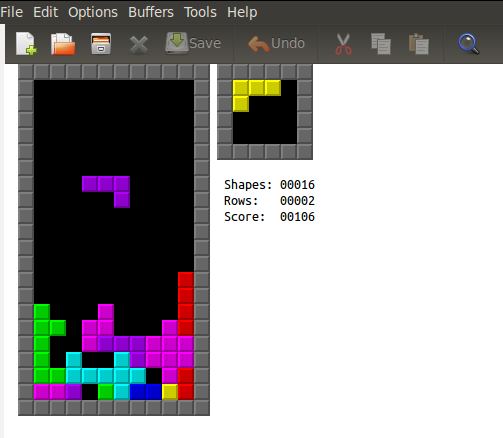
Tetris
Tetris is available in GNU Emacs and you can launch it using M-x tetris. The ‘Up’ arrow key can be used to spin the tile, while the space key can quickly drop the tile. You can pause the game by pressing the ‘p’ key. At the end of the game, a score is displayed in a buffer. For example:
112 shakthi shakthi <author@shakthimaan.com>  Mon Nov  2 21:12:04 2015
52 shakthi Shakthi Kannan <author@shakthimaan.com>  Mon Nov  2 15:24:43 2015
11 shakthi shakthi <author@shakthimaan.com>  Mon Nov  2 15:29:39 2015
A screenshot of Tetris in GNU Emacs:
Pong
You can play Ping Pong in GNU Emacs with two players using M-x pong. One player can use the ‘Up’ and ‘Down’ arrow keys, and the second player can use the number keys - ‘4’ and ‘6’. Each paddle is represented by three square tiles. If the ball hits the edge of the paddle, it changes its direction. You can use the ‘p’ key to pause the game. A live score is displayed during the game. A screenshot of Ping Pong:
Doctor
GNU Emacs comes with a psychotherapist with whom you can chat. Simply type M-x doctor and it will start a session with the therapist. After you type in your statement, you need to hit Enter twice, and the therapist will reply. It will usually ask you another question, and you can continue to chat with the doctor. An example of a session is given below:
I am the psychotherapist.  Please, describe your problems.  Each time
you are finished talking, type RET twice.

Hi

How do you do?  What brings you to see me?

I am trying to talk to the doctor.

Why do you say you are trying to talk to the doctor?

I want to share this transcript with my readers.

What makes you believe you might want to share this transcript your
readers?

I can, from GNU Emacs, copy this text and paste it in my article.

Emacs?  Hah!  I would appreciate it if you would continue.

I am looking forward to watching today's cricket match that India is playing.

Is it because india is playing that you came to me?

Yes, who do you think will win?

Earlier you said you would like to share this transcript your readers?

Yes, I am still going to do that.

Can you elaborate on that?

I am writing a GNU Emacs series for the OSFY magazine.

Are you sure?

Yes, I have been writing for the past few months.

Maybe your life has something to do with this.

I want people to learn and use GNU Emacs to improve their productivity.

Are you sure that that?

Absolutely!

Perhaps you could continue.
Bubbles
The objective of the Bubbles game is to remove a series of connected bubbles in the fewest number of moves. The game can be started using M-x bubbles. As you move through the grid of bubbles, the connected bubbles with the same colour get highlighted. You can press the space bar to remove them. A screenshot of bubbles:
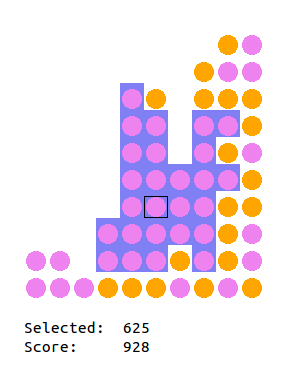
At the end of the game, a summary of the score is shown.
Selected:    9
Score:    1932
Game Over!
GNU Emacs also keeps a record of the scores:
01959   Mon Nov  2 21:26:41 2015        shakthi <author@shakthimaan.com>
01932   Mon Nov  2 21:20:38 2015        shakthi <author@shakthimaan.com>
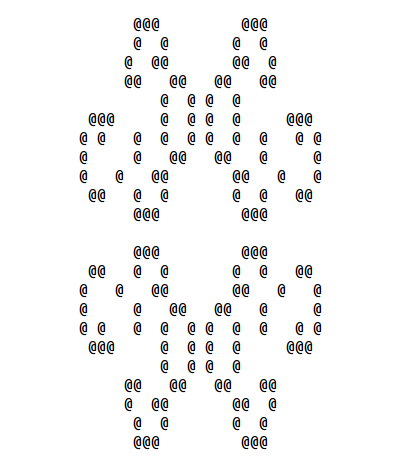
Conway’s life
The shortcut M-x life will start the Conway’s Game of Life in a new GNU Emacs buffer. The population increases in course of time, and the generation count is shown in the mode line. A screenshot of the cellular automation running inside GNU Emacs:
Morse and NATO conversions
You can convert text to Morse code and vice versa by selecting the text in a buffer and using M-x morse-region. For example, the text ‘morse code’ gets converted to the following:
--/---/.-./.../. -.-./---/-../.
You can get back the text by selecting the Morse text and applying M-x unmorse-region. Similarly, if you have a word that you would like to spell using the NATO phonetic alphabet, you can use M-x nato-region. To convert it back, you need to use M-x denato-region. For example, the text ‘abc’ gets converted to:
Alfa-Bravo-Charlie
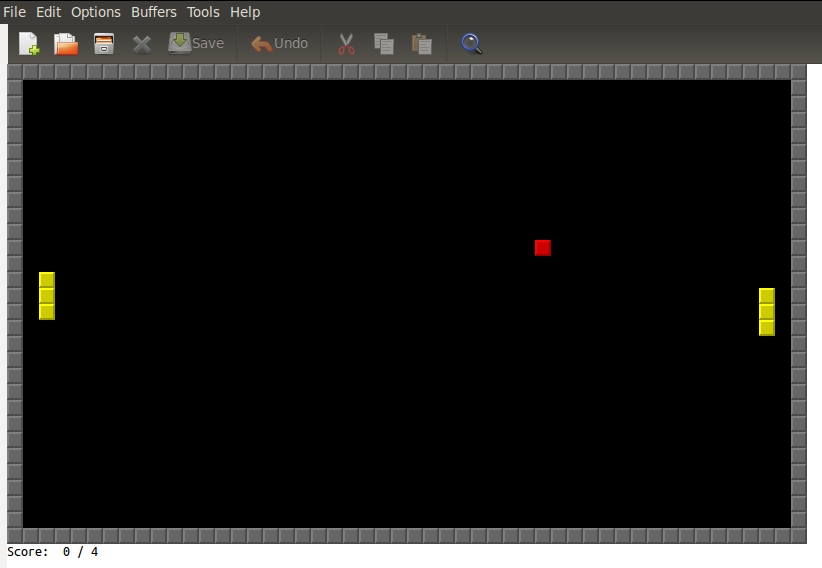
Snake
The Snake game can be started using M-x snake. You can use the arrow keys to move the head. As you play, red boxes appear in the window. If you go over them, the length of the snake increases along with the score. At the end of the game, a summary of the scores is shown. A screenshot of the Snake game:
Dunnet
Dunnet is a text based adventure game that needs to be started in batch mode as shown below:
$ emacs -batch -l dunnet

Dead end
You are at a dead end of a dirt road.  The road goes to the east.
In the distance you can see that it will eventually fork off.  The
trees here are very tall royal palms, and they are spaced equidistant
from each other.
There is a shovel here.
The help command gives you the context of the game:
>help
Welcome to dunnet (2.01), by Ron Schnell (ronnie@driver-aces.com).
Here is some useful information (read carefully because there are one
or more clues in here):
- If you have a key that can open a door, you do not need to explicitly
  open it.  You may just use 'in' or walk in the direction of the door.

- If you have a lamp, it is always lit.

- You will not get any points until you manage to get treasures to a certain
  place.  Simply finding the treasures is not good enough.  There is more
  than one way to get a treasure to the special place.  It is also
  important that the objects get to the special place *unharmed* and
  *untarnished*.  You can tell if you have successfully transported the
  object by looking at your score, as it changes immediately.  Note that
  an object can become harmed even after you have received points for it.
  If this happens, your score will decrease, and in many cases you can never
  get credit for it again.

- You can save your game with the 'save' command, and use restore it
  with the 'restore' command.

- There are no limits on lengths of object names.

- Directions are: north,south,east,west,northeast,southeast,northwest,
                  southwest,up,down,in,out.

- These can be abbreviated: n,s,e,w,ne,se,nw,sw,u,d,in,out.

- If you go down a hole in the floor without an aid such as a ladder,
  you probably won't be able to get back up the way you came, if at all.

- To run this game in batch mode (no Emacs window), use:
     emacs -batch -l dunnet
NOTE: This game *should* be run in batch mode!

If you have questions or comments, please contact ronnie@driver-aces.com
My home page is http://www.driver-aces.com/ronnie.html
You can then give directions and proceed with the game. An example of a session is shown below:
>n
You can't go that way.
>s
You can't go that way.
>e
E/W Dirt road
You are on the continuation of a dirt road.  There are more trees on
both sides of you.  The road continues to the east and west.
There is a large boulder here.
>in
You can't go that way.
>w
Dead end
There is a shovel here.
>d
You can't go that way.
>e
E/W Dirt road
There is a large boulder here.
>n s e
You can't go that way.
>in
You can't go that way.
>e
Fork
You are at a fork of two passages, one to the northeast, and one to the
southeast.  The ground here seems very soft. You can also go back west.
>w
E/W Dirt road
There is a large boulder here.
You can exit the game by typing ‘quit’ at the prompt (>).
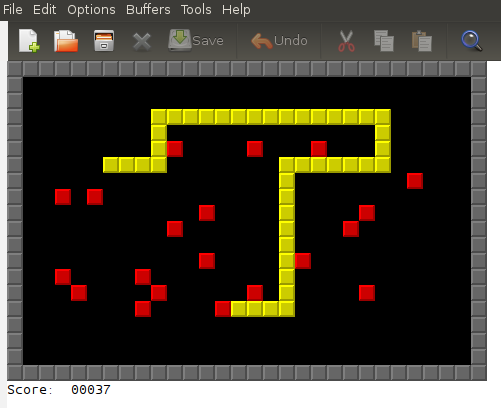
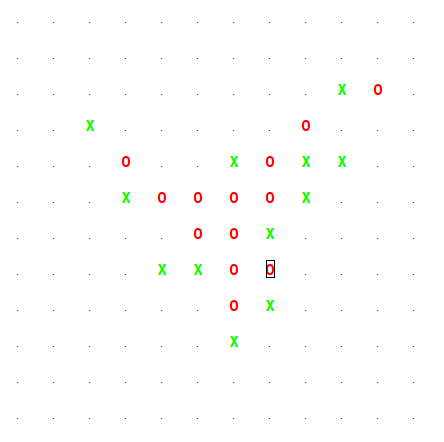
Gomoku
Gomoku is a strategy board game where you need to get five pieces in a row (any direction) to win. You and the computer will take turns to play the game. You need to use the Enter key to mark your cross in a position, and the computer will mark its position with a circle. The game ends when either player gets five continuous pieces. A screenshot of Gomoku is shown below:
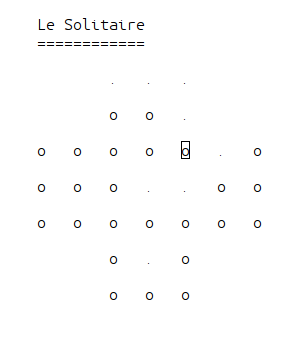
Le Solitaire
Le Solitaire is a strategy game that consists of stones represented by ‘o’ and holes represented by ’.’ (a dot). The objective of the game is to remove all the stones except the last one. You can jump over another stone to create a hole. You can use the Shift key with the arrow keys to move a stone. A screenshot of the game in progress:
All the games and examples were tried on GNU Emacs 24.5.1.
August 18, 2016
[Published in Open Source For You (OSFY) magazine, November 2015 edition.]
In this next article in the GNU Emacs series, we shall learn how to perform text search in a buffer, and introduce the concept of windows and frames.
Search
You can copy the following poem, which I wrote in 2013, in the scratch buffer or a file inside GNU Emacs to try out the search commands:
Emacs is, an operating system
Which unlike many others, is truly, a gem
Its goodies can be installed, using RPM
Or you can use ELPA, which has already packaged them

You can customize it, to your needs
You can also check EmacsWiki, for more leads
Your changes work, as long as reload succeeds
And helps you with, your daily deeds

People say, it lacks a decent editor
But after using its features, they might want to differ
Using Magit’s shortcuts, you might infer
That it is something, you definitely prefer

Plan your life, with org-mode
You don’t necessarily need, to write code
TODO lists and agenda views, can easily be showed
Reading the documentation, can help you come aboard

Emacs is, a double-edged sword
Its powerful features, can never be ignored
Customization is possible, because of Free Software code
And this is, my simple ode.
You can search for a word in a buffer using C-s shortcut. You will then be prompted with I-Search: in the minibuffer where you can type any text, and GNU Emacs will try to find words matching it, in the buffer. This is an incremental forward search and is case insensitive. Thus, if you search for the word ‘todo’ in the poem, it will match the string ‘TODO’. You can exit from the incremental search using the Enter key, or abort the search using the C-g key combination. If you want to do an incremental search in the reverse direction - from the cursor position to the top of the buffer – you can use the C-r shortcut.
If you place the cursor on the letter ‘E’ in ‘Emacs’ in the poem’s first line, and press C-s C-w, Emacs will try to find all occurrences of the word ‘Emacs’ in the text. Suppose, you have cut or copied text to the kill ring, you can search for this text by using C-s C-y shortcut. You can repeat the previous forward search using C-s C-s, and the previous backward search using C-r C-r shortcuts.
The first occurrence of a text can be looked up in the forward direction using C-s. This will prompt you in the minibuffer with a Search: string where you can type the text that you want to search for, and then press the Enter key. It will then search for the text and move the cursor to the matching word. This is a non-incremental forward search. Similarily, you can perform a non-incremental backward search using C-r. You can then input the search string to be searched for, followed by the Enter key.
Regular expression searches are very useful too. In order to search forward for an expression, you can use C-M-s followed by the Enter key, which will prompt you in the minibuffer with the string ‘Regexp search:’. You can then enter a regular expression. This will only match the first occurrence of the text and the search will then terminate. You can perform a one-time backward regular expression search using C-M-r shortcut. To perform an incremental forward search, you need to use C-M-s and you will be prompted with the string ‘Regexp I-search:’, where you can provide the pattern to match. For example, ‘[a-z]+-[a-z]+’ will match both the expressions ‘org-mode’ and ‘double-edged’ words in the poem. You can use C-M-r for an incremental backward regex search.
A common use case is to find and replace text in a buffer. The sequence to be used is M-x query-replace followed by the Enter key. You will then be prompted with the string ‘Query replace:’ where you will be asked which word or phrase is to be replaced. For example, if you mention ‘ode’, it will again prompt you with ‘Query replace ode with:’ and then you can enter the replacement string. You can also search and replace text by matching a regular expression with the C-M-% shortcut key combination.
Frames
The outermost user interface boundary of GNU Emacs is called a frame. In fact, when you split the GNU Emacs user interface, you are actually creating windows. So, in GNU Emacs, you have windows inside a frame. This is in contrast to today’s user applications, where the entire application is contained in a ‘window’. This is an important terminology to remember when using GNU Emacs.
You can create a new frame using C-x 5 2 key combination. You can move the cursor to the next frame using C-x 5 o (letter ‘o’), and delete the current frame using C-x 5 0 (zero) shortcut. This will not delete the existing buffers, but, only the view. In order to open a file in a new frame, you can use C-x 5 f. You can also open a file in a new frame in read-only mode using C-x 5 r. To switch to the buffer in a new frame, use C-x 5 b key combination.
Windows
You can split a frame vertically to create two windows using C-x 2 (Figure 1).
To split horizontally, you can use C-x 3 (Figure 2).

To move the cursor to the next window, use C-x o (the letter ‘o’). You can delete the current window using C-x 0 (zero). Note that this does not delete the buffer, but, just the view. If you have multiple windows and you want to retain the current window and remove the rest of the windows from the display, you can use C-x 1.
You can open a file in a new window using C-x 4 f. You can also select an existing buffer in another window using C-x 4 b. If you have multiple windows that you would like to be balanced equally, you can use C-x +. Figure 3 shows an Emacs screenshot with three windows that are balanced.
You can scroll the contents in the other window using C-M-v. You can scroll backwards using C-M-Shift-v.
You can also use the following shortcuts in your ~/.emacs to simplify the shortcuts used to split and remove windows.
(global-set-key (kbd "C-1") 'delete-other-windows)
(global-set-key (kbd "C-2") 'split-window-below)
(global-set-key (kbd "C-3") 'split-window-right)
(global-set-key (kbd "C-0") 'delete-window)
If you would like to make a window wider, you can use C-x } shortcut and to reduce it horizontally, you will need to use C-x {. You can use a prefix count to perform the operation ‘n’ times. For example, C-u 5 C-x { to shrink a window horizontally. To make a window taller, you can use C-x ^ shortcut; and to make it smaller, you have to use a negative prefix. For example, C-u -1 C-x ^. A screenshot of a custom Emacs frame with three windows is shown in Figure 4.
July 26, 2016
I attended Deep Learning Conference 2016 at CMR Institute of Technology, Bengaluru on July 1, 2016.

Anand Chandrasekaran, CTO, Mad Street Den began the day’s proceedings with his talk on “Deep learning: A convoluted overview with recurrent themes and beliefs”. He gave an overview and history of deep learning. He also discussed about LeNet, Deep Belief Network by Geoffrey Hinton, Backpropagation Algorithm (1974) by Paul Werbos, and Deep Convolutional Neural Networks (2012) by Alex Net, named after Alex Krizhevsky. Mad Street Den primarily work on computer vision problems. In one of their implementations, they extract 17,000 features from a dress, and provide recommendations to customers. They are one of the early users of NVIDIA GPUs. He also briefed on other deep learning tools like Amazon ML, Torch 7, and Google TensorFlow.
The second talk of the day was a sponsored talk on “Recent advancements in Deep Learning techniques using GPUs” by Sundara R Nagalingam from NVIDIA. He talked on the available GPU hardware and platforms for deep learning available from NVIDIA. It was a complete sales pitch. I did ask them if they have free and open source Linux device drivers for their hardware, but, at the moment they are all proprietary (binary blobs).
After a short tea break, Abhishek Thakur presented on “Applied Deep Learning”. This was one of two best presentations of the day. Abhishek illustrated binary classification and fine tuning. He also briefed on GoogleNet, DeepNet, and ImageNet Large Scale Visual Recognition Challenge (ILSVRC). Deep learning software such as Theano, Lasagne, and Keras were also discussed. A query can be of three types - navigational, transactional, or informational. Word2vec is a two-layer neural net that can convert text into vectors. You can find a large collection of images for input datasets at CIFAR.
The next two sessions were 20-minute each. The first talk was on “Residual Learning and Stochastic Depth in Deep Neural Networks” by Pradyumna Reddy, and the second was on “Expresso - A user-friendly tool for Deep Learning” by Jaley Dholakiya. The Expresso UI needs much work though. I headed early for lunch.
Food was arranged by Meal Diaries and it was delicious!
The post-lunch session began at 1410 IST with Arjun Jain talking on “Joint Training of a Convolutional Network and a Graphical Model for Human Pose Estimation”. He gave a number of examples on how difficult it is to train models, especially the human body.
Vijay Gabale then spoke on “Deep Dive into building Chat-bots using Deep Learning”. This was the second best presentation of the day. He gave a good overview of chat-bots and the challenges involved in implementing them. There are four building blocks for chat bots - extract intent, show relevant results, contextual interaction and personalization. He also discussed on character-aware neural language models.
I then headed to the BoF session on “Getting Started with Deep Learning”. A panel of experts answered questions asked by the participants. It was suggested to start with toy data and move to big data. Andrew Ng’s Machine Learning course and Reinforcement Learning course were recommended. CS231n: Convolutional Neural Networks for Visual Recognition was also recommended for computer vision problems. Keras and Theano are useful tools to begin with. It is important to not just do a proof-of-concept, but, also see how things work in production. It is good to start to use and learn the tools, and subsequently delve into the math. Having references can help you go back and check them when you have the know-how. Data Nuggets and Kagil are two good sources for datasets. The Kaggle Facial Keypoints Detection (KFKD) tutorial was also recommended. Data science does involve both programming and math. We then headed for a short tea break.
Nishant Sinha, from MagicX, then presented his talk on “Slot-filling in Conversations with Deep Learning”. He gave an example of a semantic parser to fill slots using a simple mobile recharge example. He also discussed about CNN, Elman RNN and Jordan RNN. This was followed by the talk on “Challenges and Implications of Deep Learning in Healthcare” by Suthirth Vaidya from Predible Health. He spoke on the difficulties in dealing with medical data, especially biometric images. Their solution won the Multiple Sclerosis Segmentation Challenge in 2015.
The last talk of the day was on “Making Deep Neural Networks smaller and faster” by Suraj Srinivas from IISc, Bengaluru. He discussed how large model can be mapped to small models using model compression. This involves compressing matrices through four techniques - sparsify, shrink, break, and quantize. The objective is to scale down the solution to run on mobile and embedded platforms, and on CPUs. It was an interesting talk and a number of open research problems exist in this domain.
Overall, it was a very useful one day conference.
July 4, 2016
Few photos taken on a trip to Karaikudi and Chettinad, Tamil Nadu, India. More photos in my /gallery.


June 23, 2016
[Published in Open Source For You (OSFY) magazine, October 2015 edition.]
Internet Relay Chat (IRC) provides instant communication over the Web. It is generally used for one-to-one communication or group discussion forums, also known as channels. In this next article in the GNU Emacs series, we shall learn how to use GNU Emacs as an Internet Relay Chat (IRC) client.
What is IRC?
Internet Relay Chat (IRC) is a messaging protocol that was created by Jarkko Oikarinen in 1988. An IRC server has a number of channels (or rooms, as how they are called in other chat software) where both technical and non-technical discussions take place. Every user requires a nickname to chat. You will need to register your nickname with a password to identify yourself every time you log in to the IRC server. IRC can also be used for file sharing among users.
You can connect to any one of a number of IRC servers that are available worldwide, free. The most popular is Freenode (irc.freenode.net). The other IRC servers, to name a few, are IRCNet, OFTC, and EFNet. The Debian and Ubuntu projects have their own chat servers – irc.debian.org and irc.ubuntu.com. All IRC channel names begin with ‘#’. Some channels begin with ‘##’. Examples of channels are ##linux-india, #dgplug, #emacs, #ruby, #guile, #lisp, and #scheme. You can also create your own channels, or host your own IRC server. Some examples of free and open source IRC server software are IRCd, UnrealIRCd, and Synchronet. Each IRC channel has a topic that can include useful links relevant to the channel. Sometimes announcements, or news updates are also mentioned in the topic.
Basic commands
A number of commands can be given to the IRC server. A few of them are discussed below:
/list is used to provide a list of all the available channels in a server. For example: /list in irc.freenode.net returned the following:
...
#linod           1
##welding        3       Welcome to ##Welding, We're a little bare at the moment, but will help if we can. Tutorials: https://www.youtube.com/channel/UCJAFY2kKKb5sg79yld7T3hA
#drupal-ph       1       "Drupalista! Welcome to Philippine Drupal Users Group. Have a good time chatting. If you have a question, please don't ask to ask but fire up your question in very specific and constructive way! Please join #drupal or #drupal-support if no one is around"
#orx-project     4       Orx: Portable Game Engine
#tinkerforge     5
#osi             10      The Open Source Initiative
#xampp           1
#guitar          8
#bitcoin-ar      3       Comunidad Bitcoin Argentina
#LargeHadrosaurCollider 19      Welcome to the LHC, est. 2001 | http://www.largehadrosaurcollider.net | August Birthdays: Digby 08/21, Josh 08/31 | At night it is pitch black, often for months. | http://tinyurl.com/psgdagl
* End of /LIST
/msg NickServ REGISTER password e-mail is used to register your nickname to the IRC server. /msg NickServ IDENTIFY password is used to identify yourself to the server.
/me message displays the message for a user. For example:
/me says "Hello, World!"

 * mbuf says "Hello, World!"
/whois nickname provides useful information for a user. For example:
 /whois mbuf

* [mbuf] (~shakthi@123.123.123.123): Shakthi Kannan
* [mbuf] #guile #scheme ##linux-india #stumpwm #guix #dgplug #lisp #emacs
* [mbuf] kornbluth.freenode.net :Frankfurt, Germany
* [mbuf] is connecting from *@123.123.123.123 123.123.123.123
* [mbuf] idle 00:41:52, signon: Thu Sep  3 20:36:52
* [mbuf] is logged in as mbuf
* [mbuf] End of WHOIS list.
/msg nickname is used to send a private message to a nickname and to start a private conversation.
/help provides useful help on basic IRC commands. These commands are:
  ADDBUTTON ALLCHAN   ALLCHANL  ALLSERV   AWAY
  BACK      BAN       CHANOPT   CHARSET   CLEAR
  CLOSE     COUNTRY   CTCP      CYCLE     DCC
  DEBUG     DEHOP     DELBUTTON DEOP      DEVOICE
  DISCON    DNS       ECHO      EXEC      EXECCONT
  EXECKILL  EXECSTOP  EXECWRITE FLUSHQ    GATE
  GETFILE   GETINT    GETSTR    GHOST     GUI
  HELP      HOP       ID        IGNORE    INVITE
  JOIN      KICK      KICKBAN   KILLALL   LAGCHECK
  LASTLOG   LIST      LOAD      MDEHOP    MDEOP
  ME        MENU      MKICK     MODE      MOP
  MSG       NAMES     NCTCP     NEWSERVER NICK
  NOTICE    NOTIFY    OP        PART      PING
  QUERY     QUIT      QUOTE     RECONNECT RECV
  SAY       SEND      SERVCHAN  SERVER    SET
  SETCURSOR SETTAB    SETTEXT   SPLAY     TOPIC
  TRAY      UNBAN     UNIGNORE  UNLOAD    URL
  USELECT   USERLIST  VOICE     WALLCHAN  WALLCHOP

User defined commands:

  ACTION    AME       ANICK     AMSG      BANLIST
  CHAT      DIALOG    DMSG      EXIT      GREP
  J         KILL      LEAVE     M         ONOTICE
  RAW       SERVHELP  SPING     SQUERY    SSLSERVER
  SV        UMODE     UPTIME    VER       VERSION
  WALLOPS   WII

Plugin defined commands:

  UNLOAD    UNLOAD    LOAD      PY        LOAD
  RELOADALL SOURCE    TCL       RELOADALL UNLOADALL
  PL_RELOAD RELOAD    UNLOAD    LOAD      TIMER


Type /HELP <command> for more information, or /HELP -l
/quit is used to disconnect and exit from IRC.
/join #channel - is used to join a channel. For example: /join #guix.
/nick newnickname changes your nick to newnickname. Suppose, you wish to move away from the computer, you can change your nick to nick|away, or nick|phone.
/part is used to leave a channel.
Using rcirc
If you are using a recent GNU/Linux distribution, you should already have rcirc as part of GNU Emacs. You can simply start it by typing M-x rcirc from inside Emacs. The ‘M’ key represents the Meta key, which is usually mapped to the ‘Alt’ key. After rcirc connects to the IRC server, you can use /nick to change your nickname, register (only the first time) your nick, identify yourself, join channels, and start chatting! Since everything is a buffer in GNU Emacs, each channel is a separate buffer. For example, #emacs@irc.freenode.net is the #emacs IRC channel. All your basic buffer navigation commands will work just like they would on a file!
Some basic rcirc commands
The rcirc commands for the above mentioned IRC commands are given in the following table:
| /list |
rcirc-cmd-list |
| /msg NickServ |
rcirc-authenticate |
| /me |
rcirc-cmd-me |
| /whois |
rcirc-cmd-whois |
| /msg nick |
rcirc-cmd-msg |
| /help |
/help |
| /quit |
rcirc-cmd-quit |
| /join |
rcirc-cmd-join |
| /nick |
rcirc-cmd-nick |
| /part |
rcirc-cmd-part |
~/.emacs
GNU Emacs is an extensible editor. There are a number of locations where Emacs checks for custom configurations before launching the editor. These are: ~/.emacs, /.emacs.el, and/.emacs.d/init.el. The start-up files can be customised, and their locations can also be changed. There are a number of ways to organize, and manage your Emacs configuration. Until we get to learn Emacs lisp, and customize Emacs as a project, we shall use ~/.emacs for all our user-specific customizations.
rcirc customization
Create a ~/.emacs.d/etc folder in your $HOME directory and an Elisp file called init-rcirc.el in it. It should contain the following (change nick, user-name and full-name to suit your needs):
;; Default user.
(setq rcirc-default-nick "shaks")
(setq rcirc-default-user-name "shakthimaan")
(setq rcirc-default-full-name "Shakthi Kannan")

;; Channels to join at startup.
(setq rcirc-server-alist
      '(("irc.freenode.net" :channels ("##linux-india" "#dgplug" "#rcirc" "#emacs"))))
The above is an example of Emacs Lisp code. Comments begin with two semi-colons. The setq construct sets the second argument value to the first argument, which is a quoted symbol. For example, the symbol ’rcirc-default-nick is set to “shaks”. The rcirc-server-alist defines the initial list of channels to login at startup.
You can now start GNU Emacs from the GNOME terminal using the following command:
$ emacs -q -l ~/.emacs.d/etc/init-rcirc.el
You will then automatically connect to the four IRC channels.
How to use IRC
People join IRC channels to have their doubts regarding free and open source software clarified. Sometimes, off-topic discussions also happen. It is like live technical support, but has a social context to it. Whenever you are connected online, you must be logged in to IRC. You can have discussions in the channel, or in private, if the other party agrees. It is a good place to learn a lot about free and open source software, and you are bound to make a lot of friends. Since people from all over the world participate, which means they are online in different time zones, some channels log the discussions for future reference. As always, before asking a question, it is important for you to do your homework first. Take sufficient time and put in an effort to debug and identify the problem to the best of your ability.
Some users in the channel may ask you for more information before being able to provide you with any assistance. So, be prepared to provide all the information necessary about the bug or error when you seek help. Sometimes, people might be logged in the channel, but, they might be away from the computer. So, even if you don’t get a response, be patient; come back later and ask again.
You should not paste more than four continuous lines of text in the channel, as it will ‘flood’ the screen for everyone else. Instead, use an external paste service like gist.github.com, or fpaste.org. These services will provide a shortened URL that you can pass around in the channel. Whoever is interested in helping you will view the contents from the link. If you enter text in the channel, it means that it is addressed to everyone in the channel. If you wish to say something to a specific user, mention their nickname first, and then type in the text.
Most IRC client software provide you with panels that list the channels that you are logged in, and show the list of users. If someone mentions your nickname in a channel, then the corresponding channel will change colour or representation to indicate that there is a message for you. A few users are channel operators (or moderators) and they have special privileges. They are similar to ‘root’ users in a system, and they exist to keep the signal-to-noise ratio to a minimum, and keep a vigil on the channel.
An IRC bot is a client software that connects to the IRC server as a user, but can respond to commands. It can thus be programmed to provide many services in a channel. You can customize existing bots, or write your own. Examples of IRC bots are Cerberus, Gambot and irccd. Cinch is an example of an IRC bot building framework written in Ruby. Bots can be used during an IRC meeting session to keep track of user questions. They can evaluate programming language constructs and return meaningful errors to newbies in the channel. They can be used to send a notification to the channel if a project test build fails, or when a new bug has been filed. The possibilities are endless.
IRC meeting protocol
A free and open source software project will have a dedicated IRC channel where the project members will meet to have discussions. Meetings can be scheduled, and can happen in different time zones depending on where the users are located. There is a protocol and etiquette to be followed during such meetings. The speaker or moderator should not be interrupted during the session.
If you wish to ask a question, type ’?’ and wait. When the speaker has finished and feels that you can type in your text, you will be asked to do so. After you have finished typing your content, end with ‘EOF’. Similarly, if you need to speak during the session, type ’!’, and wait. You can give your consent or dissent to statements made in the channel using +1 or -1, respectively.
You are encouraged to read the rcirc manual and customize rcirc to your needs. If you have made it this far, do connect to irc.freenode.net, and feel free to say ‘Hi’ to me. I am ‘mbuf’ on irc.freenode.net. A screenshot of an rcirc session is shown below:
19:35 <mbuf>    http://ecb.sourceforge.net/screenshots/index.html
19:35 ***       Arpita QUIT Client Quit
19:36 <rtnpro>  !
19:36 <mbuf>    rtnpro, shoot!
19:37 <rtnpro>  How do we get the emacs code browser?
19:37 <rtnpro>  <EOF>
19:37 <mbuf>    rtnpro, 1. Need to install "ecb" from your distro package manager
                2. you could have searched this on the Internet :)
19:38 <rtnpro>  It is not in my distro
19:38 <sumitc>  !
19:38 <mbuf>    rtnpro, and which distro are you using?
19:38 <rtnpro>  Its Fedora 9
19:39 <rtnpro>  I have got emacs but not emacs code browser
19:39 <mbuf>    rtnpro, you can always install from source
19:39 <techno_freak>    rtnpro, http://ecb.sourceforge.net/downloads.html
19:39 ***       khushbu QUIT Ping timeout: 244 seconds
19:39 <rtnpro>  ok
19:39 <mbuf>    sumitc, shoot!
19:39 <sumitc>  what is a tag-file?
19:40 <rtnpro>  What factors should decide the choice of our editor?
19:40 <mbuf>    rtnpro, wait!
19:40 ***       pushkal JOIN
19:40 <mbuf>    sumitc, the TAGS file contains the details of the reference count,
                and locations of variables/functions et. al.
19:41 <sumitc>  So, a tag file is always associated with a specific file?
19:41 <mbuf>    sumitc, no, it can have information of files in a directory
19:41 <sumitc>  ok
19:41 <sumitc>  <eof>
19:42 <mbuf>    sumitc, think of it as a database that answers all your queries
               regarding code references
References
Freenode. https://freenode.net/
rcirc manual. https://www.gnu.org/software/emacs/manual/html_mono/rcirc.html
IRC Help. http://www.irchelp.org/
Fedora project - How to use IRC. https://fedoraproject.org/wiki/How_to_use_IRC
June 1, 2016
[Published in Open Source For You (OSFY) magazine, September 2015 edition.]
Continuing with our series on Emacs, in this article, let’s explore basic buffer navigation, formatting, and help commands.
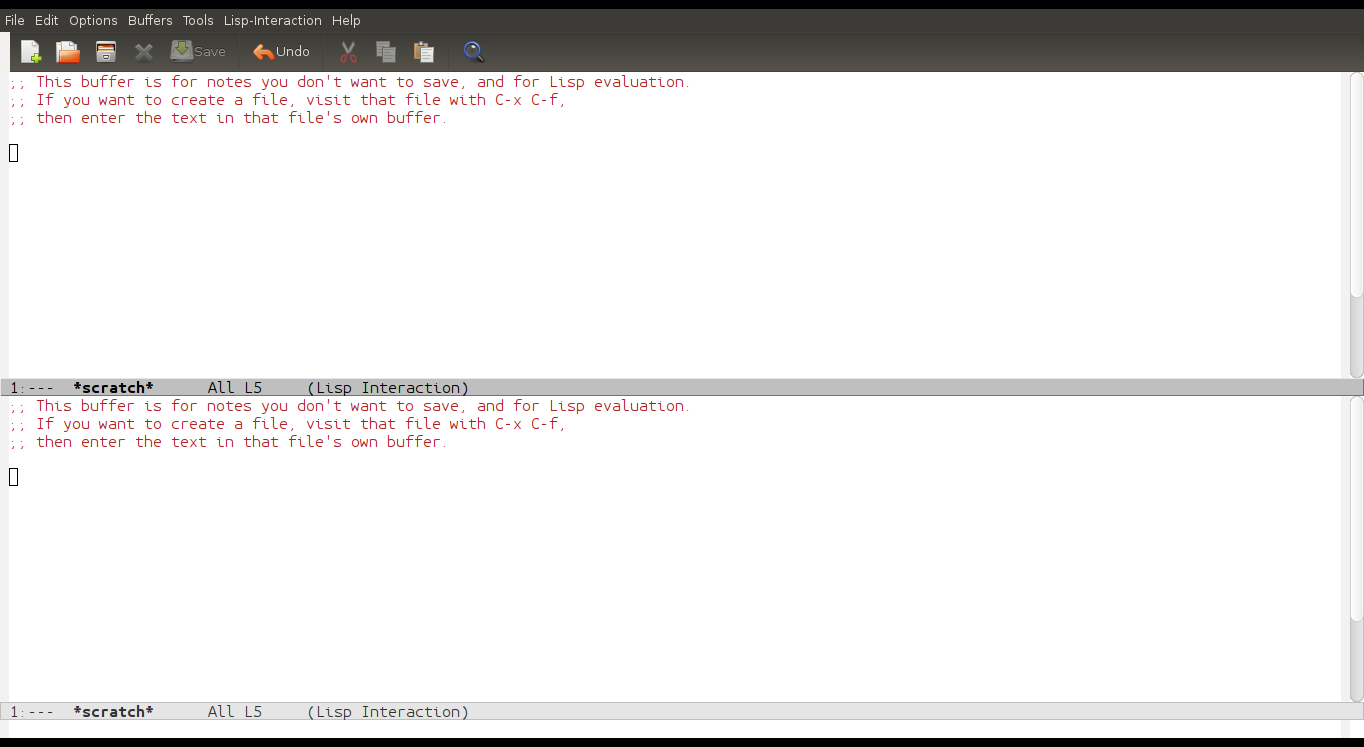
Buffers
You can view a list of buffers in GNU Emacs using the C-x C-b command, and can switch to a buffer using the C-x b shortcut. The default list of buffers as seen in GNU Emacs 24.3.1 on Ubuntu 14.10 is shown below:
CRM Buffer                  Size Mode            File
.   *scratch*               191 Lisp Interaction
*   *Messages*              485 Fundamental
%   *Completions*           264 Completion List
%   *Help*                 1855 Help
In order to kill (close) a buffer, you can use C-x k key combination. If you have multiple buffers that you would like to close, you can use M-x kill-some-buffers command, which will prompt you for a confirmation for every buffer. You can also rename a buffer using the M-x rename-buffer command. If you would like to save the buffer contents to a file, you can use C-x s, and it will prompt you with many options before proceeding to save the file. You can also save a modified buffer using C-x C-s.
Navigation
It is important to learn how to use the Emacs navigation commands instead of the arrow keys. When you learn to use macros, you will find it useful to automate steps. A summary of the basic navigation shortcuts are given in the following table:
| C-f |
Move forward one character |
| C-b |
Move backward one character |
| M-f |
Move forward one word |
| M-b |
Move back one word |
| C-p |
Move to previous line |
| C-n |
Move to next line |
| C-a |
Move to beginning of line |
| C-e |
Move to end of line |
You can scroll down a buffer using C-v, and scroll up using M-v shortcut. If you would like to move to the beginning of a file, use M-< command. You can move to the end of a file using M-> shortcut.
In order to move the cursor to a specific line, use M-x goto-line or M-g g. If you would like to position the contents where the cursor is located to the center of the screen, you can use C-l. If you want to repeat a command ‘n’ (‘n’ is an integer) number of times, you can use M-n following by the command. You can also use C-u n, but, if you don’t specify ‘n’ here, the next command, by default, will be executed four times.
Clipboard
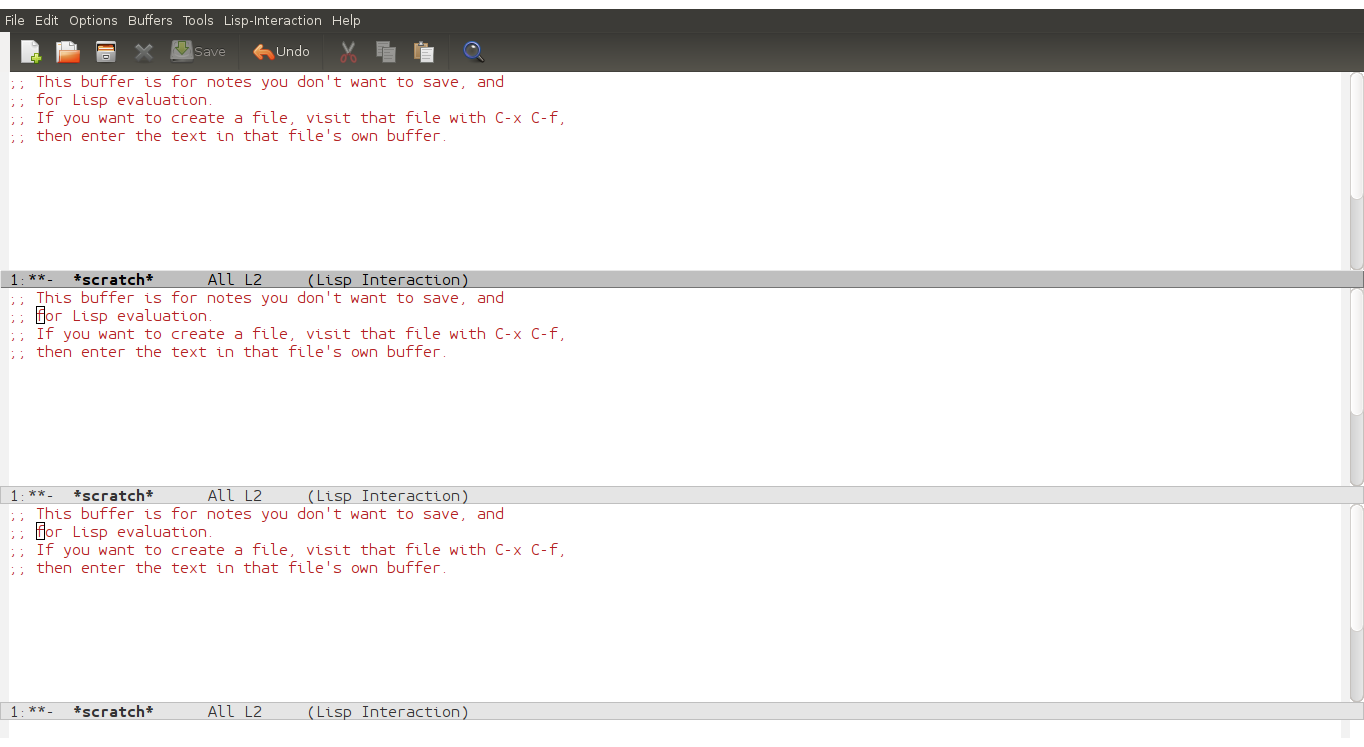
You can delete a character where the cursor is located using C-d. To remove a word, you can use M-d. You can remove text from the cursor position till the end of line using C-k. The cut text goes into a kill ring buffer. You can paste whatever you have removed using C-y. You can cycle through the text that has been removed by repeatedly using M-y after C-y. Consider the text:
When you have a question about Emacs, the Emacs manual is often the
best starting point.
If you place the cursor before “about” in the above sentence, and press ‘M-d’, it will remove " about“. You can now see the value of the kill-ring using C-h v (describe variable), and it will prompt you with the message”Describe variable:“, where you can enter kill-ring. You will see an entry for” about“. Now, place the cursor after”question" and press ‘M-d’ again, and “Emacs” will be removed. If you again check the kill-ring value, you will see an entry for " Emacs".
You can now move the cursor to any location in the buffer, and press ‘C-y’, and it will paste “Emacs”. If you then press M-y, it will paste “about” which was the text that was cut before “Emacs”. This way, you can cycle through the kill ring buffer.
To select a region of text, you first need to mark the starting position with the cursor using C-space. You can then use any of the navigation commands to highlight the text that you want. You can either cut the marked region using C-w, or copy it using M-w. This will get copied to the kill-ring. You can then paste the text to any buffer. You can also select the entire buffer using C-x h.
Formatting text
It is good to have text within 80 columns and 25 rows (80x25), not just for readability, but, to avoid making any assumptions about the users’ screen size. If you have a really long sentence or paragraph, you can reformat it using the M-q shortcut from anywhere in the sentence or paragraph.
You can transpose two characters using C-t shortcut. For example, if you have misspelt “emacs” as “emcas”, you can place the cursor on ‘a’ and type C-t to swap the letters ‘a’ and ‘c’ to get “emacs”. You can transpose two words using the M-t command. For example, if you have the phrase “morning good” in a buffer, and you type M-t anywhere on the word “morning”, it will swap the words to give you “good morning”. You can also swap lines and sentences using C-x C-t and M-x transpose-sentences commands respectively.
If you would like to capitalize the first character of a word in upper case, you need to place the cursor on it, and key in M-c to make the first letter capital. You can turn all those letters from the cursor location to the rest of the word into capitals using M-u command. For example, if you have the word “sentence”, and you place the cursor on the letter ’t’, and you key in M-u the result will be “senTENCE”. To make all the characters lower case, you can use M-l. You can turn the entire previous word into capital letters using the M - M-c shortcut. Similarily, to make the previous words either upper case and lower case, you can use M - M-u and M - M-l commands, respectively.
Info
You can read manuals written in Info format inside GNU Emacs. When you type M-x info, it opens up a menu with the built-in documentation available from ‘Info’ files. The Info mode is mostly used to read hypertext manuals. You can use Tab and Shift-tab to navigate through the available links. Since the contents are in a buffer, all the basic navigation commands are applicable. To exit from Info, you can use q (quit).
You can press the return key on a link to open its contents. For example, when you click on “Emacs FAQ” it opens “The GNU Emacs FAQ” contents. The following are the sections listed in its buffer:
* Menu
* FAQ notation
* General questions
* Getting help
* Status of Emacs
* Common requests
* Bugs and problems
* Compiling and installing Emacs
* Finding Emacs and related packages
* Key bindings
* Alternate character sets
* Mail and news
* Concept index
Suppose, you hit the return key on “FAQ notation”, it will open its contents with the title “1 FAQ notation”. If you want to cycle through the headings at this level, you can press n (next topic) and p (previous topic). If you want to move one level up, to the “The GNU Emacs FAQ”, you can use the u shortcut.
If you simply want to move to the topmost node (“The GNU Emacs FAQ”), you can use the t shortcut. For example, if you were in the section “3.1 I’m just starting Emacs; how do I do basic editing?” and you pressed ’t’, it will take you to the topmost section - “The GNU Emacs FAQ”.
You can move to the previous node that you visited using the l shortcut. You can also explicitly specify the node you want to move to using the g shortcut. For example, if you are in the “1 FAQ notation” page, and you pressed g, it will then prompt you with the message “Go to node:”. You can then type “Extended” and hit TAB to auto-complete to “Extended commands”, which is one of the links in the page.
You are encouraged to try the built-in info tutorial available by pressing h in the “info” buffer.
Help
You can read manual pages inside GNU Emacs using M-x man command followed by the return key. Suppose, you try this command from the scratch buffer, it will then prompt you with the message “Manual entry:”. You can then input ls (list directory contents), and it will open a new buffer and window titled “Man ls” with the contents of the manual entry for the ls command.
From the scratch buffer, you can scroll forward the other window (‘Man ls’) using C-M-v (Ctrl-Alt-v), and scroll back using C-M-shift-v (Ctrl-Alt-Shift-v).
You can list all the available, active key-bindings using the C-h b command.
The C-h f shortcut is used to provide documentation for a function available in your installed version of GNU Emacs. For example, if you use C-h f, it will prompt you with the message “Describe function:”. If you input scroll-other-window, it will open a new buffer and window titled “Help” with the description and usage of the function. The output as seen in GNU Emacs 24.3.1 is shown below:
scroll-other-window is an interactive built-in function in `C source
code'.

It is bound to <M-next>, C-M-v, ESC <next>.

(scroll-other-window &optional ARG)

Scroll next window upward ARG lines; or near full screen if no ARG.
A near full screen is `next-screen-context-lines' less than a full screen.
The next window is the one below the current one; or the one at the top
if the current one is at the bottom.  Negative ARG means scroll downward.
If ARG is the atom `-', scroll downward by nearly full screen.
When calling from a program, supply as argument a number, nil, or `-'.

If `other-window-scroll-buffer' is non-nil, scroll the window
showing that buffer, popping the buffer up if necessary.
If in the minibuffer, `minibuffer-scroll-window' if non-nil
specifies the window to scroll.  This takes precedence over
`other-window-scroll-buffer'.

[back]
On the other hand, if you know the command, and would like to get help related to it, you can use the C-h k command. This will prompt you with the message “Describe key (or click or menu item):”. You must key in the actual shortcut, for example, C-h b, and it will update the buffer “Help”, and open it in a new window, showing the description for the shortcut as shown below:
C-h b runs the command describe-bindings, which is an interactive
compiled Lisp function.

It is bound to C-h b, <f1> b, <help> b, <menu-bar> <help-menu>
<describe> <list-keybindings>.

(describe-bindings &optional PREFIX BUFFER)

Show a list of all defined keys, and their definitions.
We put that list in a buffer, and display the buffer.

The optional argument PREFIX, if non-nil, should be a key sequence;
then we display only bindings that start with that prefix.
The optional argument BUFFER specifies which buffer's bindings
to display (default, the current buffer).  BUFFER can be a buffer
or a buffer name.

[back]
You are encouraged to try out all the commands so that you understand what actions they perform. When you use GNU Emacs as your main text editor, you will be able to regularly practice these commands, and master them.
May 9, 2016
[Published in Open Source For You (OSFY) magazine, August 2015 edition.]
Introduction
Dired is a directory editor in GNU Emacs. It opens a buffer containing a list of directories and files to operate on. It is a ‘read-only’ mode and hence you cannot input any text. This article explores some of the basic commands that can be used in Dired mode.
Let us first create a sample directory, sub-directories and files that we can use for our demonstration. Open a terminal and execute the following commands:
$ mkdir /tmp/test/network -p
$ mkdir /tmp/test/kernel -p

$ date > /tmp/test/date.txt
$ locale > /tmp/test/locale.txt

$ cat /etc/resolv.conf > /tmp/test/network/resolv.conf
$ ifconfig > /tmp/test/network/ifconfig.output

$ dmesg > /tmp/test/kernel/dmesg.txt
In general, filename extensions don’t have any meaning on *nix systems. Some applications do check the filename extension before using them. The extension is only for the benefit of the user, and hence you can have a filename without any extension on *nix.
Invocation
After opening GNU Emacs, you can enter Dired mode using M-x dired. It will prompt you for the directory to be opened in the buffer where you can input ‘/tmp/test’. You will see a buffer with the following contents:
/tmp/test:
total used in directory 24 available 146721468
drwxrwxr-x  4 shakthi shakthi 4096 Jul  3 11:36 .
drwxrwxrwt 12 root    root    4096 Jul  3 11:38 ..
-rw-rw-r--  1 shakthi shakthi   29 Jul  3 11:36 date.txt
drwxrwxr-x  2 shakthi shakthi 4096 Jul  3 11:36 kernel
-rw-rw-r--  1 shakthi shakthi  270 Jul  3 11:36 locale.txt
drwxrwxr-x  2 shakthi shakthi 4096 Jul  3 11:36 network
The contents of the buffer are similar to the ls -al output as observed in the terminal. The files were created by user ‘shakthi’, and this is indicated in the owner and group fields. The ’.’ entry represents the current ‘/tmp/test’ directory. The ’..’ listing represents the parent directory, which is ‘/tmp’ and owned by the ‘root’ user.
Exit
You can exit from Dired mode by simply pressing q (quit-window) in the Dired buffer.
Navigation
You can move to a previous line or the next line in the Dired buffer using the p and n keys, respectively. If you wish to move the cursor to the previous and next directories, you can use the ‘<’ and ‘>’ keys. If the cursor is at ‘kernel’ directory as shown below …
/tmp/test:
total used in directory 24 available 146721468
drwxrwxr-x  4 shakthi shakthi 4096 Jul  3 11:36 .
drwxrwxrwt 12 root    root    4096 Jul  3 11:38 ..
-rw-rw-r--  1 shakthi shakthi   29 Jul  3 11:36 date.txt
drwxrwxr-x  2 shakthi shakthi 4096 Jul  3 11:36 kernel      <-- CURSOR
-rw-rw-r--  1 shakthi shakthi  270 Jul  3 11:36 locale.txt
drwxrwxr-x  2 shakthi shakthi 4096 Jul  3 11:36 network
… then, when you press ‘>’, the cursor will move to ‘network’, which is the next directory in the buffer.
/tmp/test:
total used in directory 24 available 146721468
drwxrwxr-x  4 shakthi shakthi 4096 Jul  3 11:36 .
drwxrwxrwt 12 root    root    4096 Jul  3 11:38 ..
-rw-rw-r--  1 shakthi shakthi   29 Jul  3 11:36 date.txt
drwxrwxr-x  2 shakthi shakthi 4096 Jul  3 11:36 kernel
-rw-rw-r--  1 shakthi shakthi  270 Jul  3 11:36 locale.txt
drwxrwxr-x  2 shakthi shakthi 4096 Jul  3 11:36 network     <-- CURSOR
You can move to the parent directory using the ‘^’ key. To enter into a directory, move to its listing in the Dired buffer, and simply hit the return key.
Viewing files
To view a file, you can place the cursor on its entry and use the f or v key, or simply hit the return key. This will open the file in a new buffer (view). To return to the Dired buffer, you can type C-x b and the minibuffer will prompt you with the message “Switch to buffer (…)”. If you then press TAB, it will open a new Completions buffer that will list the available buffers. You can also type the entire ‘test’ buffer name, or type it partially and hit TAB for auto-completion, and hit the return key to get to the ‘test’ buffer. If you wish to close a buffer, you can use C-k to kill it. This will only close the buffer, but, the file will still exist! You can use the ‘+’ key to create a new sub-directory.
Marking and unmarking files
Dired mode allows you to operate on multiple files and directories. In order to run commands on them, you need to first select the files. The m key can be used to mark a file or directory for subsequent operations. For example, pressing ’m’ on the date.txt entry will mark it, and this is indicated by an asterisk in front of the line, as shown below:
  /tmp/test:
  total used in directory 24 available 146933380
  drwxrwxr-x  4 shakthi shakthi 4096 Jul  5 09:53 .
  drwxrwxrwt 10 root    root    4096 Jul  5 09:46 ..
* -rw-rw-r--  1 shakthi shakthi   29 Jul  5 09:46 date.txt
  drwxrwxr-x  2 shakthi shakthi 4096 Jul  5 09:46 kernel
  -rw-rw-r--  1 shakthi shakthi  270 Jul  5 09:46 locale.txt
  drwxrwxr-x  2 shakthi shakthi 4096 Jul  5 09:46 network
You can unmark the above selection using the u key. This is applicable for both files and directories. To undo a selection, you can also use M-del (M and the Delete key). Suppose, you wish to mark all the directories in the Dired buffer, you can use ‘* /’ key combination. The resultant Dired buffer is shown below:
  /tmp/test:
  total used in directory 24 available 146933432
  drwxrwxr-x  4 shakthi shakthi 4096 Jul  5 09:53 .
  drwxrwxrwt 10 root    root    4096 Jul  5 09:46 ..
  -rw-rw-r--  1 shakthi shakthi   29 Jul  5 09:46 date.txt
* drwxrwxr-x  2 shakthi shakthi 4096 Jul  5 09:46 kernel
  -rw-rw-r--  1 shakthi shakthi  270 Jul  5 09:46 locale.txt
* drwxrwxr-x  2 shakthi shakthi 4096 Jul  5 09:46 network
If you want to invert the selection, use t. The buffer will look like the following:
  /tmp/test:
  total used in directory 24 available 146933432
  drwxrwxr-x  4 shakthi shakthi 4096 Jul  5 09:53 .
  drwxrwxrwt 10 root    root    4096 Jul  5 09:46 ..
* -rw-rw-r--  1 shakthi shakthi   29 Jul  5 09:46 date.txt
  drwxrwxr-x  2 shakthi shakthi 4096 Jul  5 09:46 kernel
* -rw-rw-r--  1 shakthi shakthi  270 Jul  5 09:46 locale.txt
  drwxrwxr-x  2 shakthi shakthi 4096 Jul  5 09:46 network
To mark all the files, you can use ‘* s’ key combination.
Modifying the buffer
After you have selected files, you can remove them from the listing by pressing the k key. This does not delete the files! You can always press g to refresh the Dired buffer contents. You can change the ‘ls’ command line options used in the Dired listing using the C-u s key combination.
Actions
You can perform a number of operations on the marked files and directories. To copy a file, you can press C on a file, and it will prompt you in the minibuffer regarding where you would like to create the new copy. You can use R to rename a file. If you would like to delete a file, you can press D. You can change the mode of a file with the M command. You can compress or uncompress a file with the Z command.
A regular expression search can be done on selected files with the A command. You can create a symbolic link file with the S key. You can run a shell command on marked files using the ’!’ command. For example, if you want to perform a word count (wc) on the date.txt file, you can press ’!’ on the date.txt entry listing, and it will prompt you in the minibuffer with “! on date.txt:” message. If you input ‘wc’, the results will again be shown in the minibuffer. On my system, it returned ‘1 6 29 date.txt’. You can also run asynchronous shell commands on files using the ‘&’ command, and a new buffer will be opened that will contain the results.
Deletion
You can mark files for deletion using the d command. After selecting the files or directories, if you press x, the respective actions will be performed on the files. To demonstrate an example, let us use ‘d’ on the ‘kernel’ directory to mark it for deletion. The letter ‘D’ will be added to its entry as shown below:
  /tmp/test:
  total used in directory 24 available 146933432
  drwxrwxr-x  4 shakthi shakthi 4096 Jul  5 09:53 .
  drwxrwxrwt 10 root    root    4096 Jul  5 09:46 ..
  -rw-rw-r--  1 shakthi shakthi   29 Jul  5 09:46 date.txt
D drwxrwxr-x  2 shakthi shakthi 4096 Jul  5 09:46 kernel
  -rw-rw-r--  1 shakthi shakthi  270 Jul  5 09:46 locale.txt
  drwxrwxr-x  2 shakthi shakthi 4096 Jul  5 09:46 network
When you press ‘x’, you will be prompted to confirm deletion with the message “Delete kernel (yes or no)”. When you input “yes” and hit the return key, the directory contents will be removed. GNU Emacs will perform auto-save on files, and also create backup files ending with ‘~’. You can mark such files using the ‘~’ command.
Regex
You can use ‘% d’ to select files based on a regular expression (regex) to mark for deletion. To simply mark files based on regex, you can use ‘% m’ shortcut. To rename the marked files, you can use ‘% R’.
Find
You can search for files matching a pattern using the M-x find-name-dired command. Suppose you wish to find all the .txt files in our original /tmp/test directory, you can use ‘M-x find-name-dired’ in the Dired buffer. It will prompt you in the minibuffer with the following message “Find-name (directory): /tmp/test”. After you press the return key, it will ask for the regex with the message “Find-name (filename wildcard):”. If you input ‘*.txt’, it will return the following contents:
/tmp/test/:
find . \( -name \*.txt \) -ls
6826601    4 -rw-rw-r--   1 shakthi  shakthi        29 Jul  5 09:46 date.txt
6826616   64 -rw-rw-r--   1 shakthi  shakthi     63050 Jul  5 09:46 kernel/dmesg.txt
6826602    4 -rw-rw-r--   1 shakthi  shakthi       270 Jul  5 09:46 locale.txt

find finished at Sun Jul  5 10:27:02
You can also find files based on regex patterns that exist in the file contents using the M-x find-grep-dired. Suppose, you wish to find the files that have the text ‘eth’ in them, you can use ‘M-x find-grep-dired’, which will prompt you in the minibuffer with the message “Find-grep (directory): /tmp/test”. After you press the return key, it will prompt you for the regex with the message “Find-grep (grep regexp):”, where you can input ‘eth’ and this will return the following results:
/tmp/test/:
find . \( -type f -exec grep -q -e eth \{\} \; \) -ls
6826605    4 -rw-rw-r--   1 shakthi  shakthi      1620 Jul  5 09:46 network/ifconfig.output
6826616   64 -rw-rw-r--   1 shakthi  shakthi     63050 Jul  5 09:46 kernel/dmesg.txt

find finished at Sun Jul  5 10:31:27
You can also execute a find operation on marked files using M-x find-dired.
Help
To open the help menu for Dired, you can use the h shortcut key. To see the Dired log messages, you can press the ? key.
You may refer to a quick reference card at https://www.gnu.org/software/emacs/refcards/pdf/dired-ref.pdf, and try out more Dired commands.
April 4, 2016
[Published in Open Source For You (OSFY) magazine, July 2015 edition.]
Introduction
GNU Emacs is a very popular text editor written in C and Emacs Lisp. It can be run on many platforms, and can be easily customised and extended for user needs. It was created by Richard Stallman, the founder of the GNU project. This article is the first in a series on how to use it. There are a number of tutorials available for GNU Emacs; this series of articles provide one approach to understanding and learning the software. You are encouraged to refer to the official GNU Emacs reference manual for more information, and it supersedes everything. Here are a few interesting quotes on Emacs.
“I use Emacs, which might be thought of as a thermonuclear word processor” – Neal Stephenson (In the Beginning… Was the Command Line)
“Emacs is undoubtedly the most powerful programmer’s editor in existence. It’s a big, feature-laden program with a great deal of flexibility and customizability. … Emacs has an entire programming language inside it that can be used to write arbitrarily powerful editor functions.” – Eric S. Raymond (from ‘The Art of UNIX Programming’)
“Personally, I feel inspired whenever I open Emacs. Like a craftsman entering his workshop, I feel a realm of possibility open before me. I feel the comfort of an environment that has evolved over time to fit me perfectly - an assortment of packages and keybindings which help me bring ideas to life day after day.” – Daniel Higginbotham (in ‘Clojure for the Brave and True’)
“EMACS could not have been reached by a process of careful design, because such processes arrive only at goals which are visible at the outset, and whose desirability is established on the bottom line at the outset. Neither I nor anyone else visualized an extensible editor until I had made one, nor appreciated its value until he had experienced it. EMACS exists because I felt free to make individually useful small improvements on a path whose end was not in sight.” – Richard Stallman
Installation
You can use your favourite GNU/Linux distribution package manager to install GNU Emacs. On Debian/Ubuntu, you can install with the following command:
$ sudo apt-get install emacs
On Fedora, you can use the Yum package manager as shown below:
$ sudo yum install emacs
The emerge tool can install GNU Emacs on Gentoo, as follows:
# emerge --ask app-editors/emacs
On Arch, the Pacman software can help you in installing GNU Emacs:
$ sudo pacman -S emacs
Use the Zypper package manager in SUSE as shown below:
$ sudo zypper install emacs
Startup
If you use the Unity interface, you can search for emacs in the Dash, and it will show the Emacs icon that you can click to open the editor. This is illustrated in the following figure.

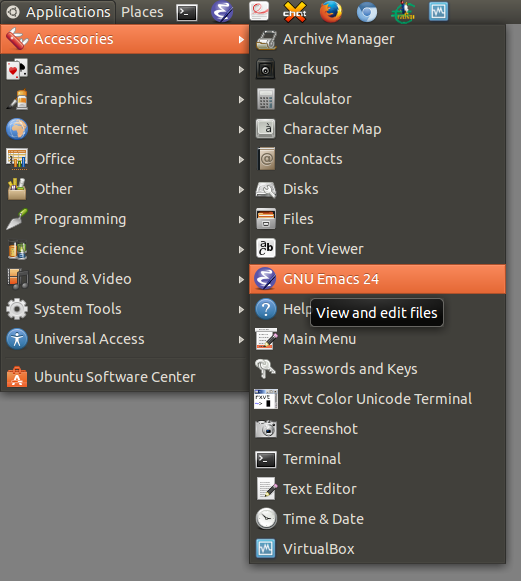
On the Metacity interface or any other desktop environment with a panel, you can open GNU Emacs from “Applications” -> “Accessories” -> “Emacs” as shown below:
You can also open the editor from the terminal by simply typing ‘emacs’ and hitting the return key.
$ emacs
The version that I have used for this article is GNU Emacs 24.3.1.
Exit
To exit from GNU Emacs, you need to use C-c C-q, where ‘C’ stands for the Control key. You can also use your mouse and close the editor by clicking on the ‘x’, but, GNU Emacs was designed to be completely usable with a keyboard, and I am going to encourage you to only use the keyboard shortcuts.
Concepts
While you can work using GUI editors, I am going to teach you to work entirely on the keyboard to experience the power of shortcuts in GNU Emacs. You can disconnect the mouse and your touchpad when working on GNU Emacs. Just as an exercise, I’d encourage you to remove your mouse completely and see how you can work with a computer for one day. You will realise that a lot of user interfaces are heavily dependent and designed for mouse interactions! By only using the keyboard, you can be blazingly fast and productive.
The keyboard shortcuts in GNU Emacs may seem to involve many keys. But, please bear with me on this, because the way the shortcuts are designed, you will be able to remember them easily. As you practice, you will gain insight into how consistently they have been defined.
GNU Emacs is a ‘stateless’ editor for the most part. By ‘stateless’, I mean that there are no specific state transitions that need to happen before you can use the commands. There does exist the concept of modes. When you open GNU Emacs, you will see menus, buffer and a mode line as illustrated in the following figure:

As mentioned earlier, we will not be clicking on the menus or icons with a mouse, but only use keyboard shortcuts. Everything is a buffer in GNU Emacs. Each buffer can have one major mode and one or more minor modes. The mode determines the keyboard shortcuts that are applicable primarily on the buffer. Examples of major modes are given below:
| Text mode |
Writing text |
| HTML mode |
Writing HTML |
| cc mode |
Writing C, C++ and C-like programs |
| Dired mode |
Handling files and directories |
| Shell mode |
Working with shell |
| LaTeX mode |
Formatting TeX and LaTeX files |
| Picture mode |
Creating ASCII art |
| Outline mode |
Writing outlines |
| SQL mode |
Interacting with SQL databases |
| Lisp mode |
Writing Lisp programs |
The mode line exists below the buffer and it gives you a lot of information on the status of the buffer, such as what modes are active and other useful information. Below the mode line is the mini-buffer, where any commands you issue are indicated and prompts for user input are shown. This is the overall view of the default GNU Emacs interface.
In today’s user interface applications, an application is treated as a window on a desktop. But, when you open GNU Emacs, you are actually opening a frame. A frame can be split it into many windows. Everything is a buffer in GNU Emacs. So, you can have many frames of GNU Emacs, and inside each you can have one or more windows containing buffers (or files).
Features
Although GNU Emacs was designed primarily for text editing, it can do a lot more. ‘A lot’ is probably a highly simplified term. It has got support for syntax highlighting for a large number of programming languages. You can also generate code snippets from templates using the yasnippet package. You can also enter markup or markdown text. There is support for indentation of text and programs depending on the programming languages and modes. Internationalization support is available, and you can use it to even enter text in Indian languages.
A number of configurations are available for setting it up for your development work, including automating tasks for compiling, executing, testing and deployment. When you become familiar with Emacs Lisp, you can implement your own modules. Since, it is Lisp, it is also easily extensible. You can write your own macros to perform repeated tasks. You can also query an inbuilt help system for information, shortcuts, tutorials and other documentation. You are not at all dependent on the Internet for information, and thus you can work offline too. Version control support is available for many centralized (cvs, svn) and decentralized systems (Git, Hg).
org-mode is a very popular mode for managing your notes. You can use it for planning your day-to-day activities. GNU Emacs can be used as publishing software. You can create wikis, blogs and publish books using it. This article is written using org-mode. Spell-checking modules are also available for your documentation needs. It is also possible to export plain text into a number of formats (PDF, HTML etc.).
A number of Emacs lisp packages are available for networking. You can use Gnus for checking your e-mails, and reading and writing to newsgroups. Emacs Relay Chat (ERC) can be used for connecting to Internet Relay Chat (IRC) channels. There are modules that support the Jabber protocol for communicating with chat servers. There is also support for viewing Web pages inside Emacs. There are a large number of Emacs modules available through package repositories such as MELPA (melpa.org), and Marmalada (marmalade-repo.org).
History
The first version of Emacs (macros) was written by Richard Stallman and Guy L. Steele, Jr. in 1976 for the TECO editor in MIT. It was written in a low-level language for the PDP-10 assembler. People were able to freely hack on the code, make improvements and share their changes. This was the original hacker culture that existed in MIT. Unfortunately, business entities started to make software proprietary and this hacker culture ceased to exist, especially in the MIT AI labs. Richard Stallman wanted to revive the hacker culture and started the GNU project. He wrote the second implementation of the editor entirely in C in 1984, and released it as the first program of the GNU project. Today, it is a very popular editor that is widely used, and has more than 570 contributors. The official web site for GNU Emacs is at http://www.gnu.org/software/emacs/.
January 27, 2016
[Published in Open Source For You (OSFY) magazine, June 2015 edition.]
In this final article in the Haskell series, we shall explore how to use it for web programming.
Scotty is a web framework written in Haskell, which is similar to Ruby’s Sinatra. You can install it on Ubuntu using the following commands:
$ sudo apt-get install cabal-install
$ cabal update
$ cabal install scotty
Let us write a simple `Hello, World!’ program using the Scotty framework:
-- hello-world.hs

{-# LANGUAGE OverloadedStrings #-}

import Web.Scotty

main :: IO ()
main = scotty 3000 $ do
  get "/" $ do
    html "Hello, World!"
You can compile and start the server from the terminal using the following command:
$ runghc hello-world.hs
Setting phasers to stun... (port 3000) (ctrl-c to quit)
The service will run on port 3000, and you can open localhost:3000 in a browser to see the `Hello, World!’ text. You can then stop the service by pressing Control-c in the terminal. You can also use Curl to make a query to the server. Install and test it on Ubuntu as shown below:
$ sudo apt-get install curl

$ curl localhost:3000
Hello, World!
You can identify the user client that made the HTTP request to the server by returning the “User-Agent” header value as illustrated in the following example:
-- request-header.hs

{-# LANGUAGE OverloadedStrings #-}

import Web.Scotty

main :: IO ()
main = scotty 3000 $ do
  get "/agent" $ do
    agent <- header "User-Agent"
    maybe (raise "User-Agent header not found!") text agent
You can execute the above code in a terminal using the following command:
$ runghc request-header.hs
Setting phasers to stun... (port 3000) (ctrl-c to quit)
If you open the URL localhost:3000/agent in the browser, it returns the following User-Agent information on Ubuntu 14.10 Mozilla/5.0 (X11; Linux x8664) AppleWebKit/537.36 (KHTML, like Gecko) Ubuntu Chromium/41.0.2272.76 Chrome/41.0.2272.76 Safari/537.36. The Curl version is returned for the same URL request as shown below:
$ curl localhost:3000/agent -v

 * Hostname was NOT found in DNS cache
 *   Trying 127.0.0.1...
 * Connected to localhost (127.0.0.1) port 3000 (#0)
 > GET /agent HTTP/1.1
 > User-Agent: curl/7.37.1
 > Host: localhost:3000
 > Accept: */*
 >
 < HTTP/1.1 200 OK
 < Transfer-Encoding: chunked
 < Date: Wed, 29 Apr 2015 07:46:21 GMT
 * Server Warp/3.0.12.1 is not blacklisted
 < Server: Warp/3.0.12.1
 < Content-Type: text/plain; charset=utf-8
 <
 * Connection #0 to host localhost left intact

 curl/7.37.1
You can also return different content types (HTML, text, JSON) based on the request. For example:
-- content-type.hs

{-# LANGUAGE OverloadedStrings #-}

import Web.Scotty as W
import Data.Monoid
import Data.Text
import Data.Aeson

main :: IO ()
main = scotty 3000 $ do
  get "/hello" $ do
    html $ mconcat ["<h1>", "Hello, World!", "</h1>"]

  get "/hello.txt" $ do
    text "Hello, World!"

  get "/hello.json" $ do
    W.json $ object ["text" .= ("Hello, World!" :: Text)]
You can start the above server in a terminal as follows:
$ runghc content-type.hs
Setting phasers to stun... (port 3000) (ctrl-c to quit)
You can then open the three URLs listed above in a browser to see the different output. The respective outputs when used with Curl are shown below:
$ curl localhost:3000/hello
<h1>Hello, World!</h1>

$ curl localhost:3000/hello.txt
Hello, World!

$ curl localhost:3000/hello.json
{"text":"Hello, World!"}
You can also pass parameters in the URL when you make a request. The param function can be used to retrieve the parameters as indicated below:
-- params.hs

{-# LANGUAGE OverloadedStrings #-}

import Web.Scotty
import Data.Monoid

main :: IO ()
main = scotty 3000 $ do
  get "/user" $ do
    name <- param "name"
    html $ mconcat ["<h1>Hello ", name, "</h1>"]
You can start the above server using the runghc command:
$ runghc params.hs
Setting phasers to stun... (port 3000) (ctrl-c to quit)
You can now try the URL requests with and without parameters. The observed outputs are shown below:
$ curl localhost:3000/user
<h1>500 Internal Server Error</h1>Param: name not found!

$ curl localhost:3000/user?name=Shakthi
<h1>Hello Shakthi</h1>
The Hspec testing framework can be used for integration testing the web application. Install the required dependencies as shown below:
$ cabal install happy hspec hspec-wai hspec-wai-json
The content type example has been updated to use Hspec, as illustrated below:
-- content-type-spec.hs

{-# LANGUAGE OverloadedStrings, QuasiQuotes #-}
module Main (main) where

import Data.Monoid
import Data.Text

import           Network.Wai (Application)
import qualified Web.Scotty as W
import           Data.Aeson (object, (.=))

import           Test.Hspec
import           Test.Hspec.Wai
import           Test.Hspec.Wai.JSON

main :: IO ()
main = hspec spec

app :: IO Application
app = W.scottyApp $ do
  W.get "/hello.txt" $ do
    W.text "Hello, World!"

  W.get "/hello" $ do
    W.html $ mconcat ["<h1>", "Hello, World!", "</h1>"]

  W.get "/hello.json" $ do
    W.json $ object ["text" .= ("Hello, World!" :: Text)]

spec :: Spec
spec = with app $ do
  describe "GET /" $ do
    it "responds with text" $ do
      get "/hello.txt" `shouldRespondWith` "Hello, World!"

    it "responds with HTML" $ do
      get "/hello" `shouldRespondWith` "<h1>Hello, World!</h1>"

    it "responds with JSON" $ do
      get "/hello.json" `shouldRespondWith` [json|{text: "Hello, World!"}|]
You can compile the above code as shown below:
$ ghc --make content-type-spec.hs
Linking content-type-spec ...
The following output is observed when you run the above built test executable:
$ ./content-type-spec

GET /
  responds with text
  responds with HTML
  responds with JSON

Finished in 0.0010 seconds
3 examples, 0 failures
Please refer to the hspec-wai webpage at https://github.com/hspec/hspec-wai for more information.
Template support is available through many Haskell packages. The use of the blaze-html package is demonstrated below. Install the package first using the following command:
$ cabal install blaze-html
Consider a simple web page with a header and three unordered lists. Using blaze-html, the template can be written in Haskell DSL as follows:
-- template.hs

{-# LANGUAGE OverloadedStrings #-}

import Web.Scotty as W
import Text.Blaze.Html5
import Text.Blaze.Html.Renderer.Text

main :: IO ()
main = scotty 3000 $ do
  get "/" $ do
    W.html . renderHtml $ do
      h1 "Haskell list"
      ul $ do
        li "http://haskell.org"
        li "http://learnyouahaskell.com/"
        li "http://book.realworldhaskell.org/"
You can compile the above code using GHC:
$ ghc --make template.hs
Linking template ...
You can then execute the built executable, which starts the server as shown below:
$ ./template
Setting phasers to stun... (port 3000) (ctrl-c to quit)
Opening a browser with URL localhost:3000 will render the expected HTML file. You can also verify the resultant HTML output using the Curl command as shown below:
$ curl localhost:3000
<h1>Haskell list</h1><ul><li>http://haskell.org</li><li>http://learnyouahaskell.com/</li><li>http://book.realworldhaskell.org/</li></ul>
It is good to separate the views from the actual application code. You can move the template content to a separate file as shown below:
-- Haskell.hs

{-# LANGUAGE OverloadedStrings #-}

module Haskell where

import Text.Blaze.Html5

render :: Html
render = do
  html $ do
    body $ do
      h1 "Haskell list"
      ul $ do
        li "http://haskell.org"
        li "http://learnyouahaskell.com/"
        li "http://book.realworldhaskell.org/"
The main application code is now simplified as shown below:
-- template-file.hs

{-# LANGUAGE OverloadedStrings #-}

import qualified Haskell
import Web.Scotty as W
import Text.Blaze.Html
import Text.Blaze.Html.Renderer.Text

blaze :: Text.Blaze.Html.Html -> ActionM ()
blaze = W.html . renderHtml

main :: IO ()
main = scotty 3000 $ do
  get "/" $ do
    blaze Haskell.render
You need to place both the source files (Haskell.hs and template-file.hs) in the same top-level directory, and you can then compile the template-file.hs file that will also compile the dependency Haskell.hs source file as shown below:
$ ghc --make template-file.hs

[1 of 2] Compiling Haskell          ( Haskell.hs, Haskell.o )
[2 of 2] Compiling Main             ( template-file.hs, template-file.o )
Linking template-file ...
You can now run the server as follows:
$ ./template-file
Setting phasers to stun... (port 3000) (ctrl-c to quit)
Executing template-file produces the same output as in the case of the template.hs example.
$ curl localhost:3000
<html><body><h1>Haskell list</h1><ul><li>http://haskell.org</li><li>http://learnyouahaskell.com/</li><li>http://book.realworldhaskell.org/</li></ul></body></html>
You can refer the Scotty wiki page at https://github.com/scotty-web/scotty/wiki for more information.
The clay package is a CSS preprocessor similar to LESS and Sass. You can install it using the following Cabal command:
$ cabal install clay
Let us consider a simple CSS example to generate a list of fonts to be used in the body section of a HTML page. The corresponding Clay Haskell embedded DSL looks like the following:
-- clay-simple.hs

{-# LANGUAGE OverloadedStrings #-}

import Clay

main :: IO ()
main = putCss exampleStylesheet

exampleStylesheet :: Css
exampleStylesheet = body ? fontFamily ["Baskerville", "Georgia", "Garamond", "Times"] [serif]
You can compile the above code as follows:
$ ghc --make clay-simple.hs
[1 of 1] Compiling Main             ( clay-simple.hs, clay-simple.o )
Linking clay-simple ...
You can then execute clay-simple to generate the required CSS output as shown below:
$ ./clay-simple

body
{
  font-family : "Baskerville","Georgia","Garamond","Times", serif;
}

/* Generated with Clay, http://fvisser.nl/clay */
A more comprehensive example is shown below for the HTML pre tag:
-- clay-pre.hs

{-# LANGUAGE OverloadedStrings #-}

import Clay

main :: IO ()
main = putCss $
  pre ?
    do border dotted (pt 1) black
       whiteSpace (other "pre")
       fontSize (other "8pt")
       overflow (other "auto")
       padding (em 20) (em 0) (em 20) (em 0)
You can compile the above clay-pre.hs file as shown below:
$ ghc --make clay-pre.hs
[1 of 1] Compiling Main             ( clay-pre.hs, clay-pre.o )
Linking clay-pre ...
Executing the above complied clay-pre binary produces the following output:
$ ./clay-pre

pre
{
  border      : dotted 1pt rgb(0,0,0);
  white-space : pre;
  font-size   : 8pt;
  overflow    : auto;
  padding     : 20em 0em 20em 0em;
}

/* Generated with Clay, http://fvisser.nl/clay */
You can also add custom values using the Other type class or the fallback operator `-:’ to explicitly specify values. For example:
-- clay-custom.hs

{-# LANGUAGE OverloadedStrings #-}

import Clay

main :: IO ()
main = putCss $
  body ?
       do fontSize (other "11pt !important")
          "border" -: "0"
Compiling and executing the above code produces the following output:
$ ghc --make clay-custom.hs
[1 of 1] Compiling Main             ( clay-custom.hs, clay-custom.o )
Linking clay-custom ...

$ ./clay-custom

body
{
  font-size : 11pt !important;
  border    : 0;
}

/* Generated with Clay, http://fvisser.nl/clay */
You can explore more of clay from the official project homepage http://fvisser.nl/clay/.
A number of good books are available for further learning. I recommend the following books available online and in print:
Bryan O’Sullivan, Don Stewart, and John Goerzen. (December 1, 2008). Real World Haskell (http://book.realworldhaskell.org/). O’Reilly.
Miran Lipovaca. (April 21, 2011). Learn You a Haskell for Great Good! A Beginner’s Guide (http://learnyouahaskell.com/). No Starch Press.
The https://www.haskell.org website also has plenty of useful resources. You can also join the haskell-cafe@haskell.org and beginners@haskell.org mailing lists ( https://wiki.haskell.org/Mailing_lists ) for discussions. The folks in the #haskell channel on irc.freenode.net are also very helpful.
I hope you enjoyed learning Haskell through this series, as much as I did creating them. Please feel free to write to me (author at shakthimaan dot com) with any feedback or suggestions.
Happy Hacking!